- this post covers
- what is Natvis
- how to write custom Natvis visualization
- customization in UnrealEngine
- environment
- Unreal Engine 4
ver. 4.25 - Visual Studio 2019
ver. 16.8.1
- Unreal Engine 4
- reference
- https://docs.microsoft.com/en-us/visualstudio/debugger/create-custom-views-of-native-objects?view=vs-2019
- https://docs.microsoft.com/en-us/previous-versions/visualstudio/visual-studio-2015/debugger/format-specifiers-in-cpp?view=vs-2015&redirectedfrom=MSDN
- https://www.ibm.com/support/knowledgecenter/SSEQTP_liberty/com.ibm.websphere.wlp.doc/ae/rwlp_xml_escape.html
NATive type VISualization
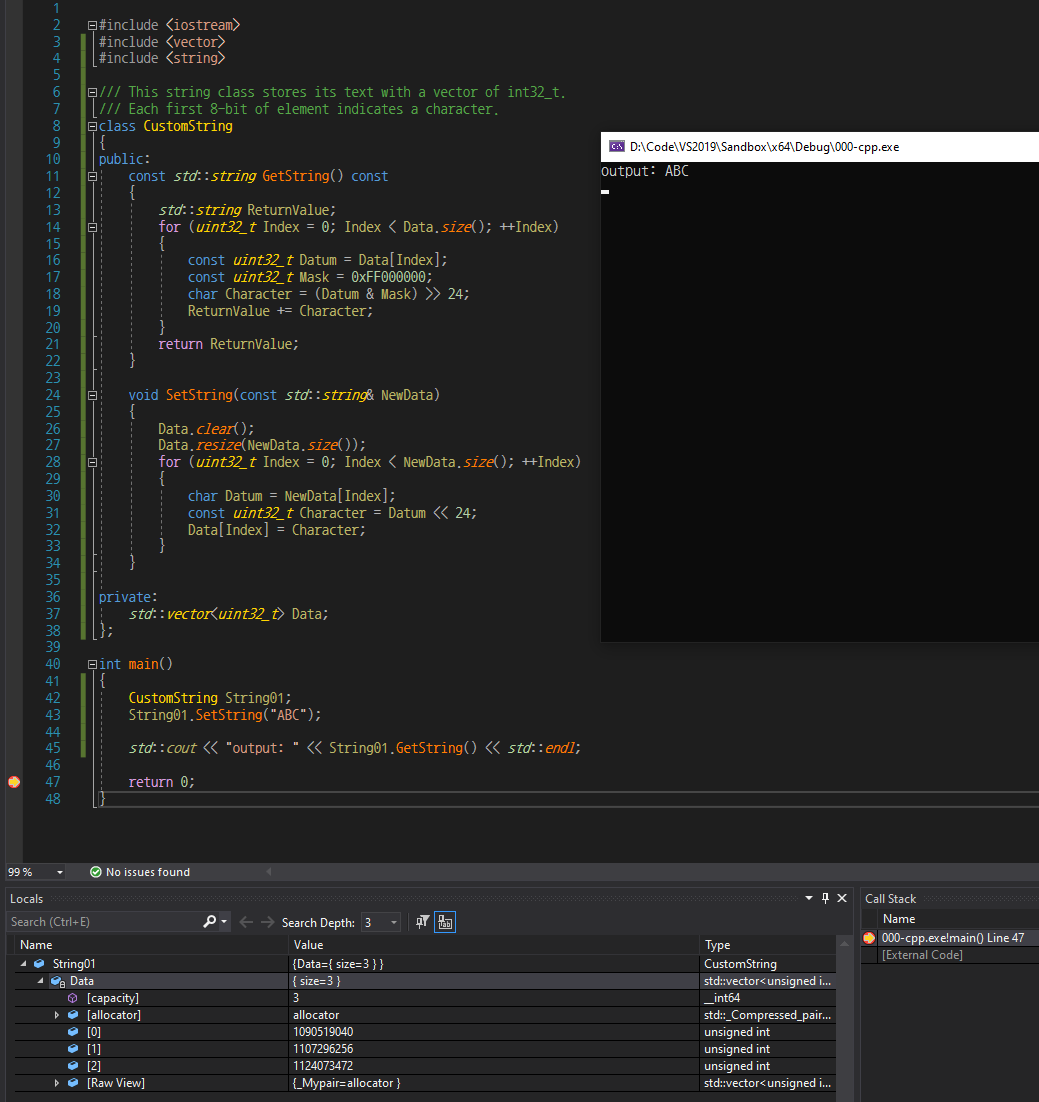
According to reference #1, the name of Natvis framework means visualization of native types. It can help your debugging with more plentiful visibility, and sometimes support mutiple environments that have a different size on the same data type. Suppose you want to make a string class storing its text as UTF-32 or something custom format, it should not be displayed well because it is not kind of ASCII. Though, do you want to see the data (in this case, the text) at Watch or Local viewport ? Then you should implement your own xml for custom Natvis visualization.
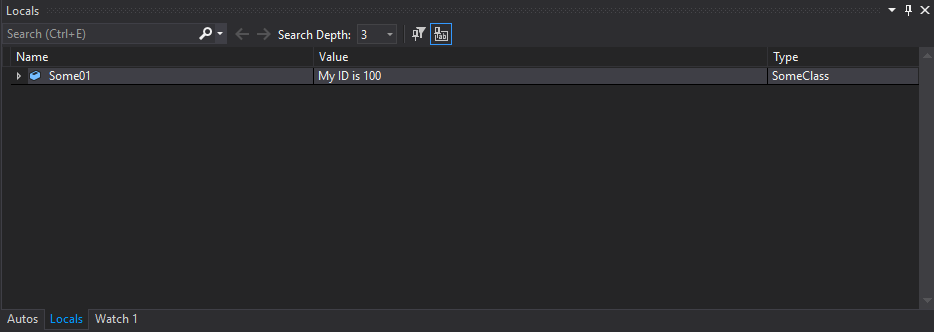
SCREENSHOT WITHOUT CUSTOM NATVIS
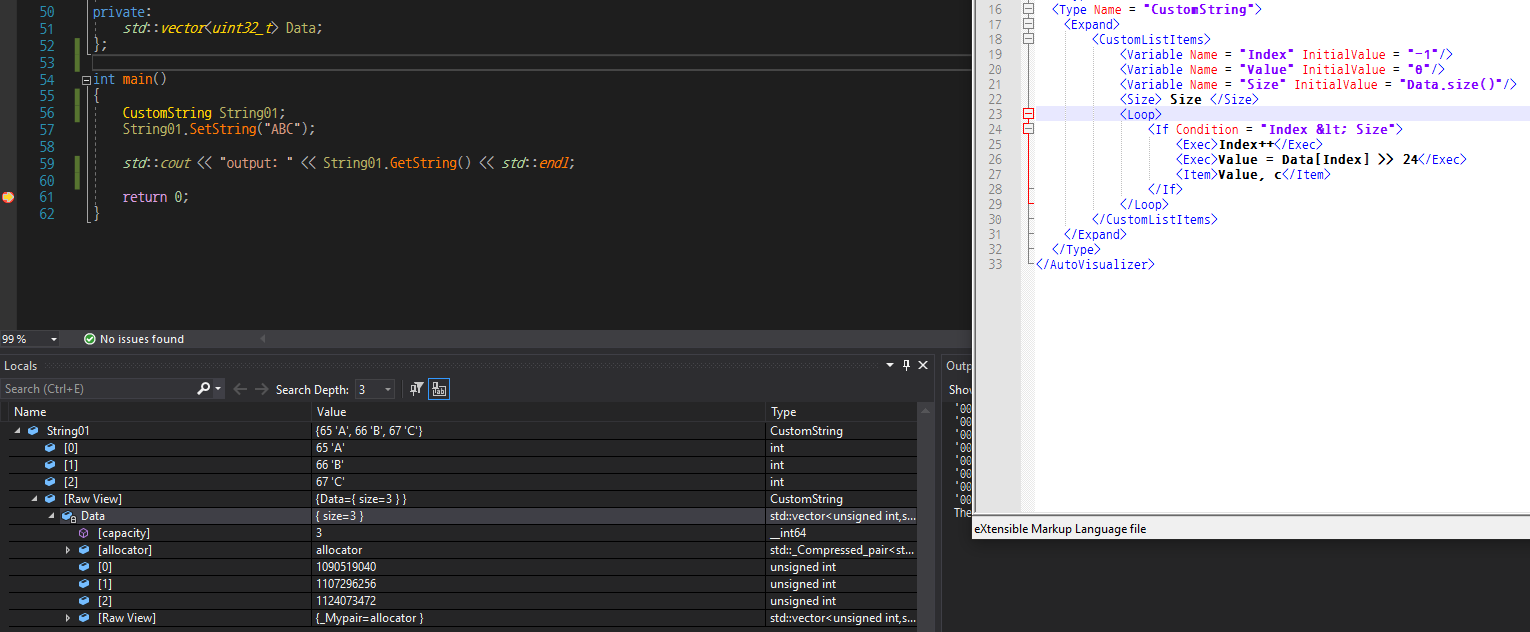
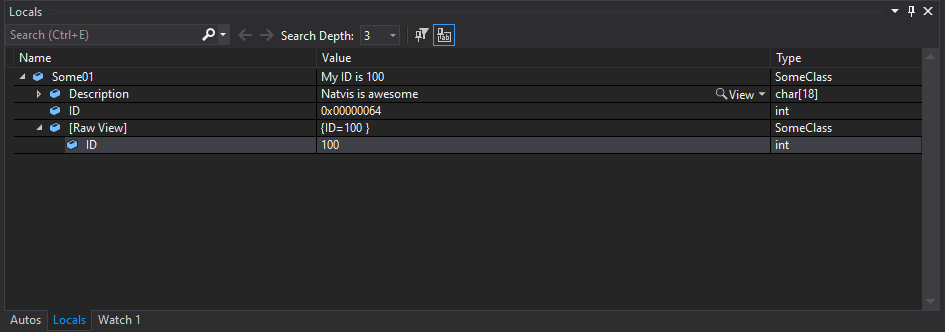
SCREENSHOT WITH CUSTOM NATVIS
Basic syntax and usage
The custom visualizer has XML syntax and it would be comfortable than a sole programming language. Just create a file of any name with .natvis extension and locate at the directory Documents/Visual Studio 2019/Visualizers. The Visual Studio IDE will find all natvis files at there and parse them. At first after you create the file, you need the tag AutoVisualizer.
1 | <AutoVisualizer> |
But you may meet the error like below with our current visualizer. (You should turn on an option for showing errors related to Natvis. Manipulate the option at Tools/Options/Debugging/Output Window/General OutputSettings/Natvisdiagnostic messages. I recommend you to set the level as Error.)
1 | Natvis: ...\Documents\Visual Studio 2019\Visualizers\Example.natvis(1,2): Fatal error: |
So you should specify the schemas. Like this.
1 | <AutoVisualizer xmlns="http://schemas.microsoft.com/vstudio/debugger/natvis/2010"> |
And, the AutoVisualizer tag can have a child tag such as Type. The Type tag must have an attribute Name. Name can be set as the name of type. For example, you should type SomeClass at the attribute when you created a type SomeClass.
1 | class SomeClass |
1 | <AutoVisualizer xmlns="http://schemas.microsoft.com/vstudio/debugger/natvis/2010"> |
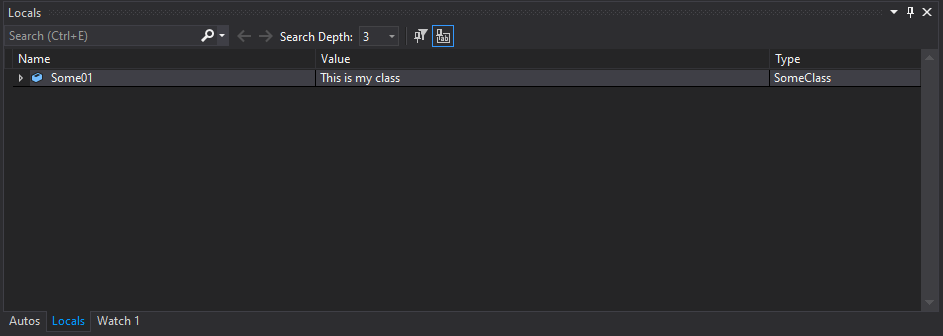
The Type tag can have a child tag such DisplayString/Expand. The DisplayString tag can be used for displaying a string at the debugging window like below.
1 | <AutoVisualizer xmlns="http://schemas.microsoft.com/vstudio/debugger/natvis/2010"> |
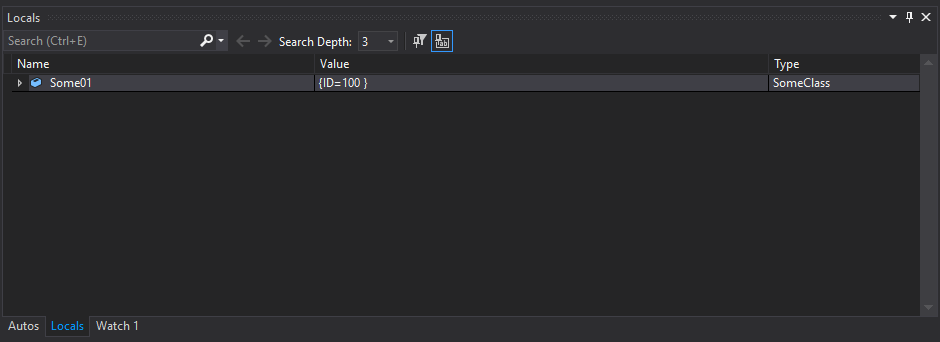
You can get the value of member variable. Brace the member variable as {}.
1 | <AutoVisualizer xmlns="http://schemas.microsoft.com/vstudio/debugger/natvis/2010"> |
With the Expand tag, you can customize the expanded view. The Item tags consist of the list. If you customize the expanded view as Expand tag, automatically Raw View item created, which was the original expanded view. You can decorate each line of list in expanded view. The specifier sb and x are respectively meaning “Display the string without quotation marks” and “Display the integer with hexa-decimal format”. For more details, visit reference #2.
1 | <AutoVisualizer xmlns="http://schemas.microsoft.com/vstudio/debugger/natvis/2010"> |
Example in UnrealEngine
Let us find an example in UnrealEngine one. You can find UE4.natvis if you installed UnrealEngine at your local system. Mostly, the UE4.natvis located in Engine/Extras/VisualStudioDebugging/UE4.natvis.
1 |
|
First of all, the FString welcomes us. Have a look for why the FString visualizer has been made like this. ( < and > things are escaped characters in xml. For more details, visit reference #3. )

Put a breakpoint at where the FString is initialized. Before initialization, we can see Invalid at the debugging window.
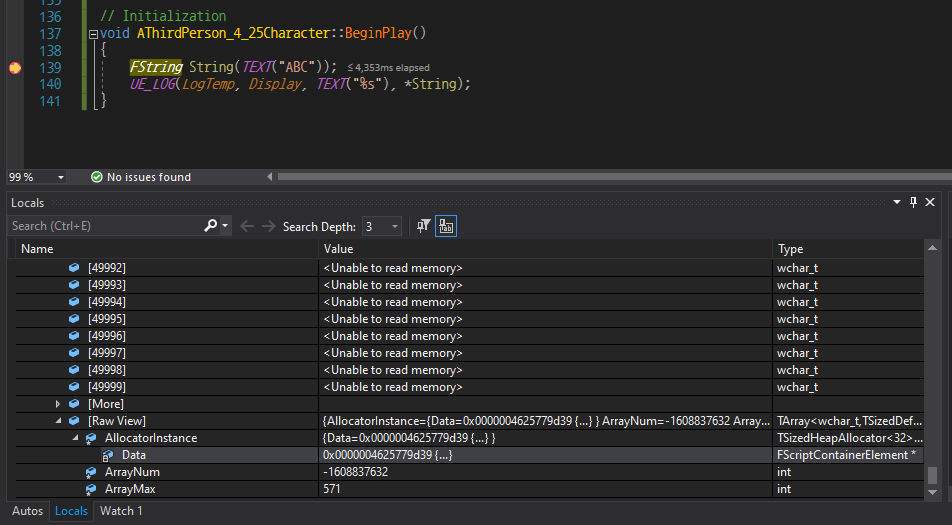
Expand the items. We can see the ArrayNum has a negative value. The condition Data.ArrayNum < 0 is satisfied and Invalid would be shown.

After initialization, we can see the string very well. In this case, the condition Data.ArrayMax >= Data.ArrayNum is satisfied and L"ABC" would be shown. Why does the string look like L"..." ? Because of the format specifier su. Check the reference #2 again.
1 | Engine/Source/Runtime/Core/Public/Containers/UnrealString.h |
The FString stores its string with TArray<TCHAR>. So we could see the ArrayNum or ArrayMax things at the FString visualizer.
1 | Engine/Source/Runtime/Core/Public/Containers/Array.h |
1 | Engine/Source/Runtime/Core/Public/Containers/ContainersFwd.h |
1 | Engine/Source/Runtime/Core/Public/Containers/ContainerAllocationPolicies.h |
And you can find the type of ArrayNum and ArrayMax is int32 with this flow.
Sometimes, the UE4.natvis gives us a hint for understanding the complicated engine code. Even someday you may need to customize UE4.natvis for special case while supporting various platforms. It would be also good to learn Natvis if you mostly use Visual Studio IDE. Read premade ones and write your ones. :)