Overview
Sometimes, you have to switch the version control system for some reason. In this post, I will cover how to migrate Perforce stream into Git repository. I have confirmed that the method in this post works only in Windows, but you might be able to accomplish the same result with a similar way.
Prerequisites
First of all, you should have Git and Perforce installed. Any latest version would be okay. Plus, you should be able to use their commands through the command prompt. For instance, the commands below should be working:
1 | > p4 -V |
1 | > git -v |
Second, you should have Python installed. The version after 2.7 would be okay. (eg. 2.8 or 3.5) Plus, you should be able to use its commands through the command prompt. For instance, the commands below should be working:
1 | > python -V |
The last one, you have to change your system locale settings if you had written the description of changelist with non-ascii codes. You can enable the option Beta: Use Unicode UTF-8 for worldwide language support
from the depth of Control Panel/All Control Panel Items/Region/Administrative/Change system locale...
.
Unless the option enabled, the commit message from migration result can be seen as untranslatable
if the description was written with non-ascii codes.
With the option enabled, the commit message would be migrated properly just like the image below. So, check your descriptions in Perforce and change the system locale settings.
Migration
Type the command of format python <path of git-p4> clone //<depot>/<stream>/<directory>@all
in prompt. For instance, I can type the command like this:
1 | > python "C:\Program Files\Git\mingw64\libexec\git-core\git-p4" clone //HellLady/mainline/HellLady@all |
Then, all changelists from the //<depot>/<stream>/<directory>
will be migrated into a Git repository.
Postscript
That is all about the migration. ๐ So simple, but it was hard to know because the official document does not cover the usage in Windows. Anyway, I hope this would be helpful for you. Check the official document for more details if you also need other commands. Good luck. ๐ค
]]>Overview
Google noticed that the support for Universal Analytics will be ended in 2023/06/30. Check this document for more details.
Therefore, I had to migrate my UA settings into GA4. Here is a solution for Hexo blog, which is the framework I am using for this blog.
Google Tag
For activating Google Analytics, Google provides you a tag named as โGoogle Tagโ. First of all, you should find out what tag should be installed. You can find out this at Google Analytics 4โs page.
Click the button Admin
.
Click the button Account Access Management
.
Click the button Data Streams
.
Click the right arrow at your data stream.
Click the right arrow at the option Configure tag settings
.
Click the button Installation instructions
.
Check out the code that you should include manually. This is the Google Tag for analytics.
Theme Config
Most of themes for Hexo have the config file for Google Analytics. You can find it by just searching โgoogle_analyticsโ with text.
Especially, google-analytics.ejs
file would be containing the Google Tag.
The tag is inserted at the front of page of every post in your blog, so you can check that with View page source
. Thus, you should replace the Google Tag with new one. Copy the new one we have prepared and paste it to the google-analytics.ejs
file. Here are the commits I used for that.
Result
After the setup, the data stream will be constructed. But, it would take some timeโฆabout 1 day or 2 days ? So just keep calm and wait for that.
When it constructed successfully, you can see the result DATA FLOWING
just like above at GA4 / Admin / Account Access Management / Setup Assistant
.
Hello, this is Ross Bae, a game programmer.
I had a great opportunity to open a class with Coloso, a platform specializing in online classes.
The class is <FPS๊ฒ์ ๊ฐ๋ฐ๋ก ํ ๋ฒ์ ์
๋ฌธํ๋ ์ธ๋ฆฌ์ผ ์์ง>. And it is supported only in Korean yet.
Currently, UnrealEngine is widely used to the extent that it is used in world-famous games such as Battlegrounds, Fortnite, and Valorant. However, I have seen many people who feel hopeless due to the lack of systematically organized materials and lectures compared to their popularity, so I prepared this class.
In this class, I created a lecture by designing a curriculum so that you can learn the basic knowledge of the UnrealEngine by making FPS games with me, and cover from blueprints to scripting using C++.
You can learn the basic contents of game development using UnrealEngine as well as the knowledge and skills necessary to study UnrealEngine on your own, so it would be a good lecture for those who are interested in UnrealEngine.
It is not easy to get through the world of UnrealEngine using only Blueprint, so if you know how to handle C++ at all, it will be a great help. That is why I would like to deal with C++ in this lecture. However, you donโt have to be afraid of streotypes about C++ because we provide training materials that would be helpful to C++ beginners.
For your information, you can take the course at a significant discount for the current Early Bird period. Therefore, if you are interested, please check the attached link below.
์๋
ํ์ธ์, ๊ฒ์ ํ๋ก๊ทธ๋๋จธ ๋ฐฐ๋ฏผ์ฒ์
๋๋ค
์ด๋ฒ์ ์ ๊ฐ ์ข์ ๊ธฐํ๋ก ์จ๋ผ์ธ ํด๋์ค ์ ๋ฌธ ํ๋ซํผ ์ฝ๋ก์์ ํจ๊ป
<FPS๊ฒ์ ๊ฐ๋ฐ๋ก ํ ๋ฒ์ ์
๋ฌธํ๋ ์ธ๋ฆฌ์ผ ์์ง>
ํด๋์ค๋ฅผ ์ด๊ฒ ๋์์ต๋๋ค
ํ์ฌ ์ธ๋ฆฌ์ผ์์ง์ ๋ฐฐํ๊ทธ๋ผ์ด๋, ํฌํธ๋์ดํธ, ๋ฐ๋ก๋ํธ ๋ฑ
์ธ๊ณ์ ์ผ๋ก ์ ๋ช
ํ ๊ฒ์์ ์ฐ์ผ ์ ๋๋ก, ๋๋ฆฌ ์ฌ์ฉ๋๊ณ ์์ต๋๋ค
ํ์ง๋ง, ๊ทธ ์ ๋ช
์ธ์ ๋นํด ์ฒด๊ณ์ ์ผ๋ก ์ ๋ฆฌ๋ ์๋ฃ๋ ๊ฐ์๊ฐ ๋ถ์กฑํด
๋ง๋งํจ์ ๋๋ผ๋ ๋ถ๋ค์ ๋ง์ด ๋ด์๊ธฐ ๋๋ฌธ์, ์ด๋ฒ ๊ฐ์๋ฅผ ์ค๋นํ๊ฒ ๋์์ต๋๋ค
์ด๋ฒ ํด๋์ค์์ ์ ์ ํจ๊ป FPS๊ฒ์์
์ง์ ๋ง๋ค์ด๋ณด๋ฉด์ ์ธ๋ฆฌ์ผ์์ง์ ๊ธฐ๋ณธ์ง์๋ค์ ์ตํ ์ ์์ผ๋ฉฐ
๋ธ๋ฃจํ๋ฆฐํธ๋ถํฐ C++ ์ ํ์ฉํ ์คํฌ๋ฆฝํ
๊น์ง ์ปค๋ฒํ ์ ์๋๋ก
์ปค๋ฆฌํ๋ผ์ ์ค๊ณํ์ฌ ๊ฐ์๋ฅผ ์ ์ํ์ต๋๋ค
์ธ๋ฆฌ์ผ์์ง์ ํ์ฉํ ๊ฒ์๊ฐ๋ฐ์ ๊ธฐ๋ณธ์ ์ธ ๋ด์ฉ๋ค์ ๋ฌผ๋ก
์ธ๋ฆฌ์ผ์์ง์ ์ค์ค๋ก ๊ณต๋ถํ๋ ๋ฐ์ ํ์ํ ์ง์๊ณผ ๊ธฐ์ ๋ค์
๋ฐฐ์ฐ์ค ์ ์์ผ๋ฏ๋ก, ํ์์ ์ธ๋ฆฌ์ผ์์ง์
๊ด์ฌ์ด ์๋ ๋ถ์ด์๋ผ๋ฉด ์ข์ ๊ฐ์๊ฐ ๋ ๊ฒ์
๋๋ค
๋ธ๋ฃจํ๋ฆฐํธ๋ง์ผ๋ก๋ ์ธ๋ฆฌ์ผ์์ง์ ์ธ์์ ํค์ณ๋๊ฐ๊ธฐ ์ฝ์ง ์๊ธฐ์
C++ ์ ์กฐ๊ธ์ด๋ผ๋ ๋ค๋ฃฐ ์ค ์๋ค๋ฉด, ํฐ ๋์์ด ๋ ๊ฒ์ด๊ธฐ
๋๋ฌธ์ ์ด๋ฒ ๊ฐ์์์ C++ ์ ๋ค๋ฃจ๊ณ ์ ํฉ๋๋ค
ํ์ง๋ง, C++ ์
๋ฌธ์๋ฅผ ๊ณ ๋ คํ์ฌ ๊ต์ก์๋ฃ๋ฅผ ๋ณ๋๋ก ๋ง๋ค์ด
์ ๊ณตํ๋ฏ๋ก C++ ์ ๋ํ ์ ์
๊ฒฌ ๋๋ฌธ์ ๊ฒ๋จน์ง ์์๋ ๋ฉ๋๋ค
์ฐธ๊ณ ๋ก, ํ์ฌ ์ผ๋ฆฌ๋ฒ๋(์์ฝ๊ตฌ๋งค) ๊ธฐ๊ฐ์ผ๋ก ํฌ๊ฒ ํ ์ธ๋ ๊ธ์ก์ผ๋ก ์๊ฐํ ์ ์์ต๋๋ค
๋ฐ๋ผ์, ๊ด์ฌ ์๋ ๋ถ์ ์ฒจ๋ถ๋ ๋งํฌ๋ฅผ ํตํด ์์ธํ ๋ด์ฉ์ ํ์ธํด์ฃผ์ธ์
version: 5.0.3
build: 22621.521
Overview
It is common that an animation asset is binding at a certain skeleton asset. So you might have experience that you could not utilize the skeleton Aโs animation at the skeleton Bโs animation. Because an animation data is made of trace of bones. Therefore, an animation asset would not be compatible when you attempt to apply it to the different skeleton asset.
Think about two skeletons, A and B. The skeleton A has a bone for head, but the skeleton B does not. An animation asset for the skeleton A would not be compatible with the skeleton B, because the skeleton B does not have a bone for head. Though, you might want to apply it, at least parts of animation without head. Fortunately, UnrealEngine provides you to reuse the animation assets by retargeting bones, even if the number of bones or position of bones are different. That is the โRetargeting animationsโ.
Preparation
I will explain you while showing an example. First, install the project Lyra. You can purchase the project in the UnrealEngine marketplace and install it into your local system. After that, purchase Animation Starter Pack, too. Both of them are free.
Add Animation Starter Pack
into the project Lyra
you installed. Now, open it.
You can see the folder AnimStarterPack
at the below of Content
, and there are several animation assets fit for SK_Mannequin
.
Open an animation asset, and you can see the list of animations available in the current skeleton.
Switch to the tab for skeleton, and you can see the skeleton asset with the hierarchy of bones. Okay, we have checked the asset Animation Starter Pack
. Jump to the next, the project Lyra
.
In the Lyra
, there are one skeleton asset, but two skeleton meshes; SKM_Manny
and SKM_Quinn
. Each of them for male and female appearance.
The name of skeleton asset is the same with the asset Animation Starter Pack
with SK_Mannequin
. From now on, I will name the skeleton for Lyra
as UE5 skeleton, and the skeleton for Animation Starter Pack
as UE4 skeleton.
Also, you can find animation assets for UE5 skeleton at Content/Characters/Heroes/Mannequin/Animations/Actions
. All we have to do is, retargeting animations from ue4 skeleton into ue5 skeleton, and retargeting animations from ue5 skeleton into ue4 skeleton.
Create a folder RetargetedAnimations
at Content/AnimStarterPack
. We will save the retargeted animations and so on here. First, you should create IK Rigs for each skeleton mesh.
Name them as IKRigUE4
and IKRigUE5
.
They might look like this. Huh, it is time to setup the IK Rig.
Setup IK Rig
The IK Rig is used to define many properties, especially for retargeting animations. First of all, you should choose the root of retargeting. It is recommended to choose a pelvis
in most cases. (Especially, when it is a human form.) Right click the pelvis
and select the Set Retarget Root
. Then, the text (Retarget Root)
is displayed by the pelvis
. After that, UnrealEngine will retarget the animations from the root, pelvis
. Do it on both of IK Rig assets.
Get back to the content browser, create a IK Retargeter. You should choose a source IK Rig to create a IK Retargeter. Choose the IKRigUE4, and name this as UE4_TO_UE5
. Open it up.
The source IK Rig is the IKRigUE4
. Therefore, you should assign IKRigUE5
at the Target IKRig Asset
.
Now you can see both of them in the viewport. Try to play an animation from the asset browser.
Then, the target one will not be animating properly. Just like the video. As you have set the pelvis as a retarget root, it looks like only the pelvis is synchronized, while others are not. The problem is, the hierarchy of bones is different between two skeletons.
For instance, the UE4 skeleton has 3 bones for spine; spine_01
, spine_02
, and spine_03
.
The UE5 skeleton has 5 bones for spine; spine_01
, spine_02
, spine_03
, spine_04
, and spine_05
. UnrealEngine cannot retarget animations because the number and position of bones are different between two skeletons. So, you should specify how to match the bones, and you can do it with a chain.
Setup Chain
The IK Rig asset has a panel IK Retargeting
beside a panel Asset Browser
. You can specify some chains here, and it chains a part of bones as a group. UnrealEngine matches the group of same name when you attempt to retarget animations. Let me show you an example. Add new chain, and name it as leg_left
. We are going to group bones for the left leg.
Check the bones. After the pelvis, left leg starts at thigh_l
and ends at ball_l
. So, set the Start Bone
and End Bone
of chain leg_left
. You have set the chain for left leg in UE4 skeleton. Next, you should set the chain in UE5 skeleton, too.
Create a chain leg_left
. Check the bones for left leg. Set the Start Bone
and End Bone
. Then, we are good to go.
Back to the retargeter asset, click the panel Chain Mapping
. And click the button Auto-Map Chains
. The Auto-Map Chains
will match the chains of similar name. You can also match the chains of different name, but you should do it manually in that case.
Try to play some animations. You can notice there is a change. Yes, as you can see in the video, the left leg is synchronized. All you have to do is, create chains and match them.
I recommend you to create the chains; leg_right
, spine
, arm_left
, arm_right
, head
. Here are the chain settings I used for UE4 skeleton.
Chain Name | Start Bone | End Bone |
---|---|---|
leg_left | thigh_l | ball_l |
leg_right | thigh_r | ball_r |
spine | spine_01 | spine_03 |
arm_left | clavicle_l | hand_l |
arm_right | clavicle_l | hand_r |
head | neck_01 | head |
Unfortunately, UnrealEngine does not support to copy the chain settings yet. So, you should write the same settings in UE5 skeleton.
Back to the retargeter asset, again. Click the button Auto-Map Chains
, and try to play some animations. It looks like the video. Does it look like perfect ? No, focus on their hands. You shoud care about fingers, too. (Even for toes if the animation covers them ๐คฃ)
I will show you an example for index finger, rest of fingers are your work.
After the work for all fingers, it should look like this video.
Edit Pose
Sometimes, you might want to retarget animations but two skeleton are different each other. Suppose you have a skeleton of pose A, and a skeleton of pose T.
In this situation, the retargeted animations look weird even you set the chains well. Just like the video. Ohโฆit is like the necromorph in the Dead Spaceโฆ๐ฑ It happens due to the pose, the two skeletons are different on the pose. You should edit oneโs pose so that they have the same pose.
Here, I will edit the skeleton of pose T. Let me edit the pose as A. First, click the button Edit Pose
.
We have returned to the base pose. Now you can select bones of the target IK Rig.
I recommend you to change the property Target Actor Offset
if you need. You can check the rotation more precisely when it is set by 0.
I have editted the pose by this settings;
Do this settings on two arms.
Now it seems okay. Then, set a proper value to Target Actor Offset
. Click the button Edit Pose
to leave the edit mode.
You would see the result just like the video. Quite better than before. But, there is onething you should remember about the feature Edit Pose
. It is that, you cannot rotate bones not in any chain.
Suppose an IK Rig asset does not have a chain for right leg. As you can see in the screenshot, there is only a chain for left leg. Go to the retargeter asset.
You cannot see the section for right leg, even you have entered the edit mode. So, it is crucial that creating necessary chains before you attempt to edit pose in the retargeter asset.
Export
Get back to the UE4 & UE5 skeletons. You could play animations for UE4 skeleton via the Asset Browser
in the retargeter asset UE4_TO_UE5
. Plus, you can export selected animations to create animation assets for UE5 skeleton, which is the target skeleton.
Export animations at Content/AnimStarterPack/RetargetedAnimations
.
When you open it up, you can see the asset is using the skeletal mesh for UE5 skeleton. Great. It is simple that retargeting animations in opposite direction; UE5 -> UE4.
IKRigUE5
.Target IKRig Asset
as IKRigUE4
.Auto-Map Chains
.You can see it is using the skeletal mesh for UE4 skeleton. ๐
]]>branch: 5.0
version: 17.2.6
build: 22000.795
Overview
We have learned about the TextBlock
in UnrealEngine at the previous post. As we saw, the TextBlock
provides the function to split a long text into multiple lines. But, it was only for the text, combinations of character.
Sometimes, we want to put something that is not a character in the middle of text. For example, you may want to put an image for key icon into the text that describes characterโs skill. Maybe, you want to highlight a part of the text by coloring it. Furthermore, you could want to put a โwidgetโ in the middle of text. The widget would interact with the playerโs action so that they can have better experience of the user interface.
An option description in PUBG Xbox.
UnrealEngine has a solution for that, the RichTextBlock widget. You can put an image or anything else in the middle of text. Plus, it also supports auto-wrapping just like at the TextBlock
. Now you know why its name is the โRichโTextBlock. Then, let us check out how the RichTextBlock
widget is implemented and how it works.
An example
Already there is a tutorial in the document, but I will show you an another example including how to make your custom RichTextBlock
decorator. Suppose you want to display the text like the screenshot below.
The size of SizeBox
is (512, 512). The text used in RichTextBlock
is here:
1 | Test <Emphasis> Test </> <somewidget id="Ferris_02"/> Test <somewidget id="Ferris_01"/> Test aaa aaa aaa aaa aaa aaa aaa aaa <img id="Ferris_01"/> aaa <somewidget id="Ferris_02"/> aaa |
As we can see, the images are put in the middle of text. The RichTextBlock
parses the input text and decorates the text with your configurations. Without some configurations, the tags such as <Emphasis>
and <somewidget>
would be displayed as a plain text. Yes, you should do some configurations for using the RichTextBlock
.
I have already set some properties, TextStyleSet
and DecoratorClasses
.
RichTextStyle
The TextStyleSet
is used for decorating a text just like a markup. You can specify a font, size, color, and so on with it. I made two data rows in the data table, and that is why some of text was displayed with green color. Check the screenshot below.
The RichTextBlock
decorates rest of text if you make a Default
row. That is why the text not embraced with tags was displayed with white color.
Without the TextStyleSet
, the RichTextBlock
cannot display the text properly. You can make a data table containing RichTextStyleRow
with the instructions.
1 | 1. Right click on contents browser. |
Now, you can manipulate the data table. But, you should be careful that the name of data row is the same with the name of tag in the RichTextBlock
.
RichImage
1 | /** Simple struct for rich text styles */ |
UnrealEngine provides a decorator class, URichTextBlockImageDecorator
. It helps you add an image widget in the middle of text.
Without it, the RichTextBlock
cannot create an image from the tag img
. You can make a data table containing RichImageRow
with the instructions.
1 | 1. Right click on contents browser. |
Now, you can manipulate the data table. Also, you should be careful that the name of data row is the same with the name of tag in the RichTextBlock
as I mentioned at the RichTextStyle
. So, remember it because this mechanism will work on other cases (Decorators using their own data table) too.
However, you need one step more to apply the data table.
1 | // Engine/Source/Runtime/UMG/Public/Components/RichTextBlock.h |
The TextStyleSet
needs only a data table, but the DecoratorClasses
takes a class inherits URichTextBlockDecorator
. That is why URichTextBlockImageDecorator
inherits that.
So, you should create a blueprint class inherits URichTextBlockImageDecorator
because the class URichTextBlockImageDecorator
has the UCLASS keyword Abstract
. And, assign it into the DecoratorClasses
at the RichTextBlock
widget. The blueprint class should reference the data table for images.
Custom decorator
I have written a custom decorator for this example, the URichTextBlockSomeWidgetDecorator
. As you can see in the example, it displays a combination of image and text. First of all, the code for this class is here.
And the followings are the major changes.
1 | public class TestRichTextBlock : ModuleRules |
You must add the modules at your Build.cs
: UMG
, Slate
, and SlateCore
.
1 | bool FRichInlineSomeWidget::Supports(const FTextRunParseResults& RunParseResult, const FString& Text) const |
I have changed the tag that my decorator supports. img -> somewidget
1 | void SRichInlineSomeWidget::Construct(const FArguments& InArgs, const FRichSomeWidgetRow* Row, const FTextBlockStyle& TextStyle, TOptional<int32> Width, TOptional<int32> Height, EStretch::Type Stretch) |
Used the max value for IconHeight
because I wanted to display the image properly. Plus, the decorator has a TextBlock
for descripting an image. In the example, a text Ferris_01
or Ferris_02
is located on the right of Ferrisโ image.
So, you can create a custom decorator like this. Rest works are just similar with RichImage
, creating some blueprint classes (decorator and data table) and assigning each other. Let your decorator have awesome functions :)
Preview of Part #2
At this part, we have seen how to use the RichTextBlock
and how to make a custom decorator.
URichTextBlockImageDecorator
.ChildSlot
.SNew
accepts only the class inherits SWidget
. In most of cases, it is okay to inherit the class SLeafWidget
.At next part, we would find out how does the RichTextBlock
wrap its contents. It will be interesting because the RichTextBlock
can have an image as a content.
branch: 5.0
version: 17.1.1
build: 22000.556
Overview
A TextBlock has an option AutoWrapText
and the option makes the TextBlock can wrap its text. Thanks to the option, we can display a text without concerning about breaking lines. For general cases of text, even the option works within very short time, almost 1 tick. How does it possible ? What is the implementation of that option ? Let us find out it in this post.
The TextBlock upper has the option turned on. Contrary, the TextBlock lower has the option turned off.
Where is the code
1 | // TextWidgetTypes.h |
The option is loacted in the class UTextLayoutWidget
. We can see the option as the class UTextBlock
inherites UTextLayoutWidget
. Unfortunately, the variable is not directly used for wrapping text, but used for saving the value of option.
1 | void UTextBlock::SynchronizeProperties() |
When you turn on or turn off the option AutoWrapText
, widgetโs SynchronizeProperties()
would be called. By the code Super::SynchronizeTextLayoutProperties(*MyTextBlock);
executed, Parentโs SynchronizeProperties(TWidgetType&)
is called.
1 | /** Synchronize the properties with the given widget. A template as the Slate widgets conform to the same API, but don't derive from a common base. */ |
In this function, InWidget
is our TextBlock. And it would call the function SetAutoWrapText(bool)
for updating the option.
1 | void UTextBlock::SetAutoWrapText(bool InAutoWrapText) |
Good. The parameter InAutoWrapText
updates the variable AutoWrapText
and MyTextBlock
. The variable MyTextBlock
is TSharedPtr<STextBlock>
. Now, the time to jump to STextBlock
.
1 | void STextBlock::SetAutoWrapText(TAttribute<bool> InAutoWrapText) |
Here, in STextBlock
the variable AutoWrapText
holds the value of option. The function Assign()
just saves the value its inside. The value of AutoWrapText
is used in two positions.
1 | // STextBlock.cpp |
First, an execution flow by Prepass.
1 | // STextBlock.cpp |
Second, an execution flow by Paint.
The flows are branched at FSlateApplication::PrivateDrawWindows()
. In the function, DrawPrepass()
is called at line #1292, and DrawWindowAndChildren()
is called at line #1338. Respectively, Prepass and Paint. Engine just invalidate the widget in Paint flow, so we only need to look into Prepass flow.
Calculating a length of text wrap
1 | FVector2D FSlateTextBlockLayout::ComputeDesiredSize(const FWidgetDesiredSizeArgs& InWidgetArgs, const float InScale, const FTextBlockStyle& InTextStyle) |
The function FSlateTextBlockLayout::ComputeDesiredSize()
is called during Prepass flow. Here, bCachedAutoWrapText
caches the value of InWidgetArgs.AutoWrapText
. This will be used at CalculateWrappingWidth()
later.
1 | float FSlateTextBlockLayout::CalculateWrappingWidth() const |
The CachedWrapTextAt
will be the same with the value set by option WrapTextAt
in editor. And, the CachedSize
depends on the size of panel where the TextBlock resides in. In the example we are using, the variables would have a value like below:
CachedWrapTextAt
= 0CachedSize.X
= 100Because the width of SizeBox is 100 and we set the option WrapTextAt
as 0. The function determines the length of wrapping, but it is not for the logic about how to divide texts or how to break lines. So, look back on FSlateTextBlockLayout::ComputeDesiredSize()
.
UpdateLayout when it is dirty
1 | // SlateTextBlockLayout.cpp |
In the function, there is some code to call FTextLayout::UpdateIfNeeded()
. Oh, the UpdateLayout()
looks like the one we wanted. The code will be executed when bHasChangedLayout
is true, and the value is usually set by SetWrappingWidth()
.
1 | void FTextLayout::SetWrappingWidth( float Value ) |
Suppose you switch the option AutoWrapText
from false into true. Here, DirtyFlags
will flag the ETextLayoutDirtyState::Layout
, which is 1. Therefore, !!(DirtyFlags & ETextLayoutDirtyState::Layout)
turns into 1. The bHasChangedLayout
becomes 1, too.
1 | void FTextLayout::UpdateLayout() |
The ClearView()
and BeginLayout()
are not important in this post. Plus, they do not something important either.
1 | void FTextLayout::FlowLayout() |
In the FlowLayout()
, the code that calls CreateLineWrappingCache()
is a point since the CreateLineWrappingCache()
creates data for wrapping text.
Break lines (1/3); Separating text into slices
1 | void FTextLayout::CreateLineWrappingCache(FLineModel& LineModel) |
In this function, we found some variables that have a name of LineBreak
. Let us check what the line break iterator does.
1 | TSharedRef<IBreakIterator> FBreakIterator::CreateLineBreakIterator() |
The LinBreakIterator
is a line break iterator using the implementation of ICU(International Components for Unicode)โs break iterator. The break iterator does a job of finding a location of boundaries in text. Visit here for more details. To summarize, the break iterator can find where each word ends. For example, we have a text of Text Block Test
and the break iterator can find locations just like this Text (HERE)Block (HERE)Test(HERE)
. So, let us see how it works.
1 | int32 FICULineBreakIterator::MoveToNextImpl() |
The MoveToNext()
calls the MoveToNextImpl()
. And, the MoveToNextImpl()
change the InternalPosition
, which is used for finding a location in text.
1 | // UnrealEngine/Engine/Source/ThirdParty/ICU/icu4c-64_1/include/unicode/brkiter.h |
The InternalPosition
is passed into following
and it is the code of ICU library.
1 | [index] 0123456789... |
In our test text, the flow looks like above.
1 | struct FBreakCandidate |
A FBreakCandidate
will be inserted into BreakCandidates
each iteration. It seems the FBreakCandidate
knows the size of word (or a part of text). What happened in CreateBreakCandidate()
? How could they know the actual size of text ?
Break lines (2/3); Measuring size of each slice
1 | FTextLayout::FBreakCandidate FTextLayout::CreateBreakCandidate( int32& OutRunIndex, FLineModel& Line, int32 PreviousBreak, int32 CurrentBreak ) |
The CreateBreakCandidate()
function is quite big size, about 200 lines. But the core of function is to calculate a size of slice. Do you remember the variable CurrentBreak
that indicates where each slice ends ? Here, the function make a slice according to CurrentBreak
and trim it. Trimming happens in while
statement, which decreases the WhitespaceStopIndex
until it indicates an end of last word.
The WhitespaceStopIndex
would be 4 in our test text. That is because the index of first whitespace is 4 in Text Block Test
. Eventually, we will enter the function Measure()
as the slice is not empty. The only case that Measure()
not called is when BeginIndex == StopIndex
is true, in other words CurrentBreak == 0
.
1 | // TextLayout.cpp |
We will get a FVector2D from FSlateTextRun::Measure()
, which is the size of slice. The code Run->Measure()
is the same with calling ShapedTextCacheUtil::MeasureShapedText()
when you are using a TextBlock. Calculating shadow offset is not important in this post, so we need to focus on ShapedTextCacheUtil::MeasureShapedText()
.
1 | // ShapedTextFwd.h |
As you can see, the FShapedGlyphSequenceRef
is a shared reference of FShapedGlyphSequence
. Then, what the hell is FShapedGlyphSequence
? And what it does ?
1 | FShapedGlyphSequenceRef FShapedTextCache::FindOrAddShapedText(const FCachedShapedTextKey& InKey, const TCHAR* InText) |
First, engine tries to find if there is already existing one. If not, creates new one and insert it into the cache.
1 | // FontCache.h |
The FShapedGlyphSequence
has a TArray of FShapedGlyphEntry
. And the FShapedGlyphEntry
has several properties such as SourceIndex
and XAdvance
. Looks like the FShapedGlyphEntry
has properties responding each character in text, and the FShapedGlyphSequence
has properties responding whole text. The properties are for how to render the text appropriately. So here, we can regard the term Glyph
as one single character.
1 | // SlateTextShaper.cpp |
Usually, the XAdvande
is determined at FSlateTextShaper::PerformKerningOnlyTextShaping()
. Engine uses the FreeType library for getting a estimated size of character when it rendered. The GlyphIndex
is calculated based on font and character value.
1 | bool FFreeTypeAdvanceCache::FindOrCache(const uint32 InGlyphIndex, FT_Fixed& OutCachedAdvance) |
The code AdvanceCache->FindOrCache(GlyphIndex, CachedAdvanceData)
finds at cache, but it creates new one and cache it if could not find. The FT_Get_Advance()
returns the result with parameter &OutCachedAdvance
. We can get a size of single character through the function because the value GlyphIndex
includes information of font and character value.
In our test text Text Block Test
, the result is like below:
Index | Character | GlyphIndex | XAdvance |
---|---|---|---|
0 | T | 55 | 18 |
1 | e | 72 | 17 |
2 | x | 91 | 16 |
3 | t | 87 | 11 |
4 | | 3 | 8 |
5 | B | 37 | 20 |
6 | l | 79 | 9 |
7 | o | 82 | 18 |
8 | c | 70 | 17 |
9 | k | 78 | 17 |
10 | | 3 | 8 |
11 | T | 55 | 18 |
12 | e | 72 | 17 |
13 | s | 86 | 17 |
14 | t | 87 | 11 |
You can see that the same character has the same XAdvance value. For example, The character T
has 55
of GlyphIndex and 18
of XAdvance. Go back to the ShapedTextCacheUtil::MeasureShapedText()
, that is why the MeasuredWidth
has a value of 220 โ 222 = 18 + 17 + ... + 17 + 11
. The difference 2
occurs by the kerning.
The final width may differ a little bit because some combination of characters need a kerning. For example, though e
and k
have the same XAdvance value 17
, a combination Te
has a small size than a combination Tk
. Because in the combination Te
, e
can stick to T
closer than k
in Tk
. In other words, a character T
can have XAdvance of 17
in the combinations such as Ta/Tc/Td
, and so on. Otherwise such as Tb/Tf/Th
, it can have XAdvance of 18
.
Break lines (3/3); Creating lines with wrapping
Go back to the FTextLayout::CreateLineWrappingCache()
, now we can wrap text according to size (exactly, width) of each slice. All slices are stored at the container BreakCandidates
. In our test text Text Block Test
, the result is like below:
BreakCandidates | ActualRange | TrimmedRange |
---|---|---|
0 | Text [0, 5) | Text [0, 4) |
1 | Block [5, 11) | Block [5, 10) |
2 | Test [11, 15) | Test [11, 15) |
โป [0, 5)
is equal to [0, 4]
Do you remember there is a code calls FTextLayout::FlowLineLayout()
in FTextLayout::FlowLayout()
?
1 | void FTextLayout::FlowLineLayout(const int32 LineModelIndex, const float WrappingDrawWidth, TArray<TSharedRef<ILayoutBlock>>& SoftLine) |
Here, we accumulate a width of each BreakCandidate on CurrentWidth
. And wrapping text occurs whenever CurrentWidth
almost reaches to WrappingDrawWidth
.
1 | else if ( !BreakDoesFit || IsLastBreak ) |
Usually, when wrapping text needed, the codes above would be executed. FinalBreakOnSoftLine
indicates the BreakCandidate that needs a new line after itself. In our test text Text Block Test
, Text
could be assigned.
1 | void FTextLayout::CreateLineViewBlocks( int32 LineModelIndex, const int32 StopIndex, const float WrappedLineWidth, const TOptional<float>& JustificationWidth, int32& OutRunIndex, int32& OutRendererIndex, int32& OutPreviousBlockEnd, TArray< TSharedRef< ILayoutBlock > >& OutSoftLine ) |
The function FTextLayout::CreateLineViewBlocks()
creates new FTextLayout::FLineView
and adds it into initialized LineViews
. We already cleared the LineViews
at the function FTextLayout::ClearView()
. In our test txt, after all process, the LineViews
will have the value like below:
LineViews | Range |
---|---|
0 | [0, 5) |
1 | [5, 11) |
2 | [11, 15) |
Finally, we found that the result of wrapping text. All of prerequisites are for splitting a text. Now we understand how the text can be wrapped in UnrealEngine.
Wrap-up
Text wrapping in UnrealEngine can be divided into 3 major steps.
Separating a text into slices
Find where each word ends using ICU library.
Separate text into slices based on the indices.
Measuring size of each slice
Estimate size of rendered character using FreeType library.
Apply several modifications such as kerning, shadow, and so on.
Creating lines with wrapping
Add width until it reaches the wrapping width.
When it reaches, create new line.
branch: 5.0
version: 17.0.4
build: 22000.493
Overview
Sometimes, you might need to rename your project in some reasons.
Unfortunately, in those situations, UnrealEngine does not provide any feature to rename your project.
So, in this post, we gonna find out how to rename your project manually.
Prerequisites
Suppose we have a project created from template Third Person
with options above.
1 | [ProjectRoot]/Source/SomeProjectA/SomeProjectACharacter.h |
After the project created, make a simple function GetSomeString()
in the character class, which returns some string. We will try to migrate the function for example later in this post. Now, build editor with the combo Development Editor + Win64
and run it.
You can find a character blueprint created from template in the Content/ThirdPersonCPP/Blueprints/ThirdPersonCharacter
. Furthermore, the blueprint has a parent class as the cpp class SomeProjectACharacter
. It means that the blueprint can use the function we have just made.
I think it would be proper to print that string when character spawned. Make some blueprint nodes for printing that string. Now, compile and save it.
Check it works out. You should be able to see that string SomeString
through the screen. Great.
1 | .../SomeProjectA> git log |
I setup the project directory as git repository to clarify what is changed. You do not have to follow this, it is optional. But, you should prepare a gitignore fits in UnrealEngine if you want to follow this. (For example, https://github.com/github/gitignore/blob/main/UnrealEngine.gitignore)
We are all prepared, and let us change the name of project from SomeProjectA
into OtherProjectB
.
Step #1; Clean-up
First of all, we should remove some files. Some files and folders are generated by other files, so we do not have to care about that files would be generated later. Thus, we would better remove those files or folders listed below:
.vs/
Binaries/
DerivedDataCache/
Intermediate/
Saved/
[ProjectName].sln
You can check if the files or folders are generated. Remove them and generate VisualStudio project files. Then, files and folders related to VisualStudio would be generated. And you can build your project from VisualStudio project. After all, you will see the files and folders listed above are restored.
Plus, that is why gitignore for UnrealEngine contains those files or folders. We do not need them to be version-controlled.
Step #2; Change contents of files
Now it is time to rename the project. There are some files usually contain the name of project in its contents. Therefore, we should change that part of contents. In this goal, we will manipulate the files likeโฆ
Config/
.ini
files such as DefaultEngine.ini
Source/
[ProjectName].uproject
Maybe there some files contain the name of project in the folder Content/
. Such as an absolute path of media file, and a blueprint class inherites a cpp class whose name contains the name of project. However, basically the files in Content/
are binary type. So, manipulating its contents as text might not ensure a result we expect. In worst case, the manipulation could break some references between blueprints. That is why we handle only the files of text type in this step.
By the way, I recommend you to use notepad++ when manipulating multiple text files, and I will use that in this post. It is open source and provides powerful features. The tool supports Windows and you can install it for ease. You do not have to install it, but I will show an example based on the tool.
Open the notepad++ and drag your project folder from file explorer into notepad++. Now notepad++ would show the folder as list view at the left sidebar.
Right click on Config/
and select Find in Files...
. Then, a dialog for search would appear.
Click the tab Find in Files
and type SomeProjectA
and OtherProjectB
respectively at Find what
and Replace with
. After that, click Replace in Files
.
Repeat the steps on Source/
folder.
Open the .uproject
file and Replace in similar manner.
1 | .../SomeProjectA> git status |
We can see some files changed. Now the contents of file get ready.
Step #3; Change name of files
We have changed the contents of files. Next, let us change the name of files. This also works whole project without Content/
folder with the same reason I mentioned.
Open a powershell prompt and type the command like below:
1 | %ProjectRoot% > Get-ChildItem -Recurse -Path Config/* | Rename-Item -NewName { $_.Name.replace("SomeProjectA","OtherProjectB") } |
This will change the name of all files in Config/
folder.
1 | %ProjectRoot% > Get-ChildItem -Recurse -Path Source/* | Rename-Item -NewName { $_.Name.replace("SomeProjectA","OtherProjectB") } |
Apply this on Source/
folder, too. After that, change the name of .uproject
file and [ProjectRoot]
folder manually.
1 | .../OtherProjectB> git status |
Check the result with git status
again.
Step #4; Redirect blueprints
Generating VisualStudio project files okay. Building editor on VisualStudio project okay. But, there is one last task to do.
We skipped blueprint files in previous steps. But, some blueprint assets could try to use old cpp classes or codes. Therefore, you will see the dialog while opening the editor. The CDO has been broken.
Some of blueprint classes lost their parent cpp class or get broken. Especially, the blueprint class ThirdPersonCharacter
was disconnected with its parent, old cpp class SomeProjectACharacter
. We need to fix it.
1 | // DefaultEngine.ini |
Fortunately, UnrealEngine provides redirecting blueprint classes. You can set the redirection settings in DefaultEngine.ini
. I have set the settings like above, and engine will redirect SomeProjectA
things into OtherProjectB
things. You should create more settings if you need. Because the example settings are from template and your project may have more classes whose CDO broken.
After setting up the redirection, remove Binaries/
+ DerivedDataCache/
+ Saved/
folders. And repeat build the editor.
Finally we meet again ! The string SomeString
was the text we prepared. We have done renaming a project and restoring whole project.
branch: 5.0
version: 17.0.4
build: 22000.376
Overview
Developing your UnrealEngine project with only the blueprint is not easy because the blueprint has some limitations on functionalities than the native, CPP. For instance, in blueprint you can access the source code tagged by BlueprintCallable
, BlueprintType
, BlueprintReadOnly
, or those series. But, in CPP you can access all of the source code as possible and even you can modify the source code of engine. In other words, using only blueprint is like using a part of UnrealEngine. So eventually, you would want to create CPP class for more functionalities. This post covers that topic; how to create CPP class in UnrealEngine.
Plus, not only creating something but removing something is important. I will tell you how to remove CPP class in UnrealEngine, too. Let us create a project from ThirdPerson template with the options below. I named it as Unreal_5_0
.
Creating CPP class; method #1
Open the Content Drawer
and click All/C++ Classes
folder. After the steps, you can see the option New C++ Class...
when you click the Add
button. Click it.
In this dialog, you can select a parent of new CPP class. Common Classes
tab contains the most commonly used classes, so you should switch to All Classes
tab and find an appropriate class if needed.
I chose the class UserWidget
as a parent of new CPP class. Click the button Next>
.
In this dialog, you can name the new CPP class and save it with some options. I will left the name as default, My[ParentClassName]
. The combobox beside name is for selecting a module to include this class. Our project created from ThirdPerson template starts with only one module whose name is the same with project, in this case Unreal_5_0
.
1 | // GameProjectUtils.h |
The radio button Class Type
is for selecting a location of new CPP class. The enum value is UserDefined
in default, but it would be forced to Public
or Private
when you select one of the radio buttons.
1 | // SNewClassDialog.cpp |
With these codes, the radio buttons just change the location of new CPP class. The new CPP class would be included in Public
folder when you clicked a radio button Public
, vice versa. This setting makes some differences especially onto accessibility.
1 | // GameProjectUtils.cpp |
1 | // Definitions.Unreal_5_0.h |
Only the class of location for Private
cannot have the macro [ModuleName]_API
. And the macro is defined as DLLEXPORT
. The attribute is used to export codes in MSVC, visit here for more details.
1 | // MyUserWidget.h |
Of course, my new CPP class MyUserWidget
has the macro [ModuleName]_API
because I had not chosen any radio button. It was left as UserDefined
and UserDefined
is usually treated like Public
. Then, the new CPP class would not have the macro if you clicked Private
at the dialog.
Click Create Class
. Engine will create intermediate files, generate project files, and build source codes.
After that, the new CPP class is ready for you.
FYI, remove [ProjectRoot]/Binaries
folder and build again if you meet a dialog like above while opening the editor.
Creating CPP class; method #2
At the method #1, you must wait for a moment while engine does a process; creating intermediate files, generating project files, and build source codes. The process of creating new CPP class is not expensive when your project is small enough, but every project gets bigger and bigger as time goes on. When it comes to the point, you would want create multiple new CPP classes and wait for only one moment. At that time, the method #2 will be able to save you.
The method #2 for creating new CPP class is quite simple; do it yourself what engine did for you. Let me explain step by step. Suppose you want to create new CPP class inherits UserWidget
class.
Open your VisualStudio project. Find an location to add your new CPP class at Solution Explorer
. I will add a class at Unreal_5_0
folder. Select Add/New Item....
at the option.
Select Header File
and name the file. I will name the file as SomeUserWidget.h
. And click the button Browse...
to locate the file. I will locate the file as the same location in Solution Explorer
, [ProjectRoot]/Source/Unreal_5_0
.
After click the button Add
, you can find the new file at both file explorer and Solution Explorer
in VisualStudio IDE. Repeat previous steps for creating a cpp file.
Then you have two files for creating new CPP class.
But they have no contents, in other words, empty. So what ? Let us fill the contents manually. The cpp file is very simple as it has only an include statement, #include "[HeaderName]"
. Problem is the header file. Usually, a generated header file from a class inherits UObject
(or child of UObject
) has a format like below:
1 | // Copyright notice |
For instance, we had created a class MyUserWidget
. The header file MyUserWidget.h
has the contents like below:
1 | // Fill out your copyright notice in the Description page of Project Settings. |
FYI, the part [ModuleName]_API
is optional as I explained at the method #1.
Then, we can write down some codes for SomeUserWidget
. They look like above. Alright, now we should generate intermediate files and project files. And then build the source codes.
For this, close your VisualStudio IDE. Right click the uproject file and select Generate Visual Studio project files
.
Open your VisualStudio project after generation ends. And build the editor. The engine will generate intermediate files such as generated.h
and gen.cpp
. For more details about generating intermediate files, visit this post.
Now build ended. Let us open the editor. We can see new class SomeUserWidget
well.
Removing CPP class
As you can see, you cannot select Delete
at the option about CPP class in editor. Then, how we can remove a class when we do not need it ? It is quite simple, but you cannot do it in editor.
Close your editor and remove files for the class you want to remove. I will remove the files for the class SomeUserWidget
.
And then generate project files via uproject file. Plus, you must remove [ProjectRoot]/Binaries
folder.
Open your VisualStudio project and build editor.
Now you can see the class SomeUserWidget
disappeared.
Still the intermediate files could be remained. Remove [ProjectRoot]/Intermediate
folder and repeat the steps.
Two years from beginning a blog
What a monumental, it has been 2 years ago when I posted the first article on this blog; The article about UnrealEngine build target. I have usually written a post each month, mostly about UnrealEngine. The topic of post is chosen by my interest. For instance, things that I want to know, what I want to check, or just a record for memo.
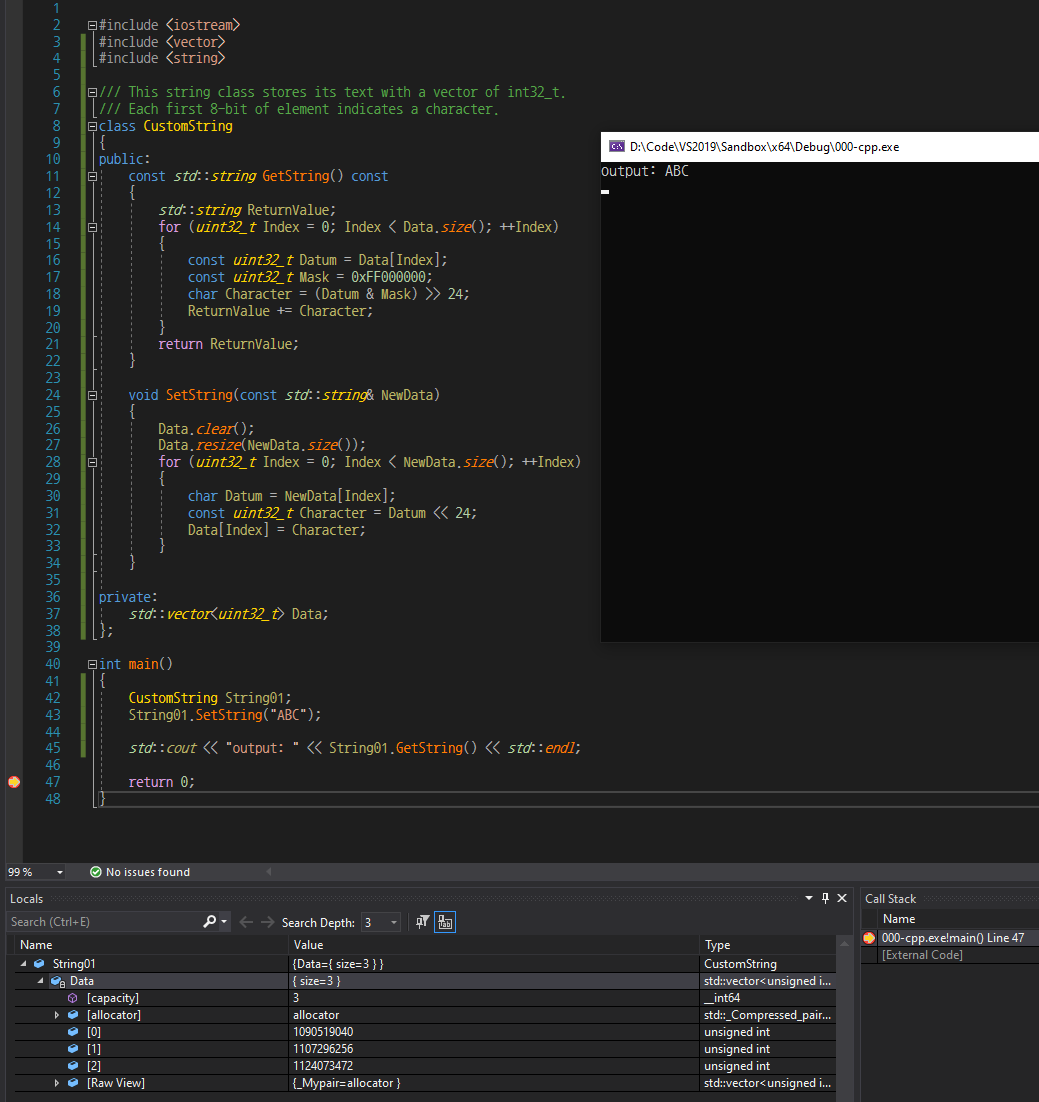
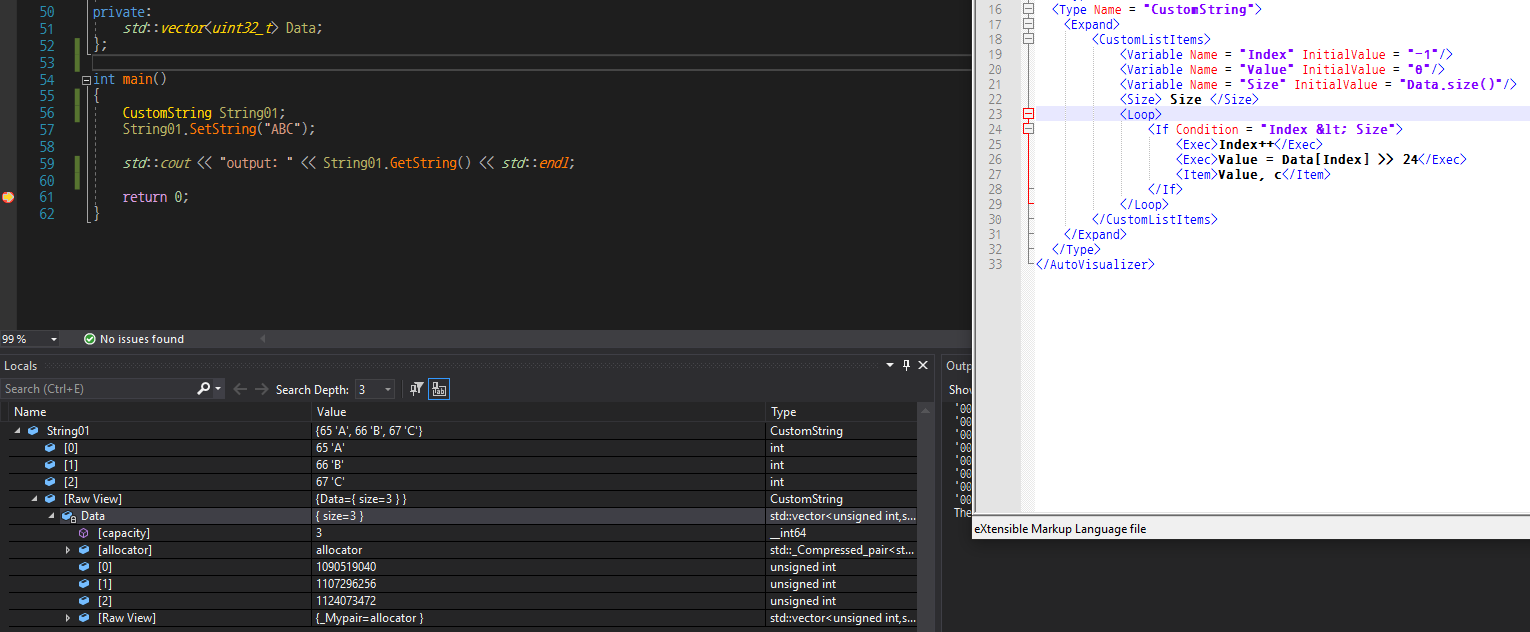
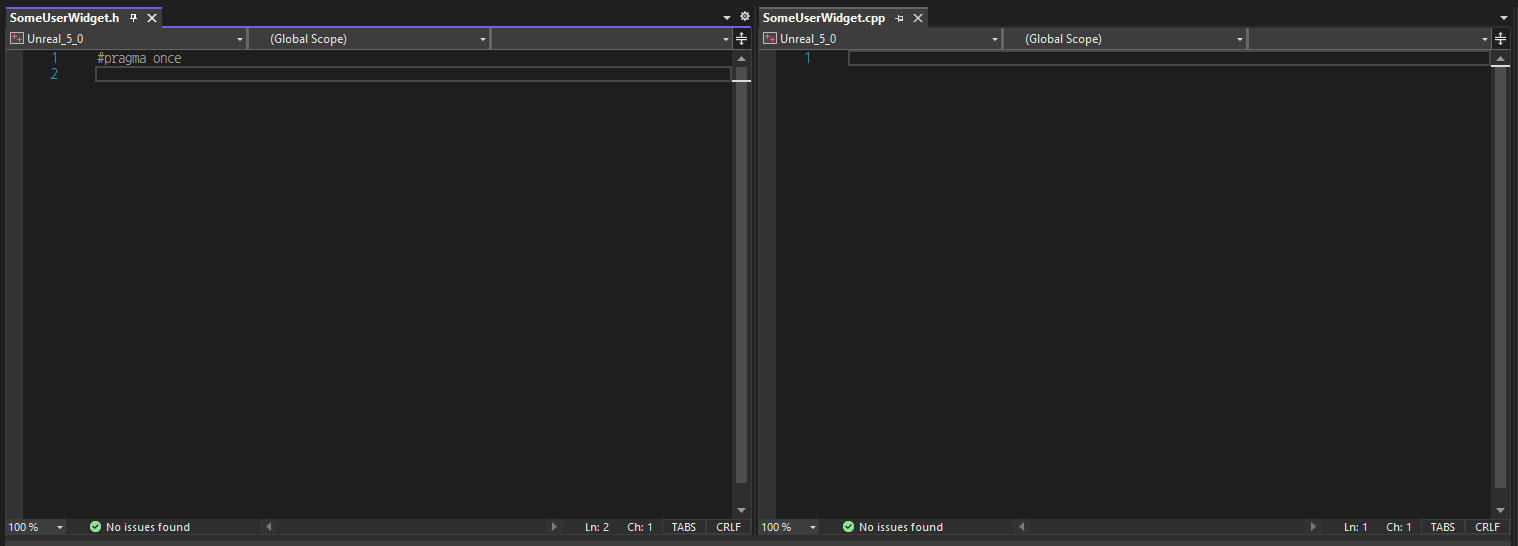
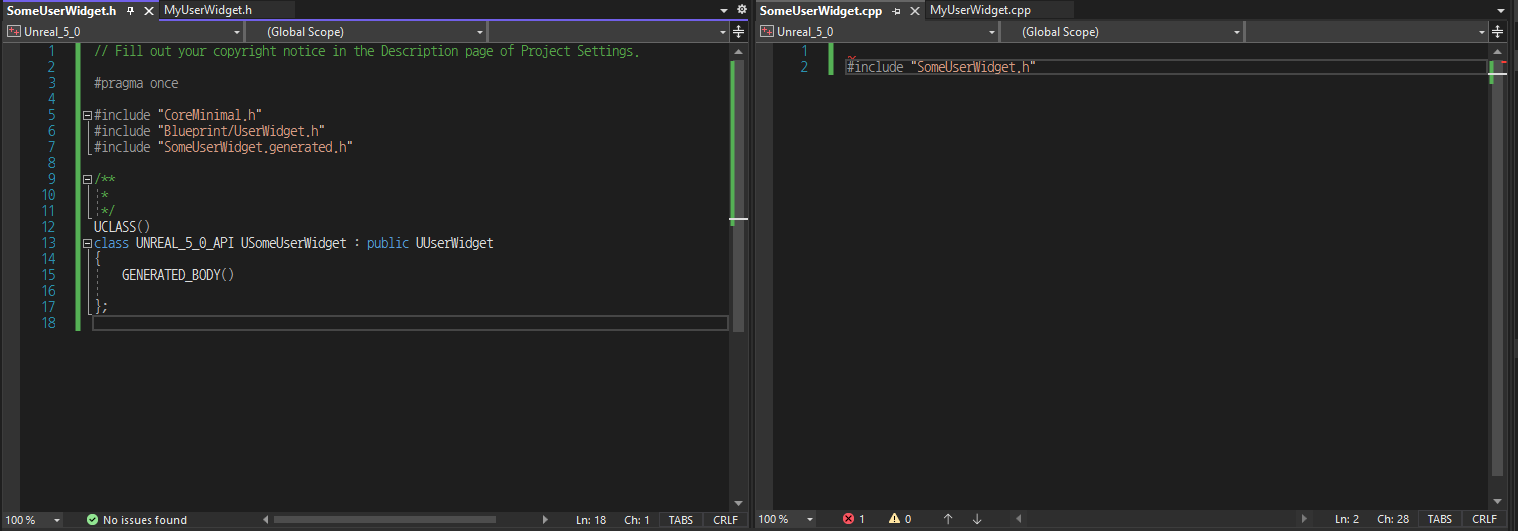
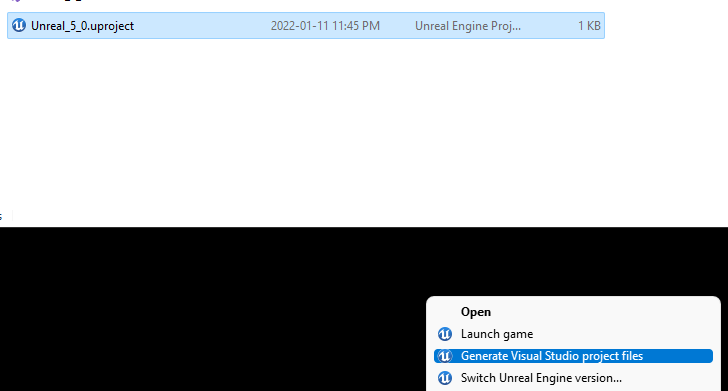
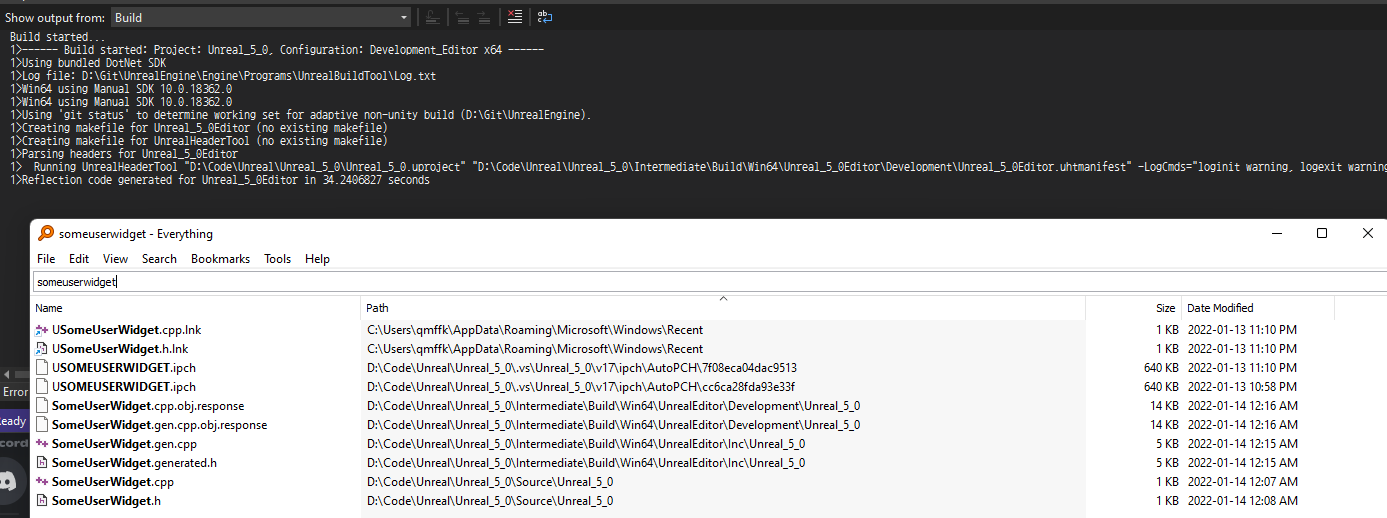
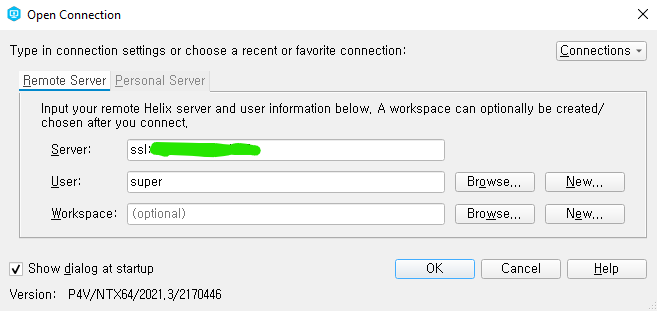
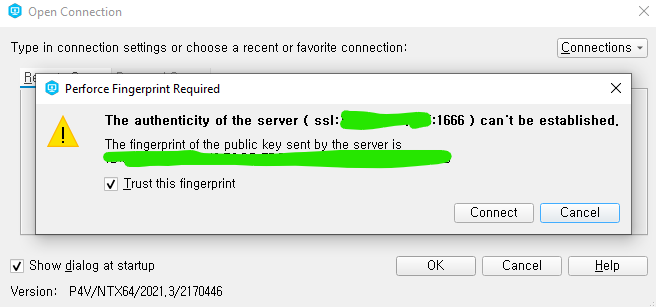
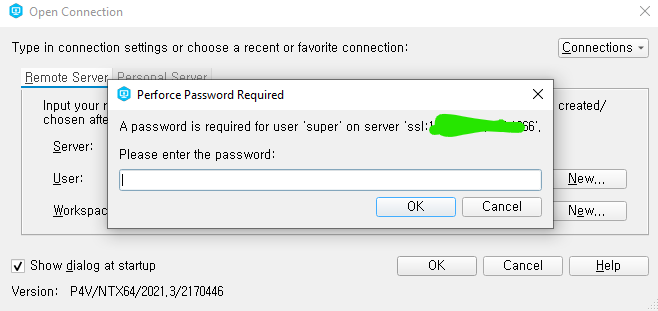
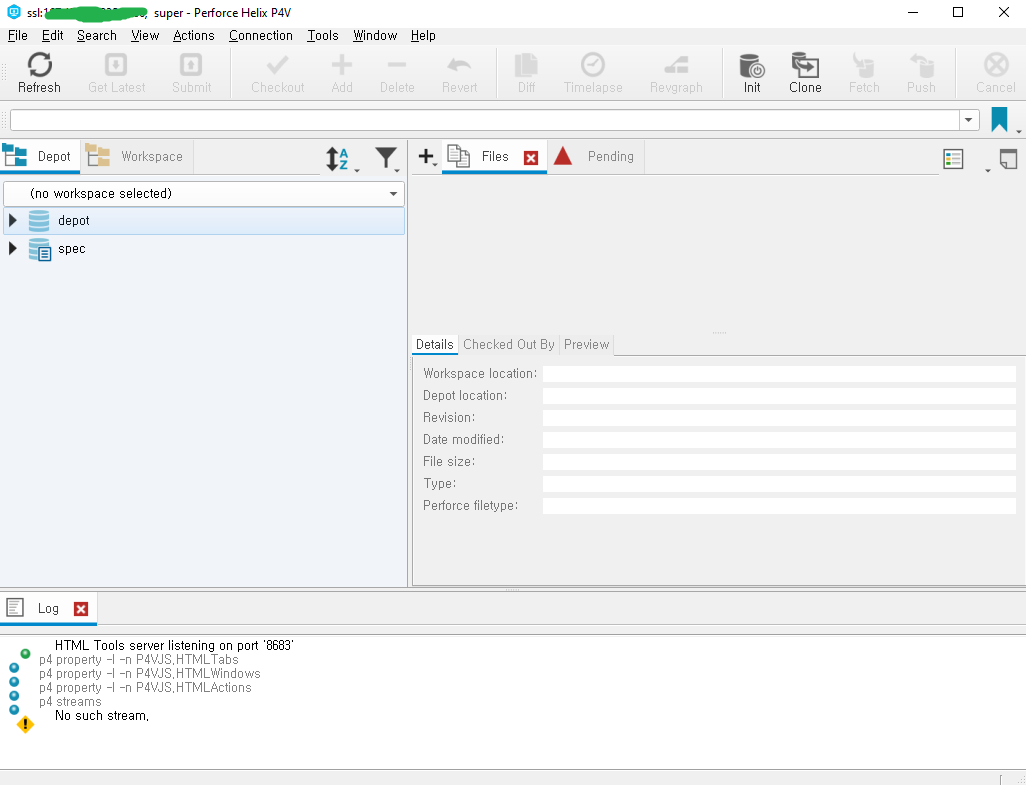
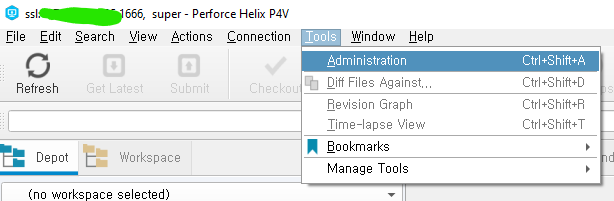
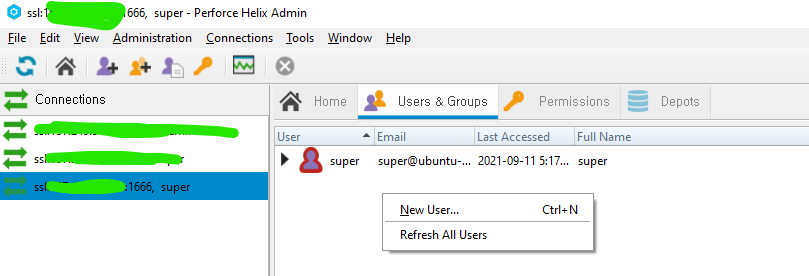
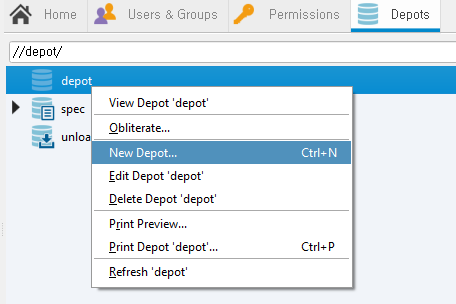
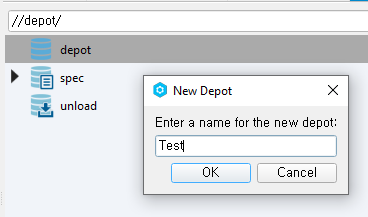
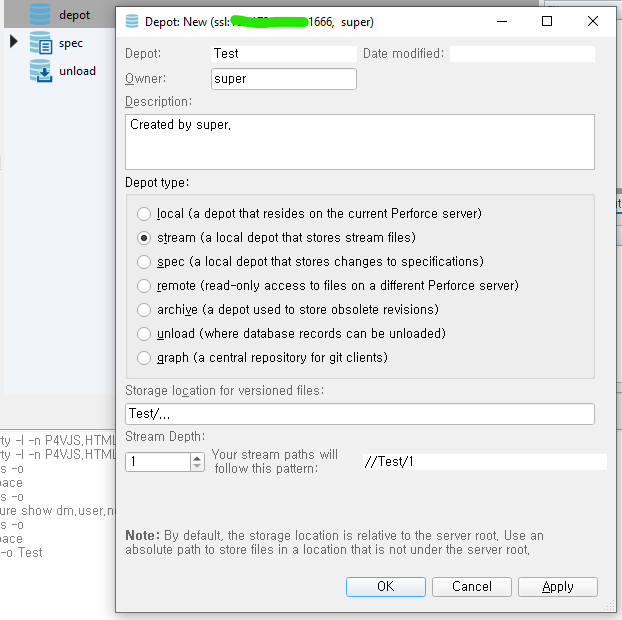
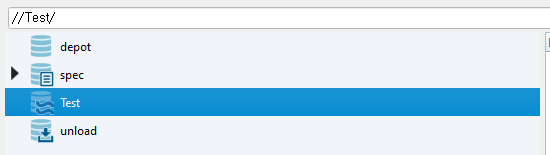
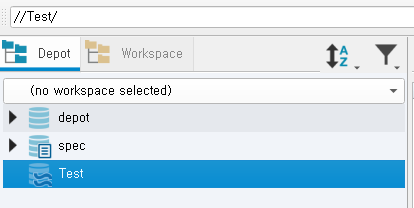
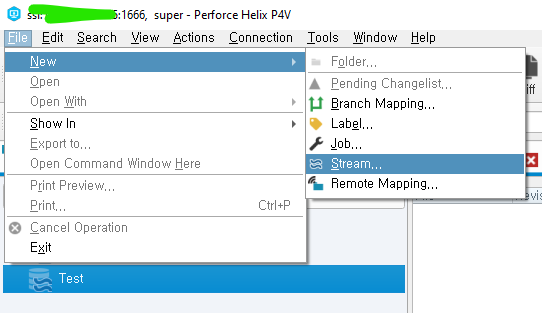
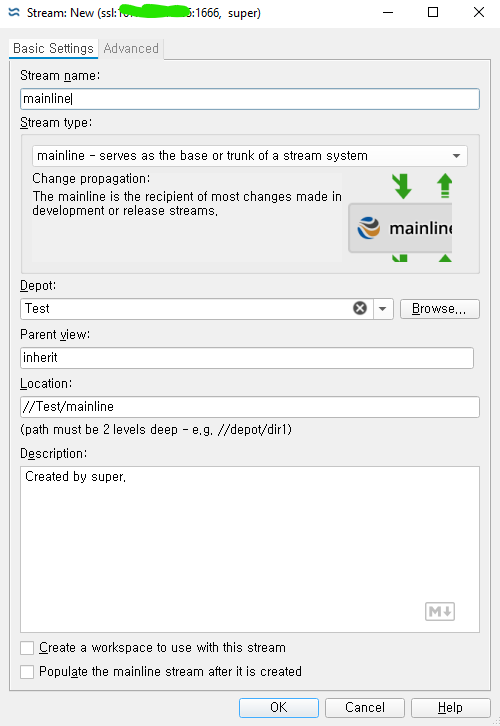
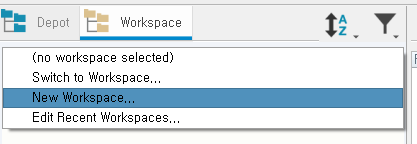
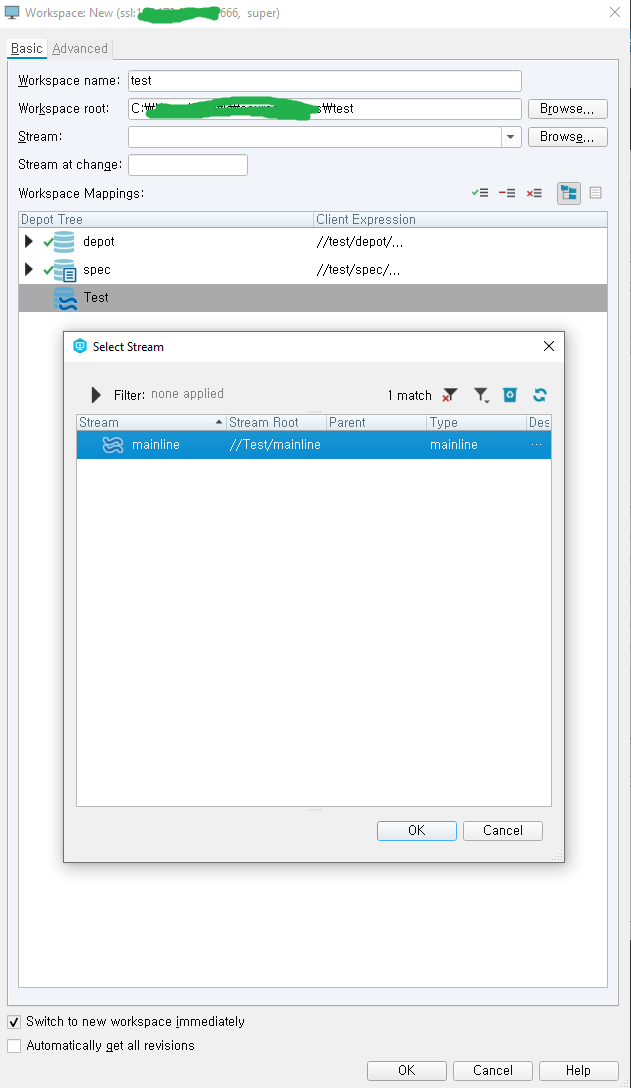
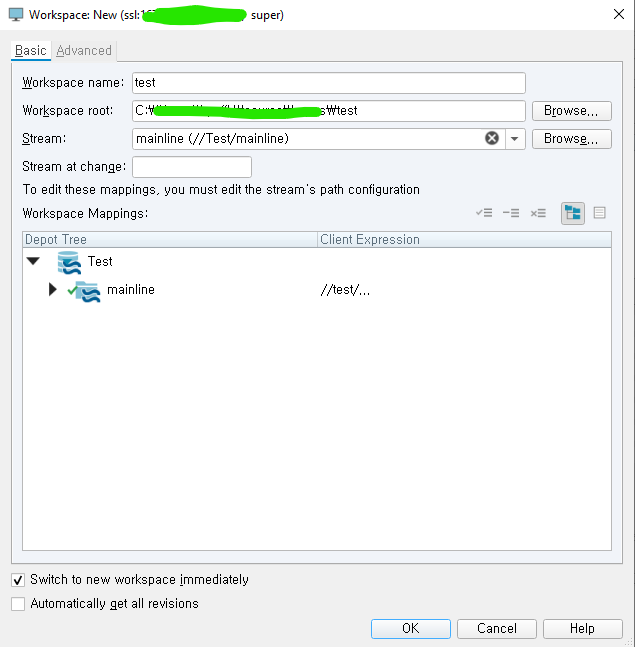
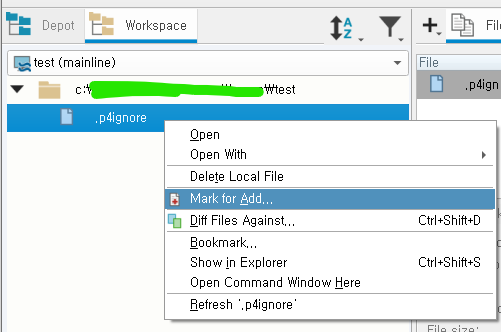
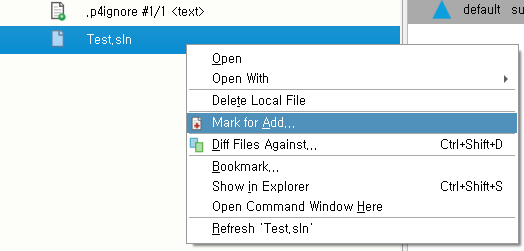
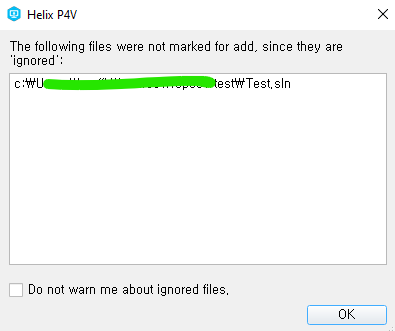
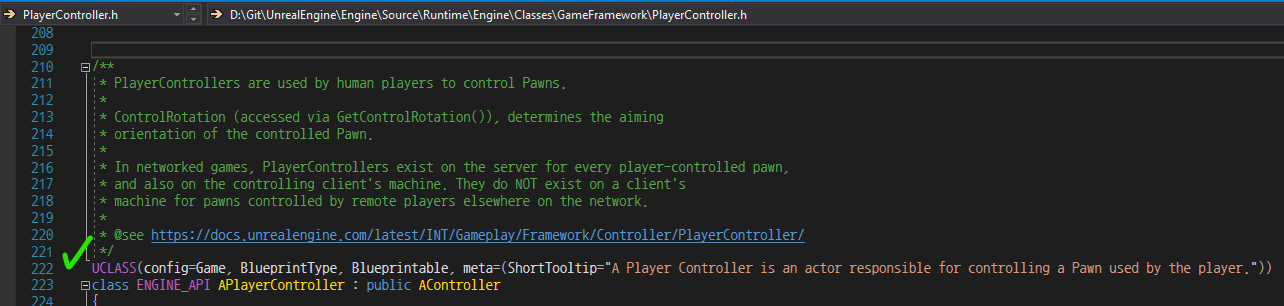
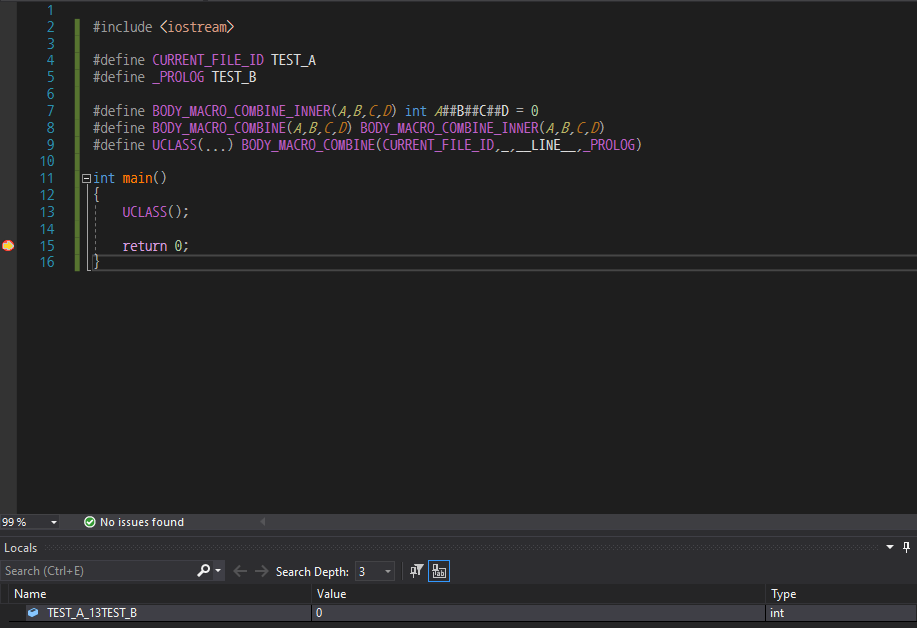
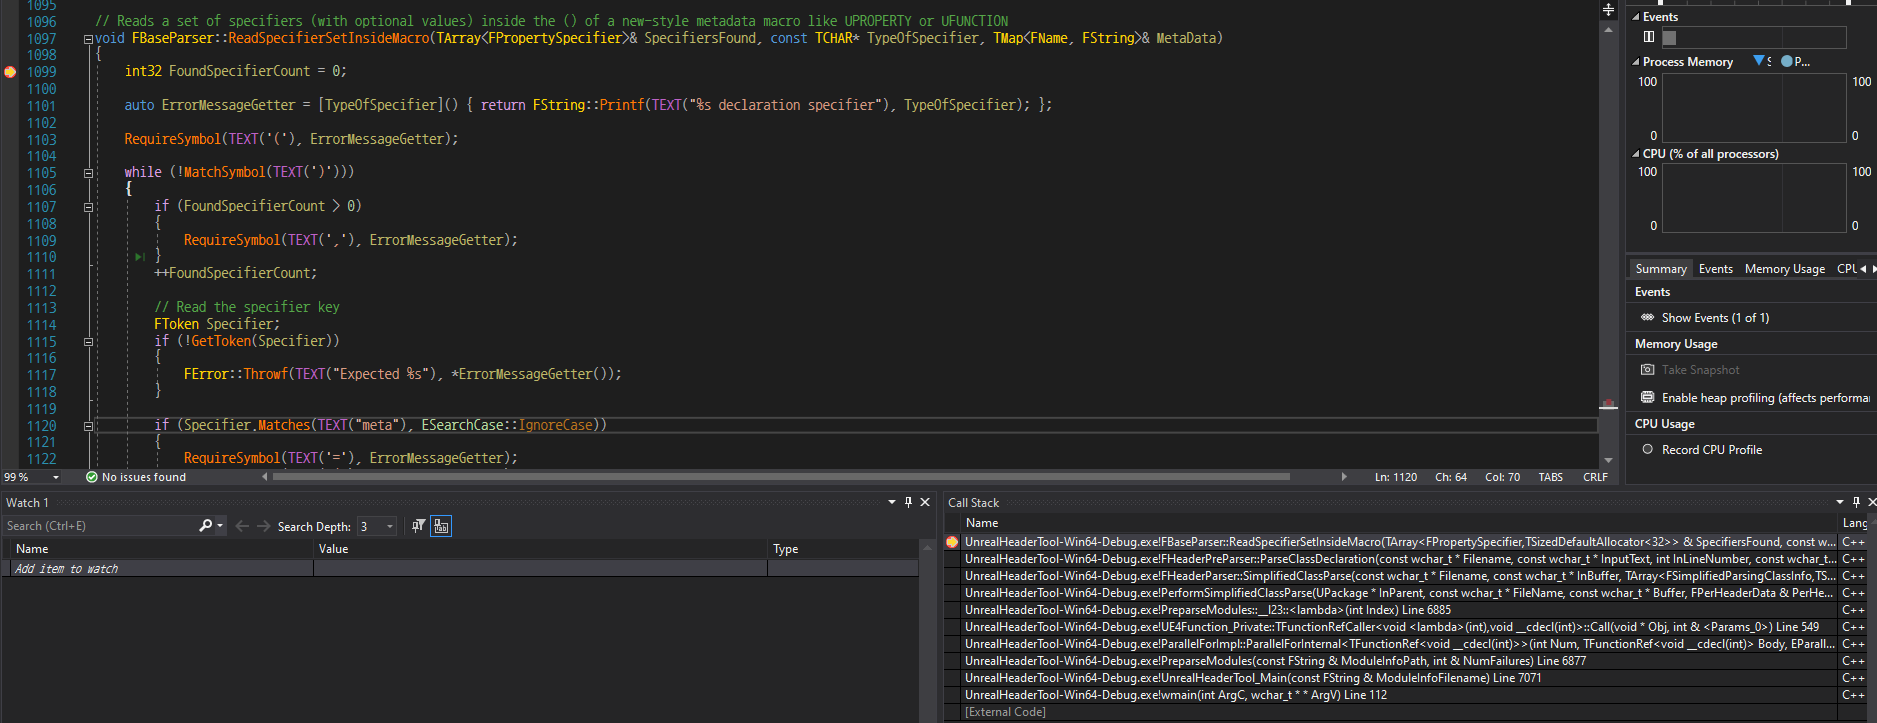
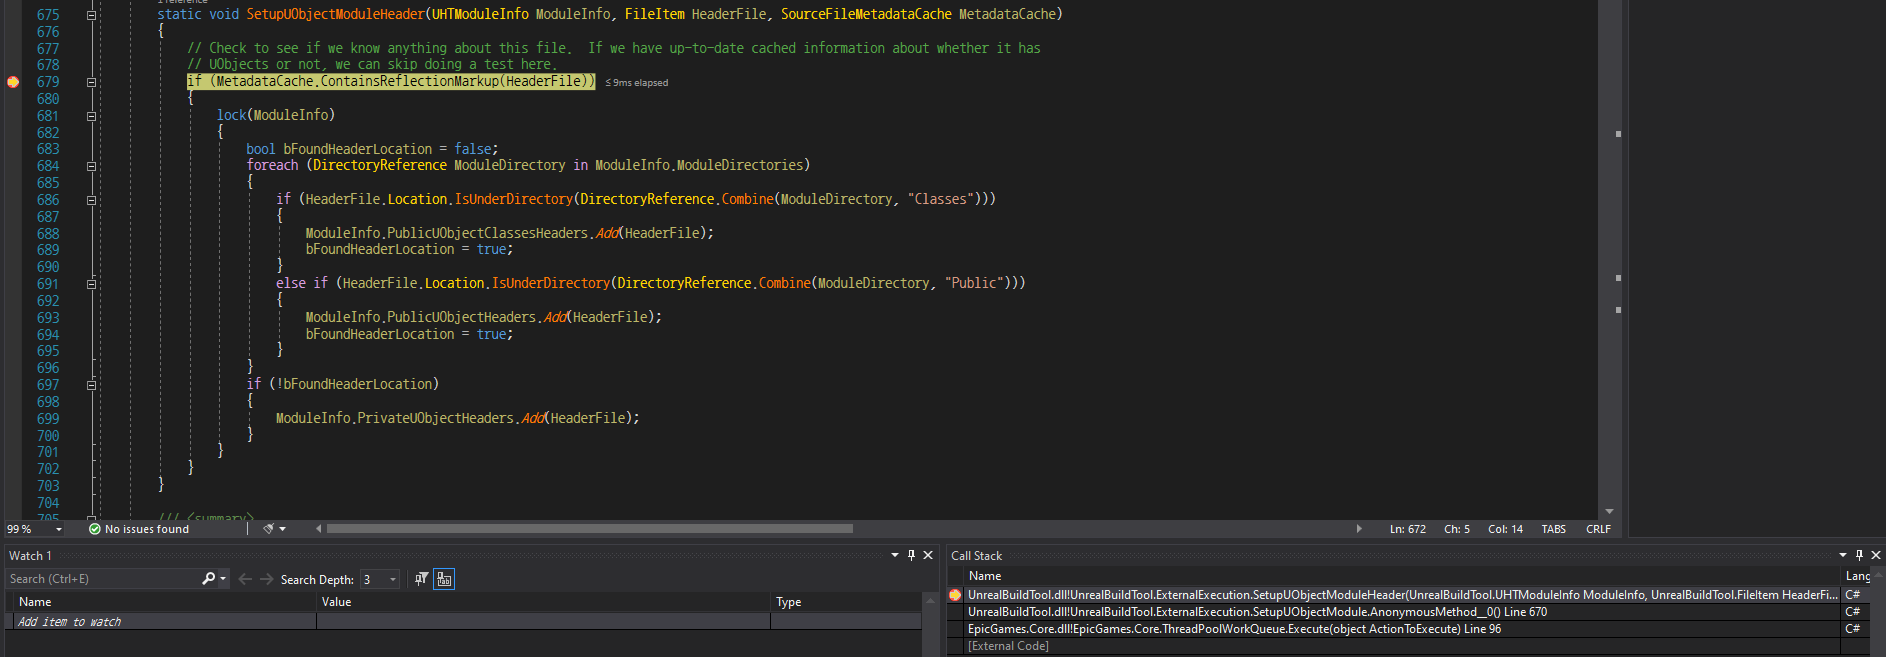
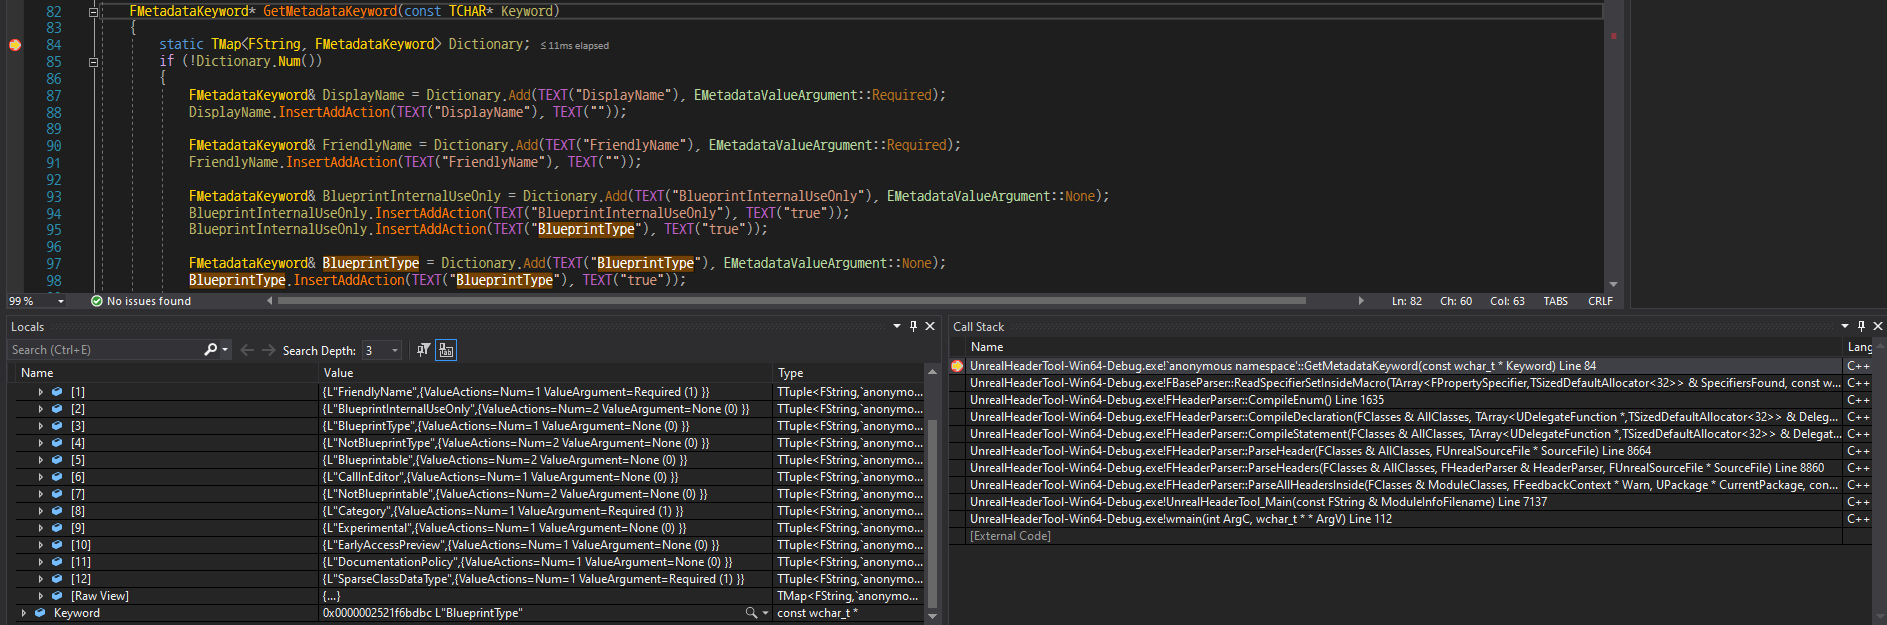
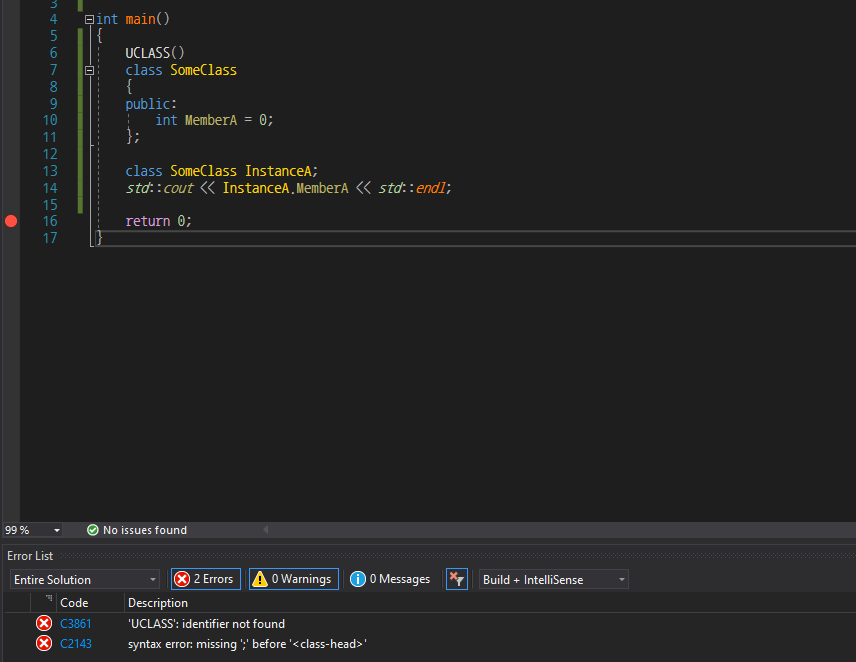
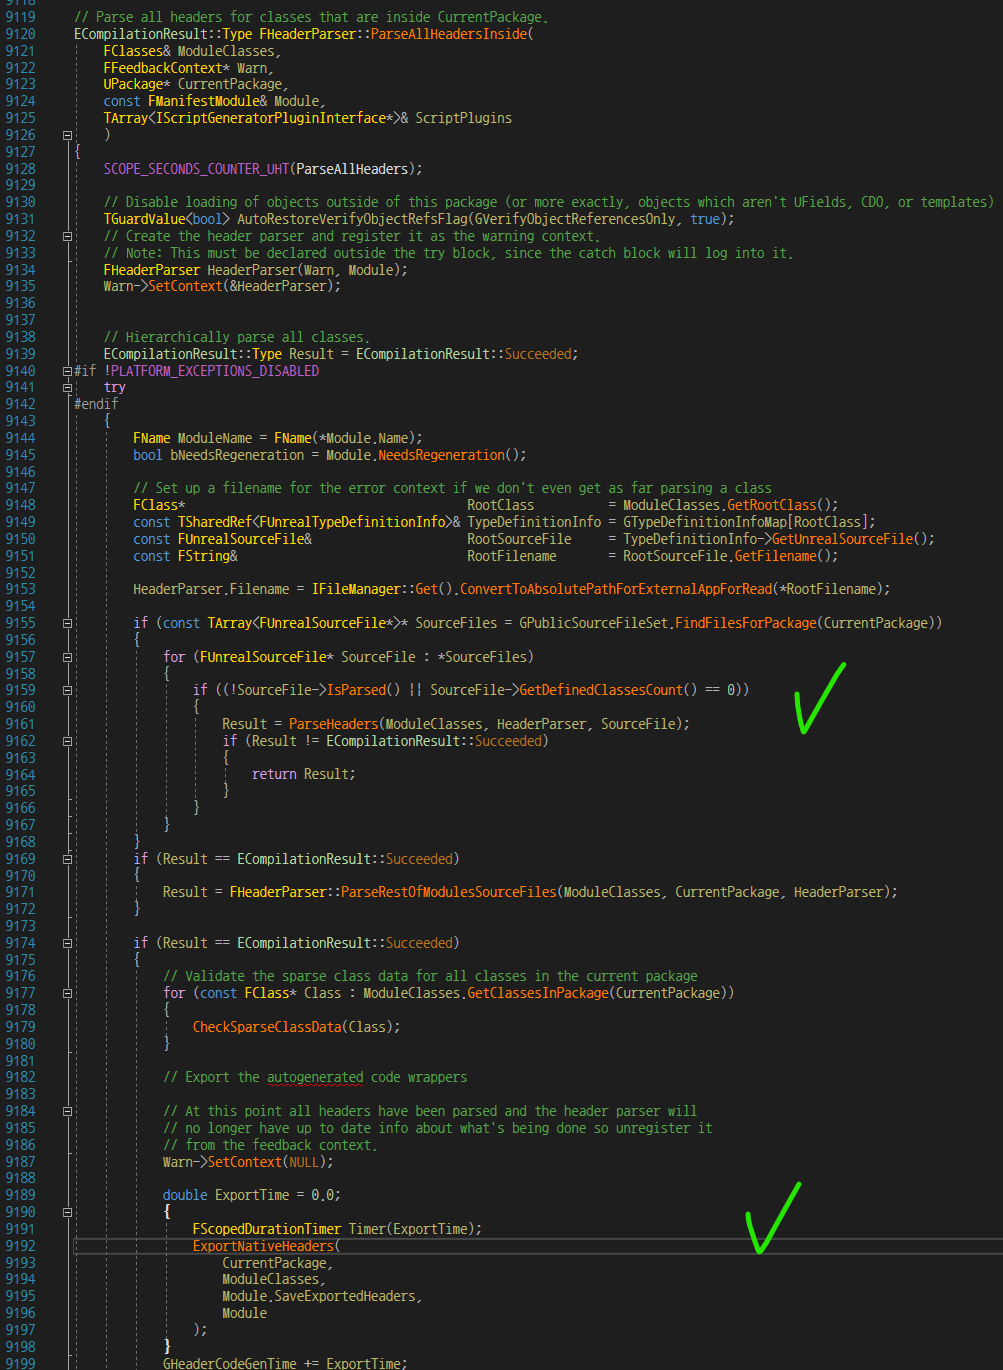
An example fits in first rule is the post about UnrealEngine macro generation. At that time, I was curious how UnrealEngine uses a macro for implementing its framework. Another one for second rule is the post about growth of std::vector
in cpp. At that time, I already knew there is difference between GCC and MSVC on growth size of std::vector
. But, I had also wanted to check where the difference comes from. Last one for third rule is the post about how to setup Perforce server. Starting a small game project, I had to setup Perforce server for my team. However, finding an easy and good manual for this was so hard that I decided to post the process of setup Perforce server. For myself and anyone.
Plus, almost every resource about UnrealEngine in Youtube or Google is targeting for the blueprint user, not the cpp user. So it was so hard to use a feature in cpp source code with the resources. Even they usually do not explain how the code works, just explain about how to use it. In this aspect, I am trying to explain the source code of engine for making it transparent. Furthermore, I am trying to put an example on every explanation. Because I have been tired of resources explained by only some words; Beginners cannot understand them, even follow the process without a precise description. Writing as simple as possible, demonstrating as many as possible, these policies would be maintained as long as possible.
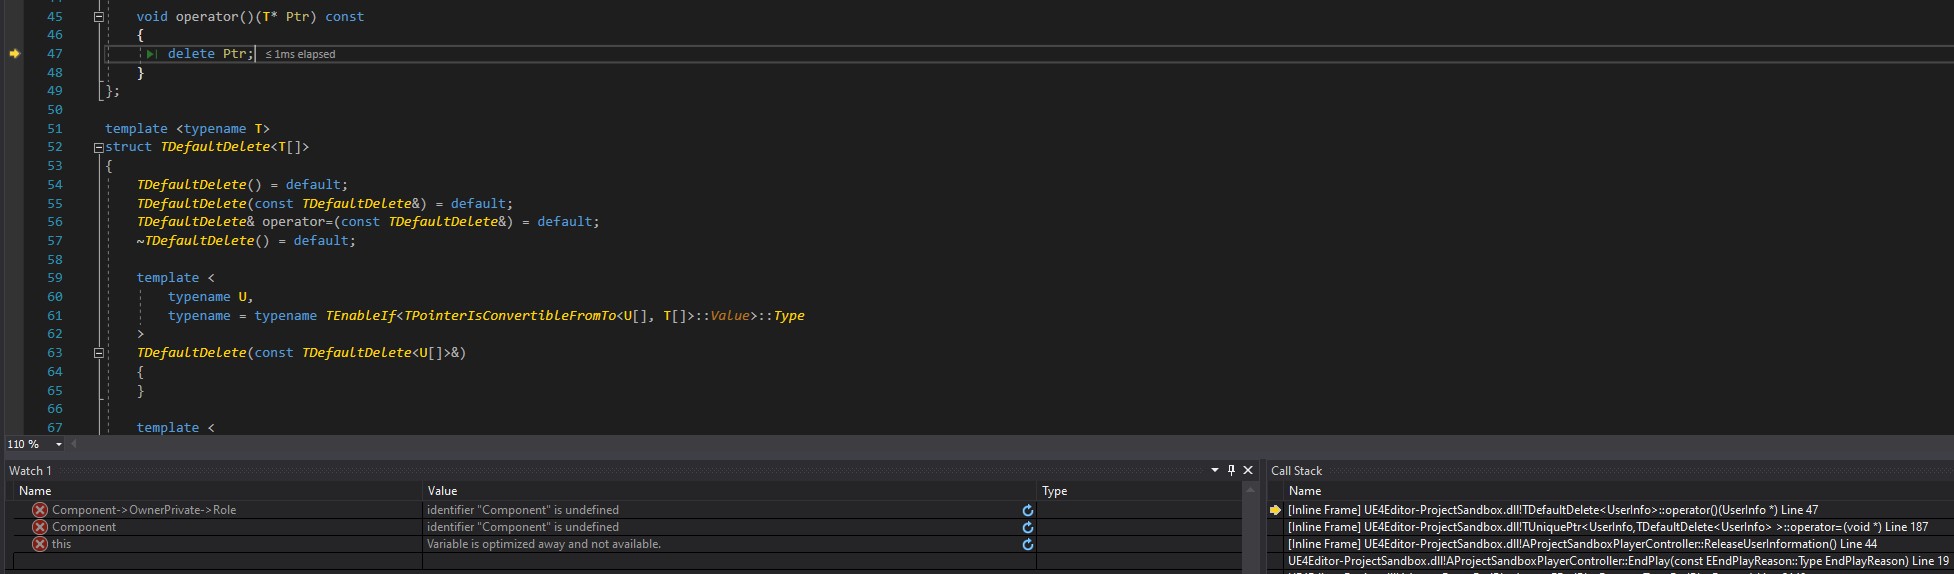
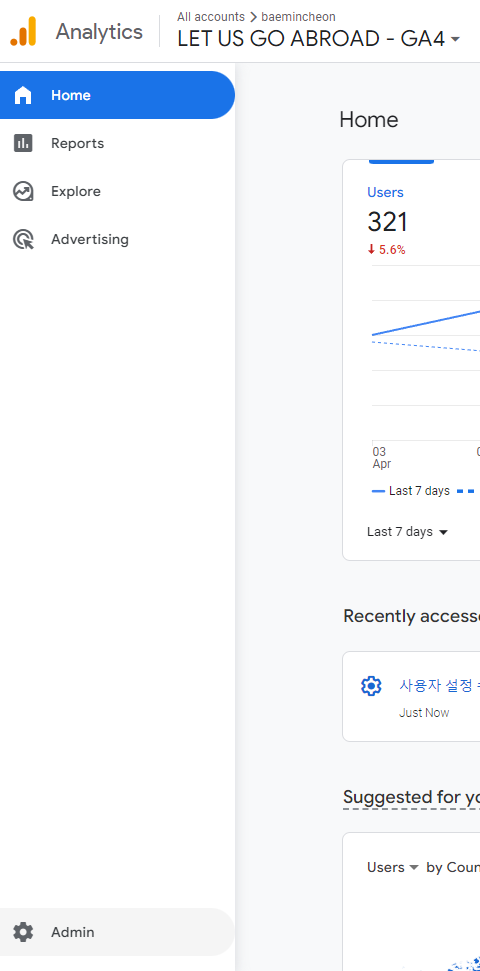
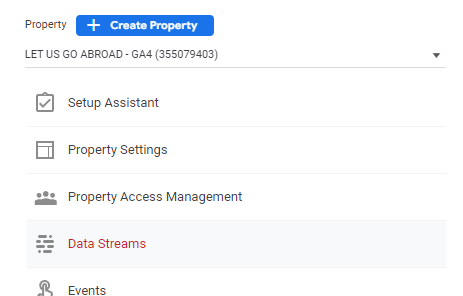
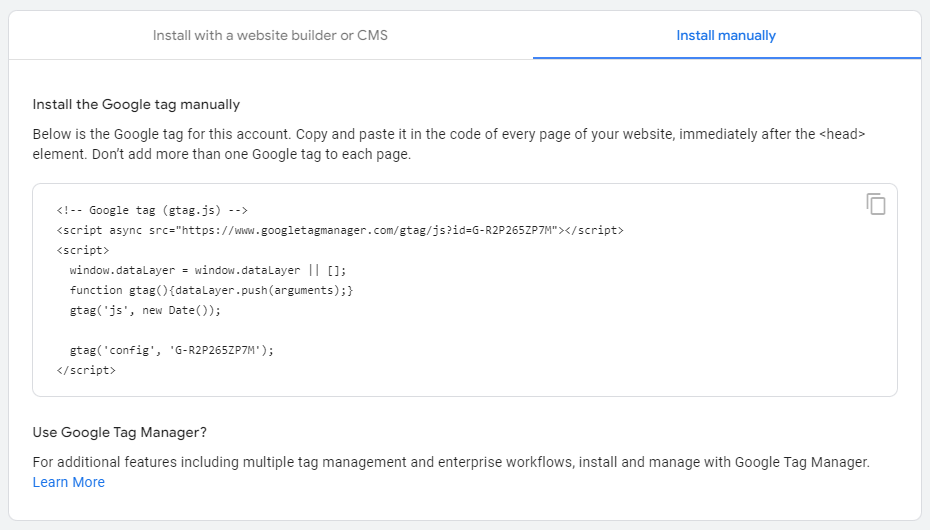
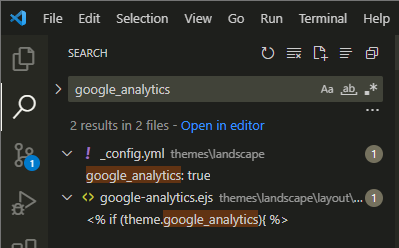
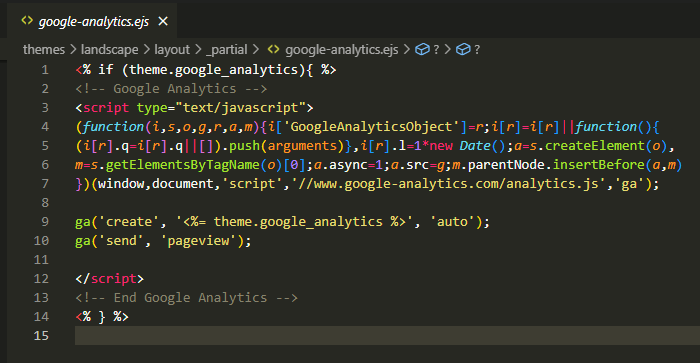
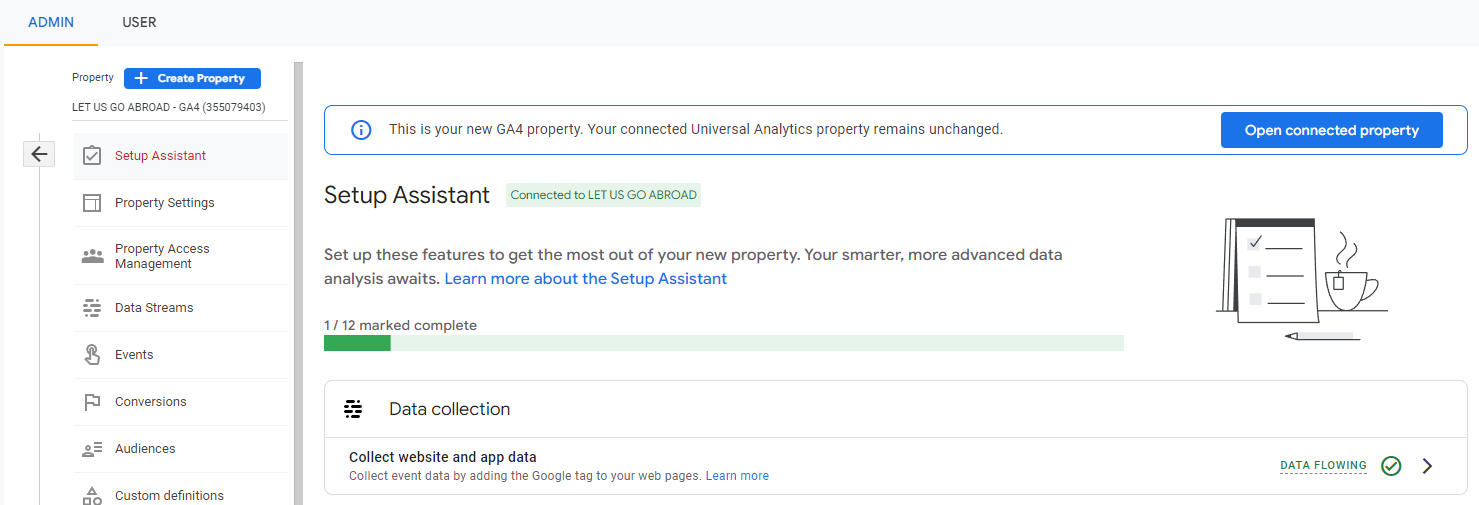
I collect data via Google Analytics plugged in this blog. Top 10 pages most visited (until now) are below:
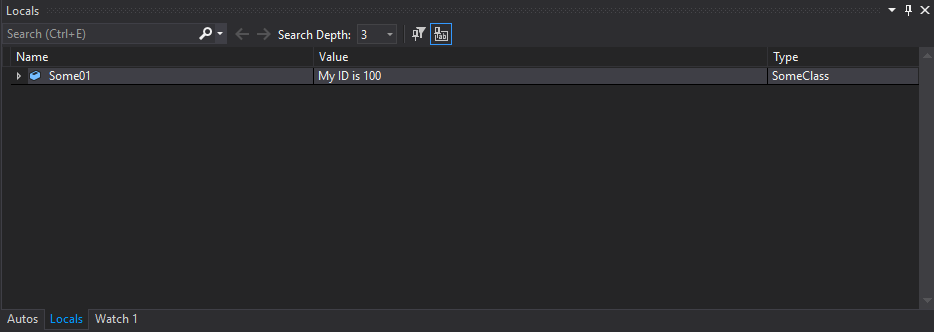
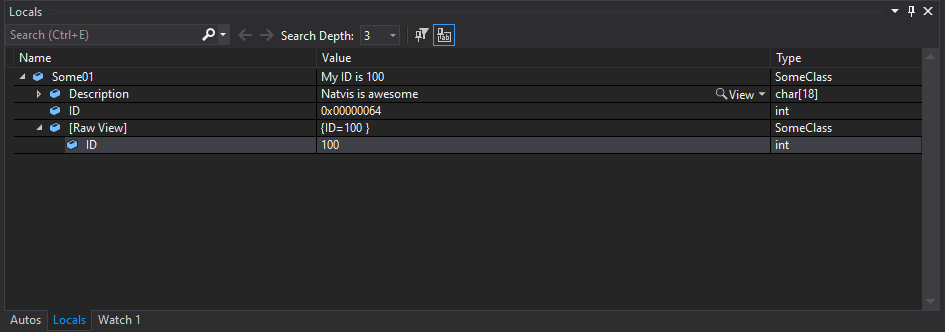
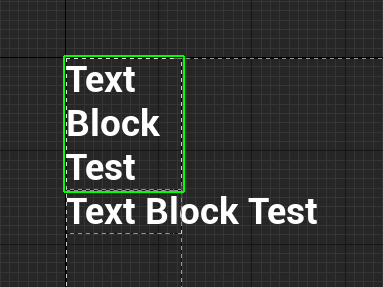
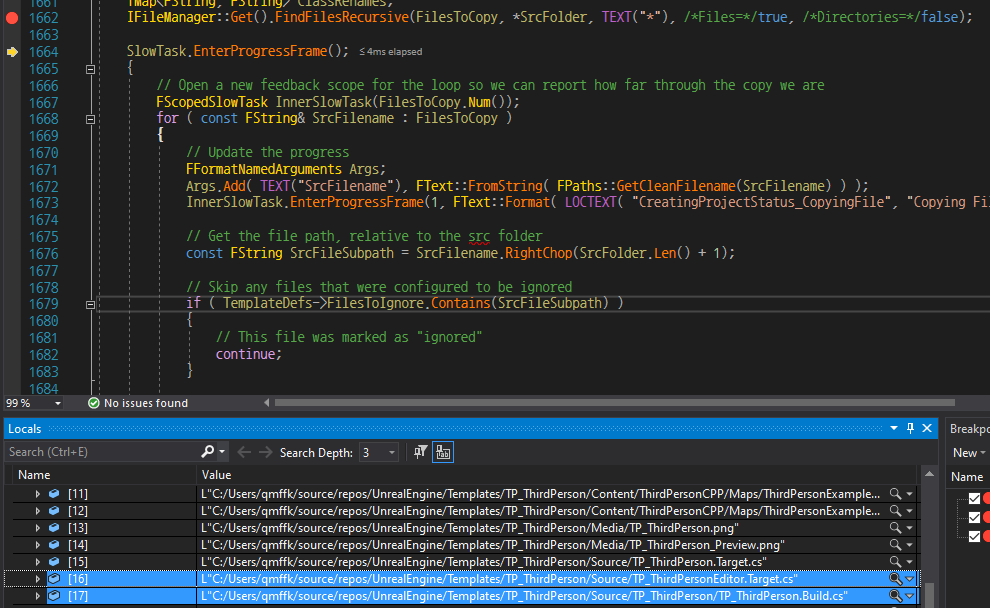
/2020/02/09/unreal-widget-coordinate-system/
/2021/04/07/difference-between-build-cs-and-target-cs/
/2020/10/25/unreal-input-system-via-gamepad/
/2020/03/14/unreal-unique-pointer/
/2019/08/06/what-is-unreal-build-target/
/2019/08/11/custom-unreal-engine-build/
/2019/08/16/differences-of-unreal-build-targets/
/2020/01/28/unreal-blueprint-practical-use/
/2021/03/01/unreal-engine-natvis/
/2020/01/17/unreal-fname-anatomy/
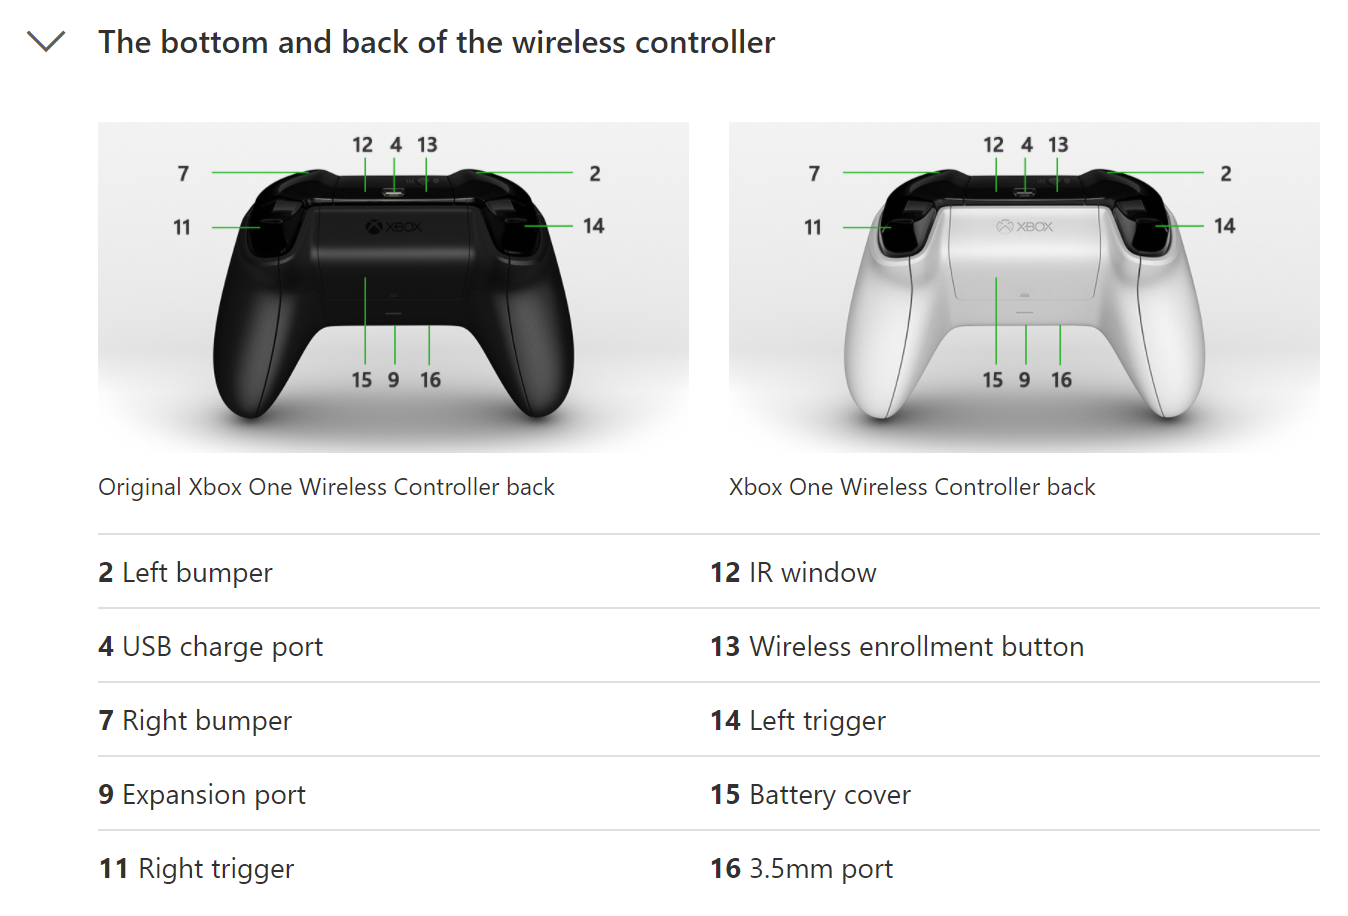
It seems that a post about widget, input, or build is more popular than others. For helping UnrealEngine newbies, I would better consider writing a post about those topics in next year. Looking back my experiences on studying UnrealEngine, I was also struggling for those topics.
Career with UnrealEngine
On working at PUBG Studio for 2 years, I have learned many things. (Even though some of them are not my part) Managing infra structure for large scale project, working remote in efficient way, developing and testing on console platforms, and so on. But most of all, various experiences of developing with UnrealEngine. Thanks to talented coworkersโ help, I could have done my tasks.
Reading and understanding the engine code is essential to development of industry level, but my skill was not sufficient to do that. So, in first year, I was busy to learn about topics mentioned in conversations. It was enough to take up my time. Repeated working at office and studying at home. After that, in second year, I became to understand most of what coworkers said. I started to read more engine code deeper and deeper. It is the time when I could say that โI know UnrealEngineโฆa bit ?โ. Now, entering third year, I have plenty of skills enough to advice coworkers. Especially, many of coworkers ask me as I have experiences of console platforms. (But I still think I should learn more about console platforms)
I have done main tasks such as optimizing contents, fixing bugs and crashes, and making development environment better. Most of all, I want to say about only the first thing. Optimizing contents was the most challenging task. You may know the common sense in program optimization;
When you increase a speed, an available memory would be decreased. On the other hand, when you increase an available memory, a speed would be decreased.
Due to the structure of memory in computer, loading data from auxiliary storage is quite expensive operation. (In comparison to main storage) Anyone who wants the program to run faster would sacrifice the memory of program for loading data as much as possible. Particularly, among the programs, the size of data in game is bigger than others. That is why games try to load data before it is needed. Because any gamer does not want to see the freezed screen whenever picking up an item.
Rightโฆin this condition, optimizing contents should not be easy one. What more worse is, new contents come in the game every update. In other words, an available memory could be decreased as the total size of data increased. So, it is hard to maintain a speed of program without sacrificing an available memory. Even more and more users are using the SSD thesedays, we have to support the old-gen consoles such as XboxOne and Playstation4, which are the devices uses HDD in default.
Additionally, loading data asynchronously is not always a best solution. Because, eventually it also consumes the resource of computer, and results a hitch or freeze. Yeap, so we struggled to manage an available memory of our game almost every update. Mainly, we have rarely chosen to skip some data loaded before entering ingame, instead we have chosen to optimize assets or codes to reduce its size so that the total size of data get reduced. Profiling our game and finding assets or codes taking up significant times, and analyzing what the assets or codes are wrong, and optimizing themโฆwith magical spell. (I mean, the way how to optimize contents varies every time so it is like MAGIC, which is not easy to explain)
What I want to do in future would be developing games with newest features of UnrealEngine. But it would be hard without engine migration as we are using 4.16 version of UnrealEngine. Additionally, it is also hard to use the most fascinating features; Nanite and Lumen, as we are supporting old-gen consoles. Maybe I keep going my tasks as before, but at least, gonna to learn the newest features of UnrealEngine. Maybe, sometime I can use them. Or, I would post with contents of them. ;)
Move to new house
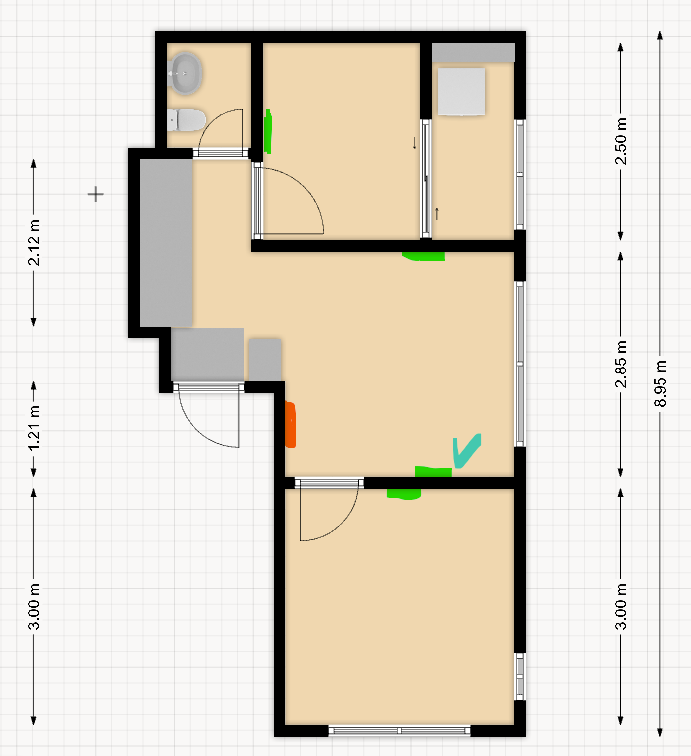
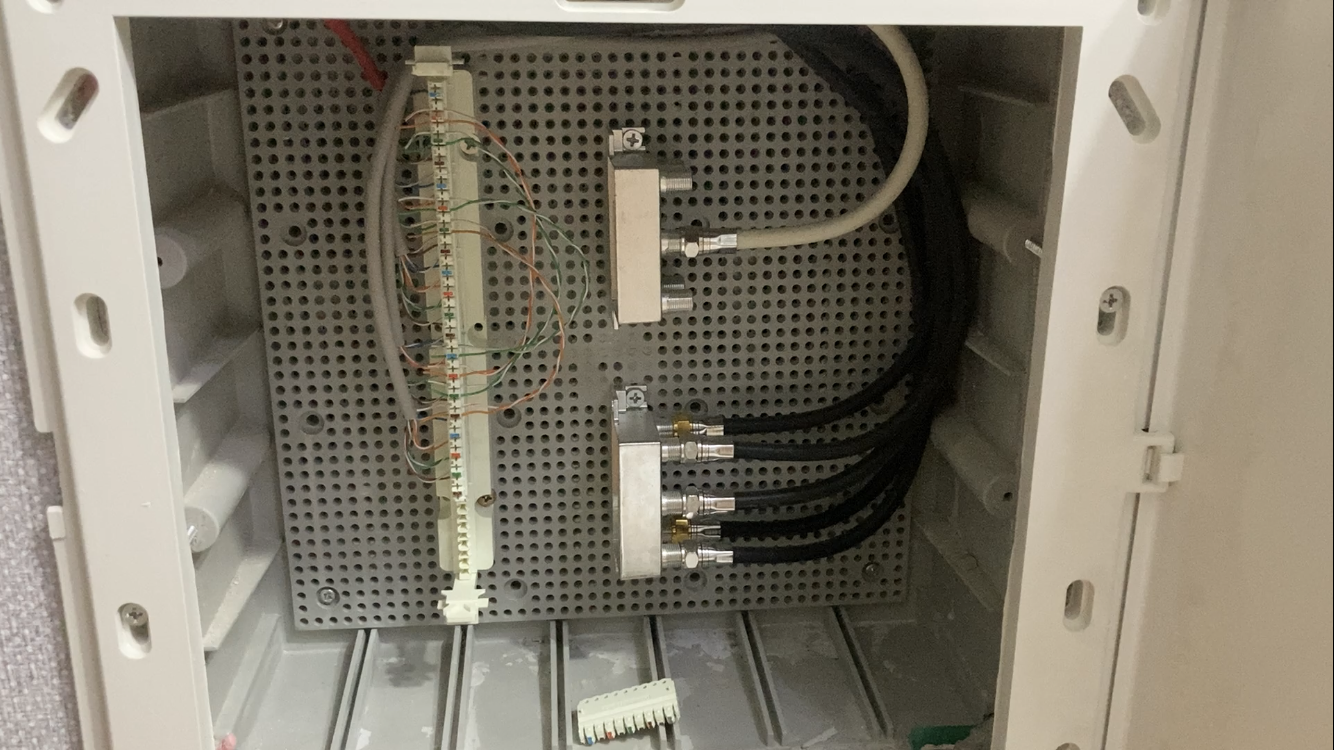
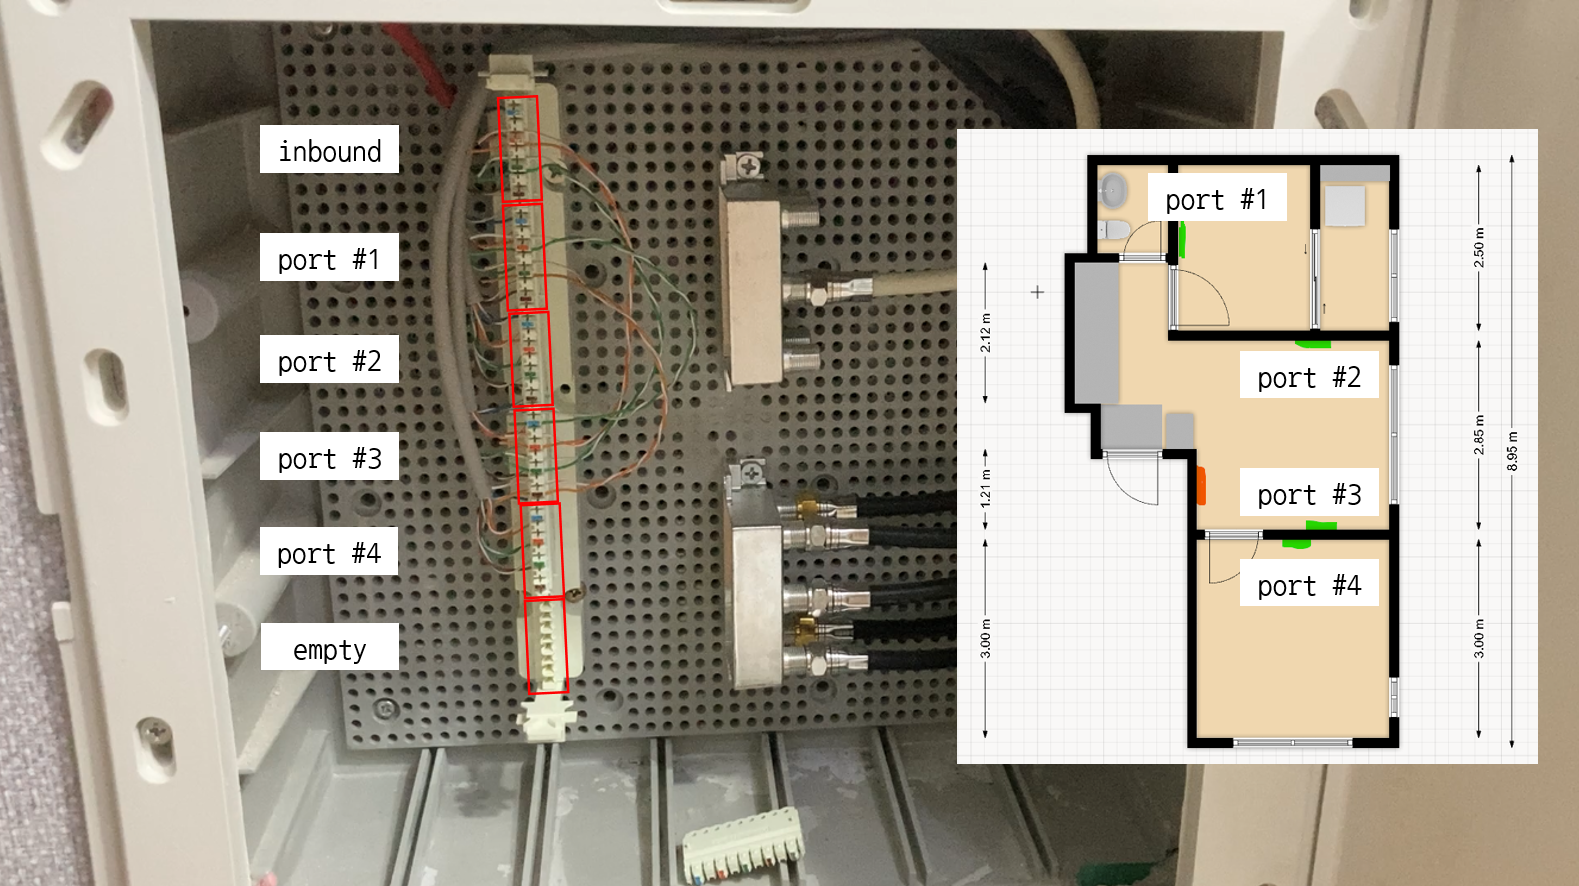
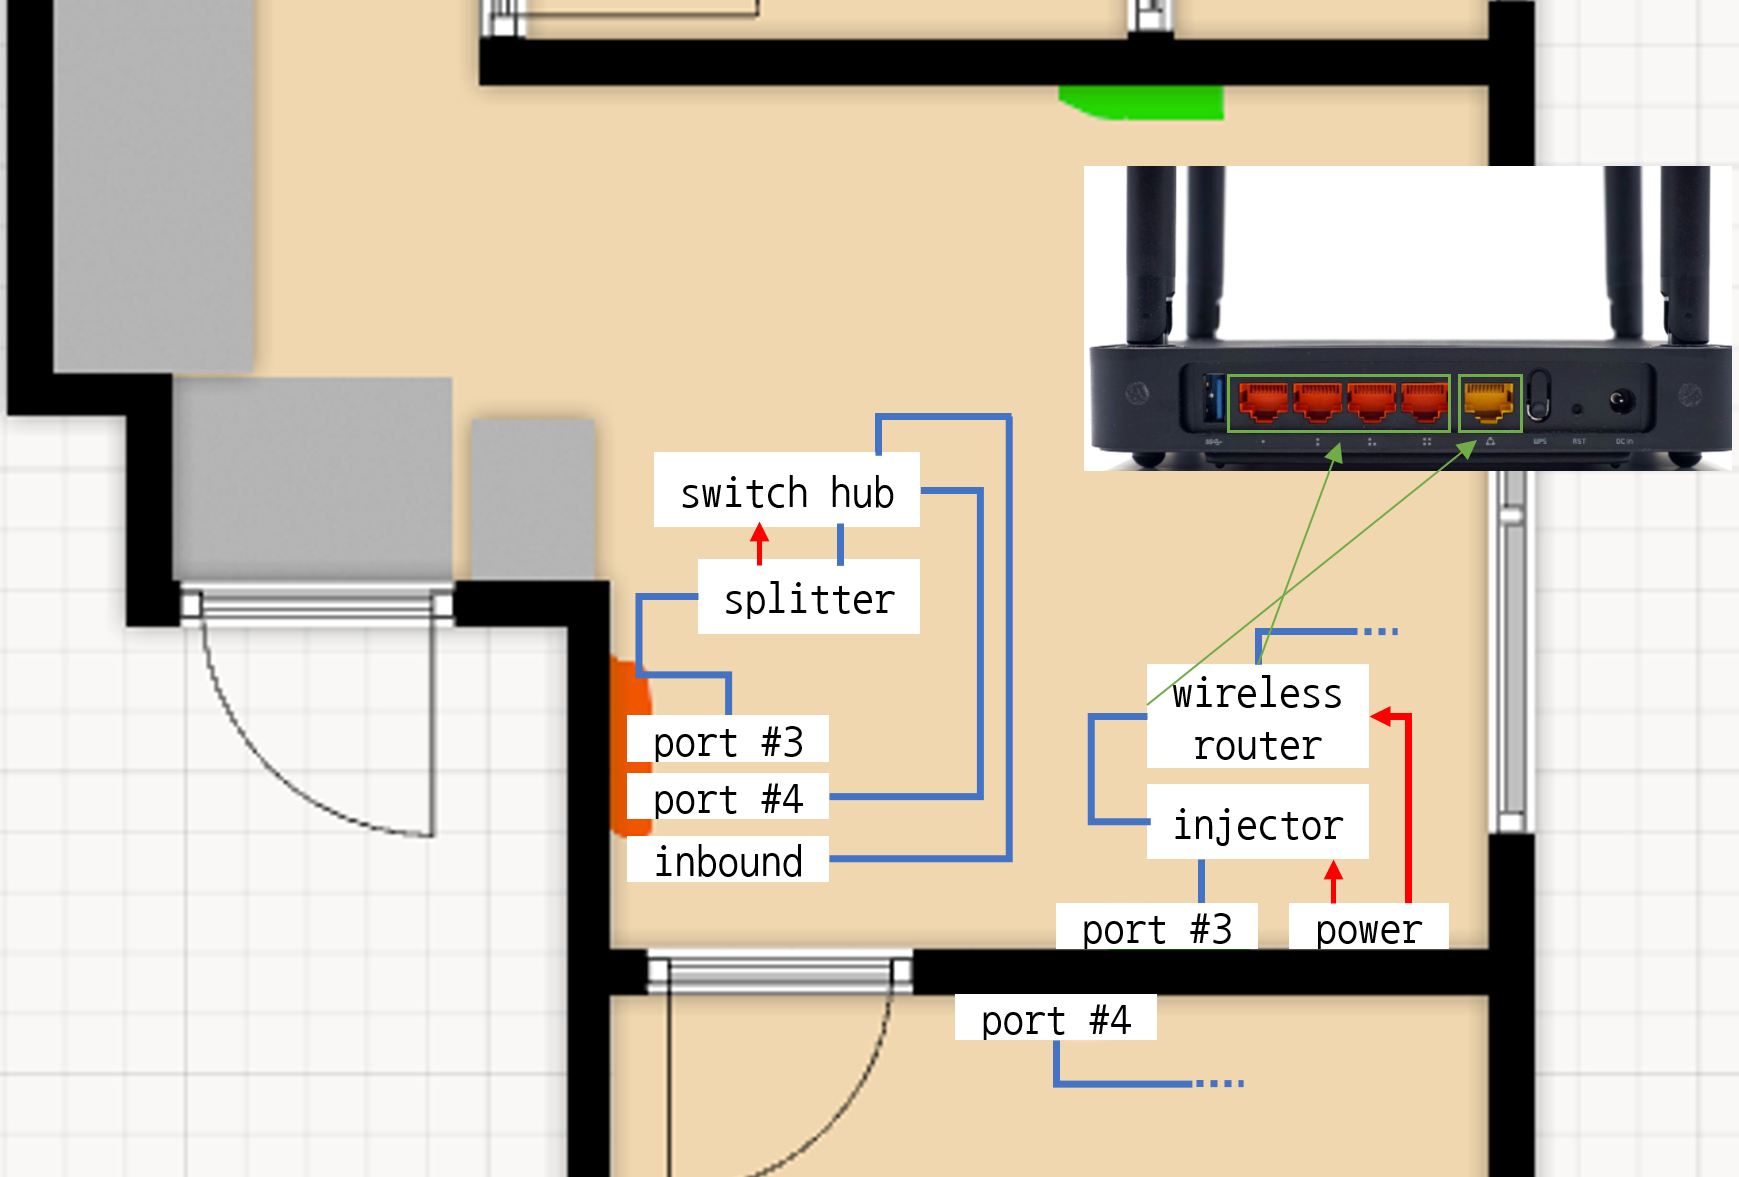
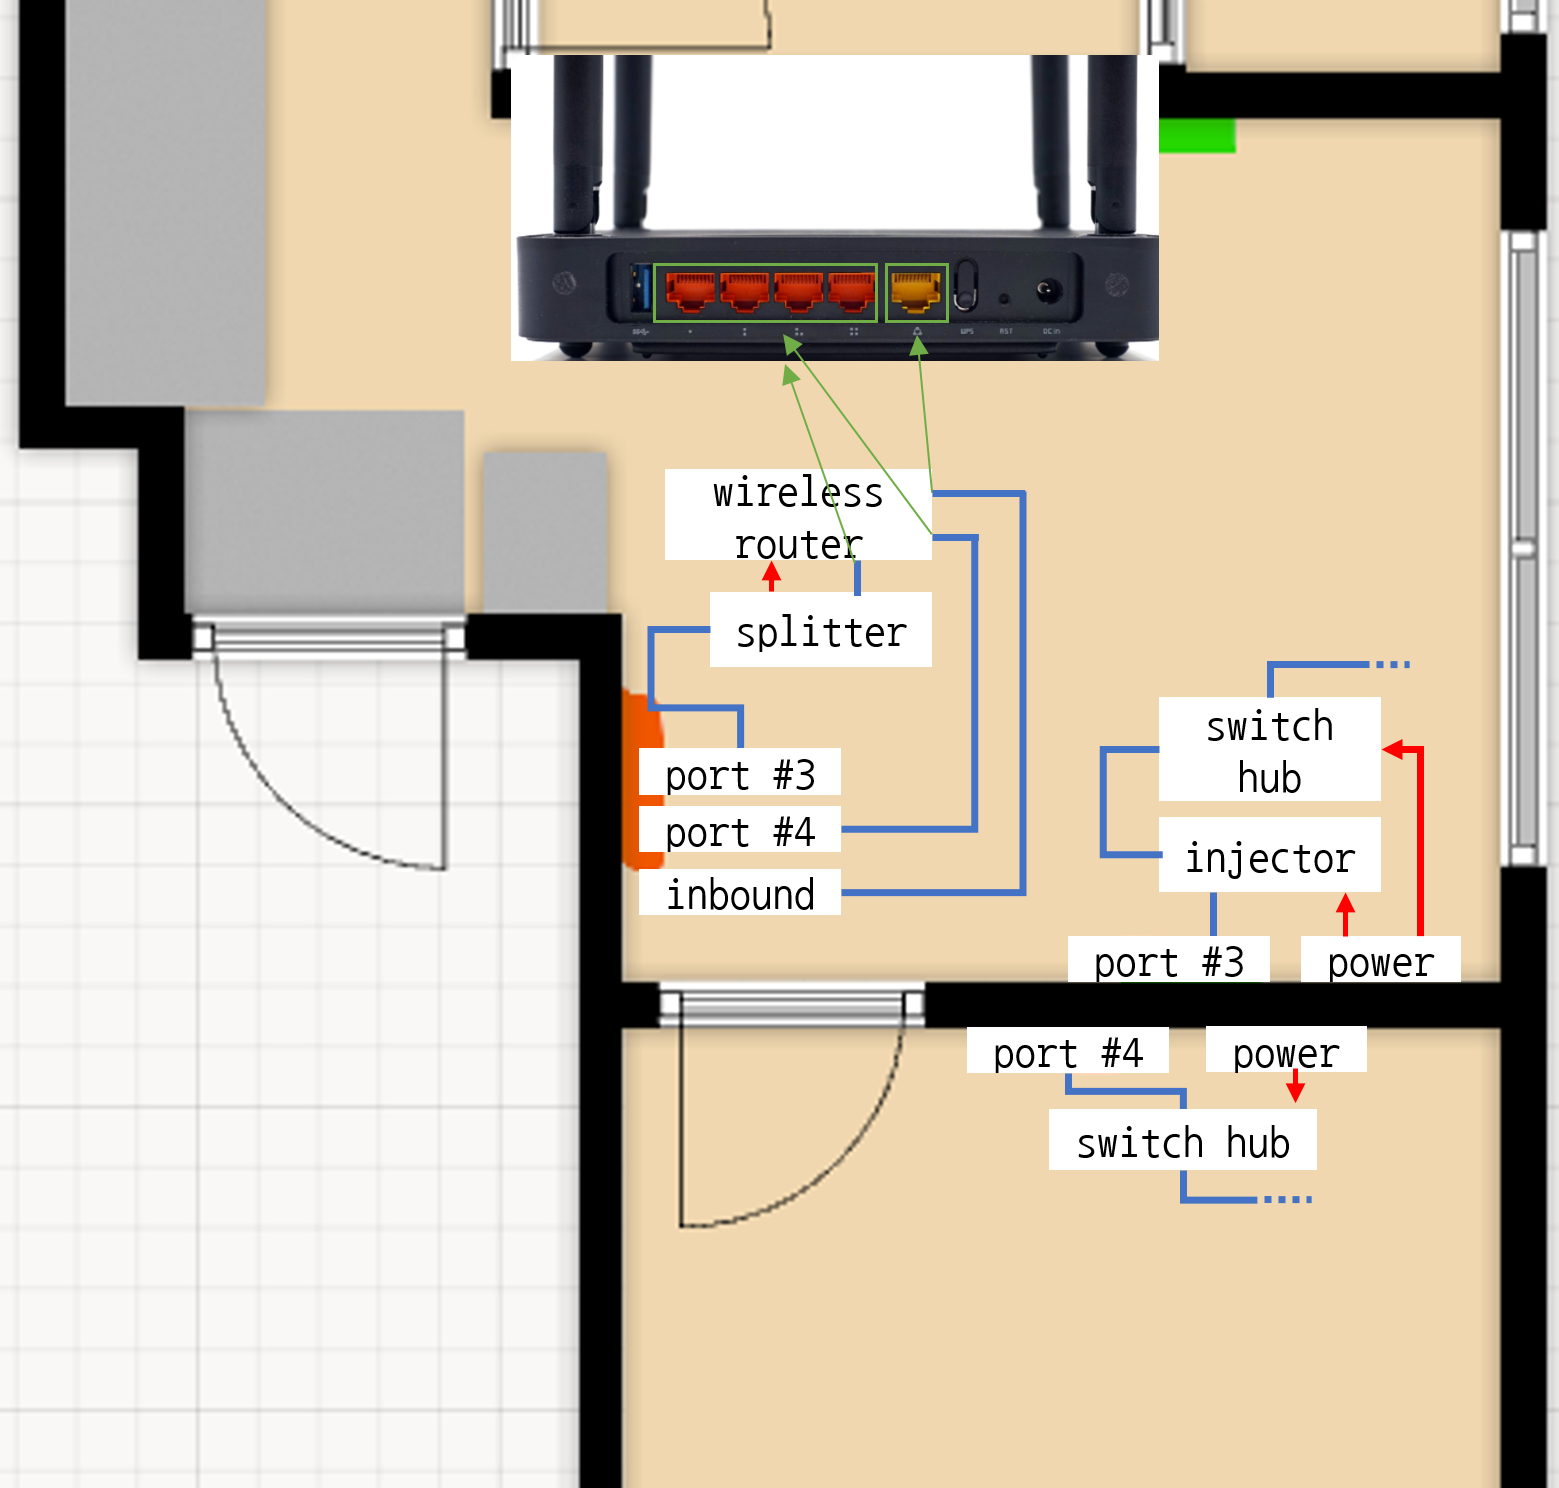
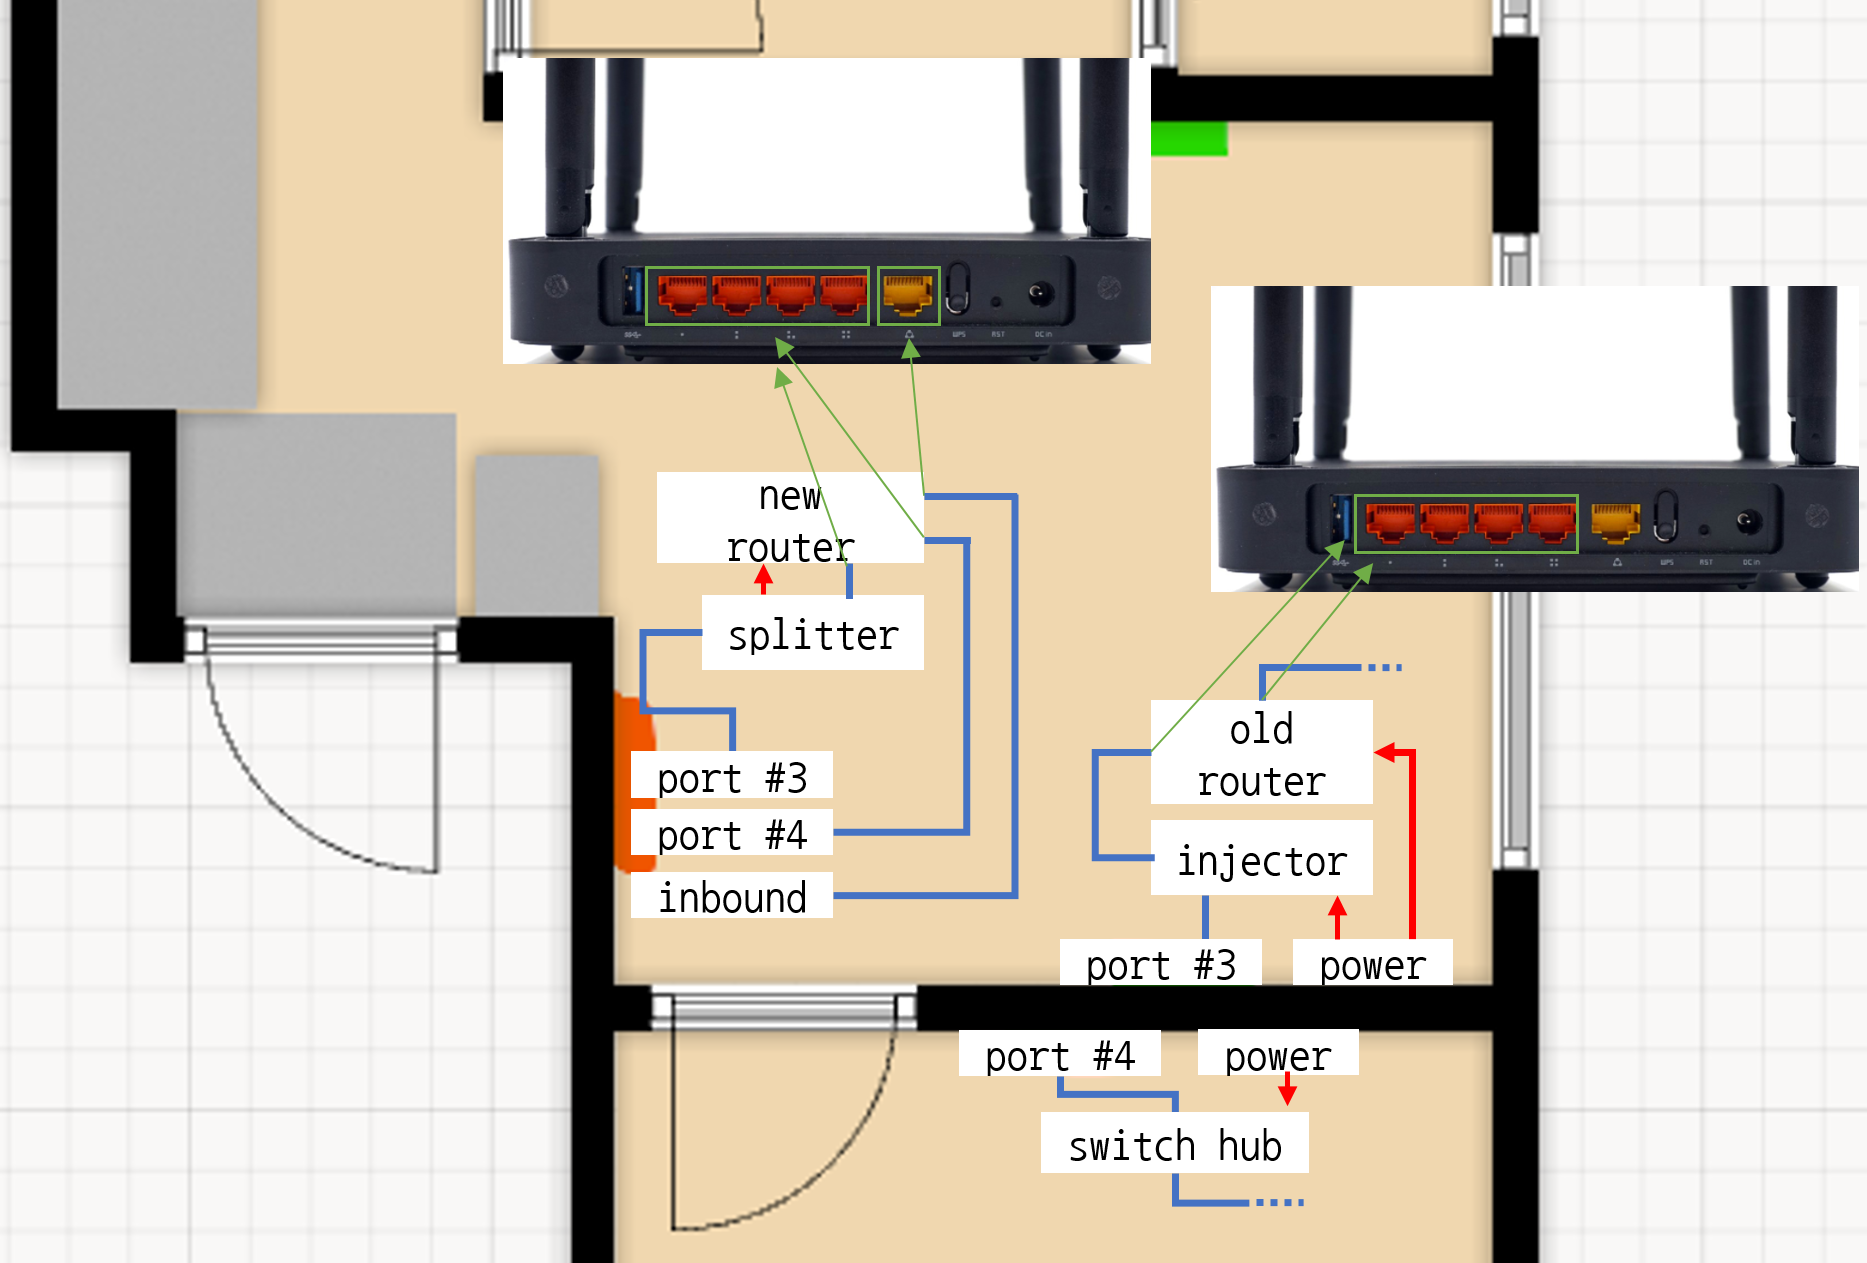
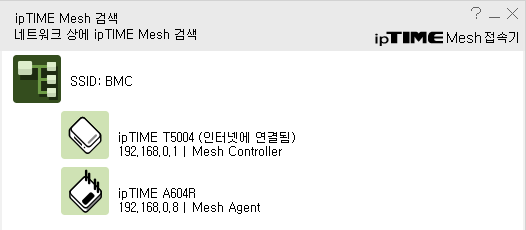
In the middle of 2021, I had moved to new house as mentioned at this post. New house is bigger than old house, and I had to buy some furnitures. (Basic furnitures such as bed, purifier, and so on are provided in old house) Therefore, I had searched several items including closet, purifier, bed, desk, and so on. Especially, I had a difficulty for buying devices related to home network. Because I never had a need to buy these tools or devices. Even when I was in Army as Signal Corps, those things were supplies. (I did not choose what to buy)
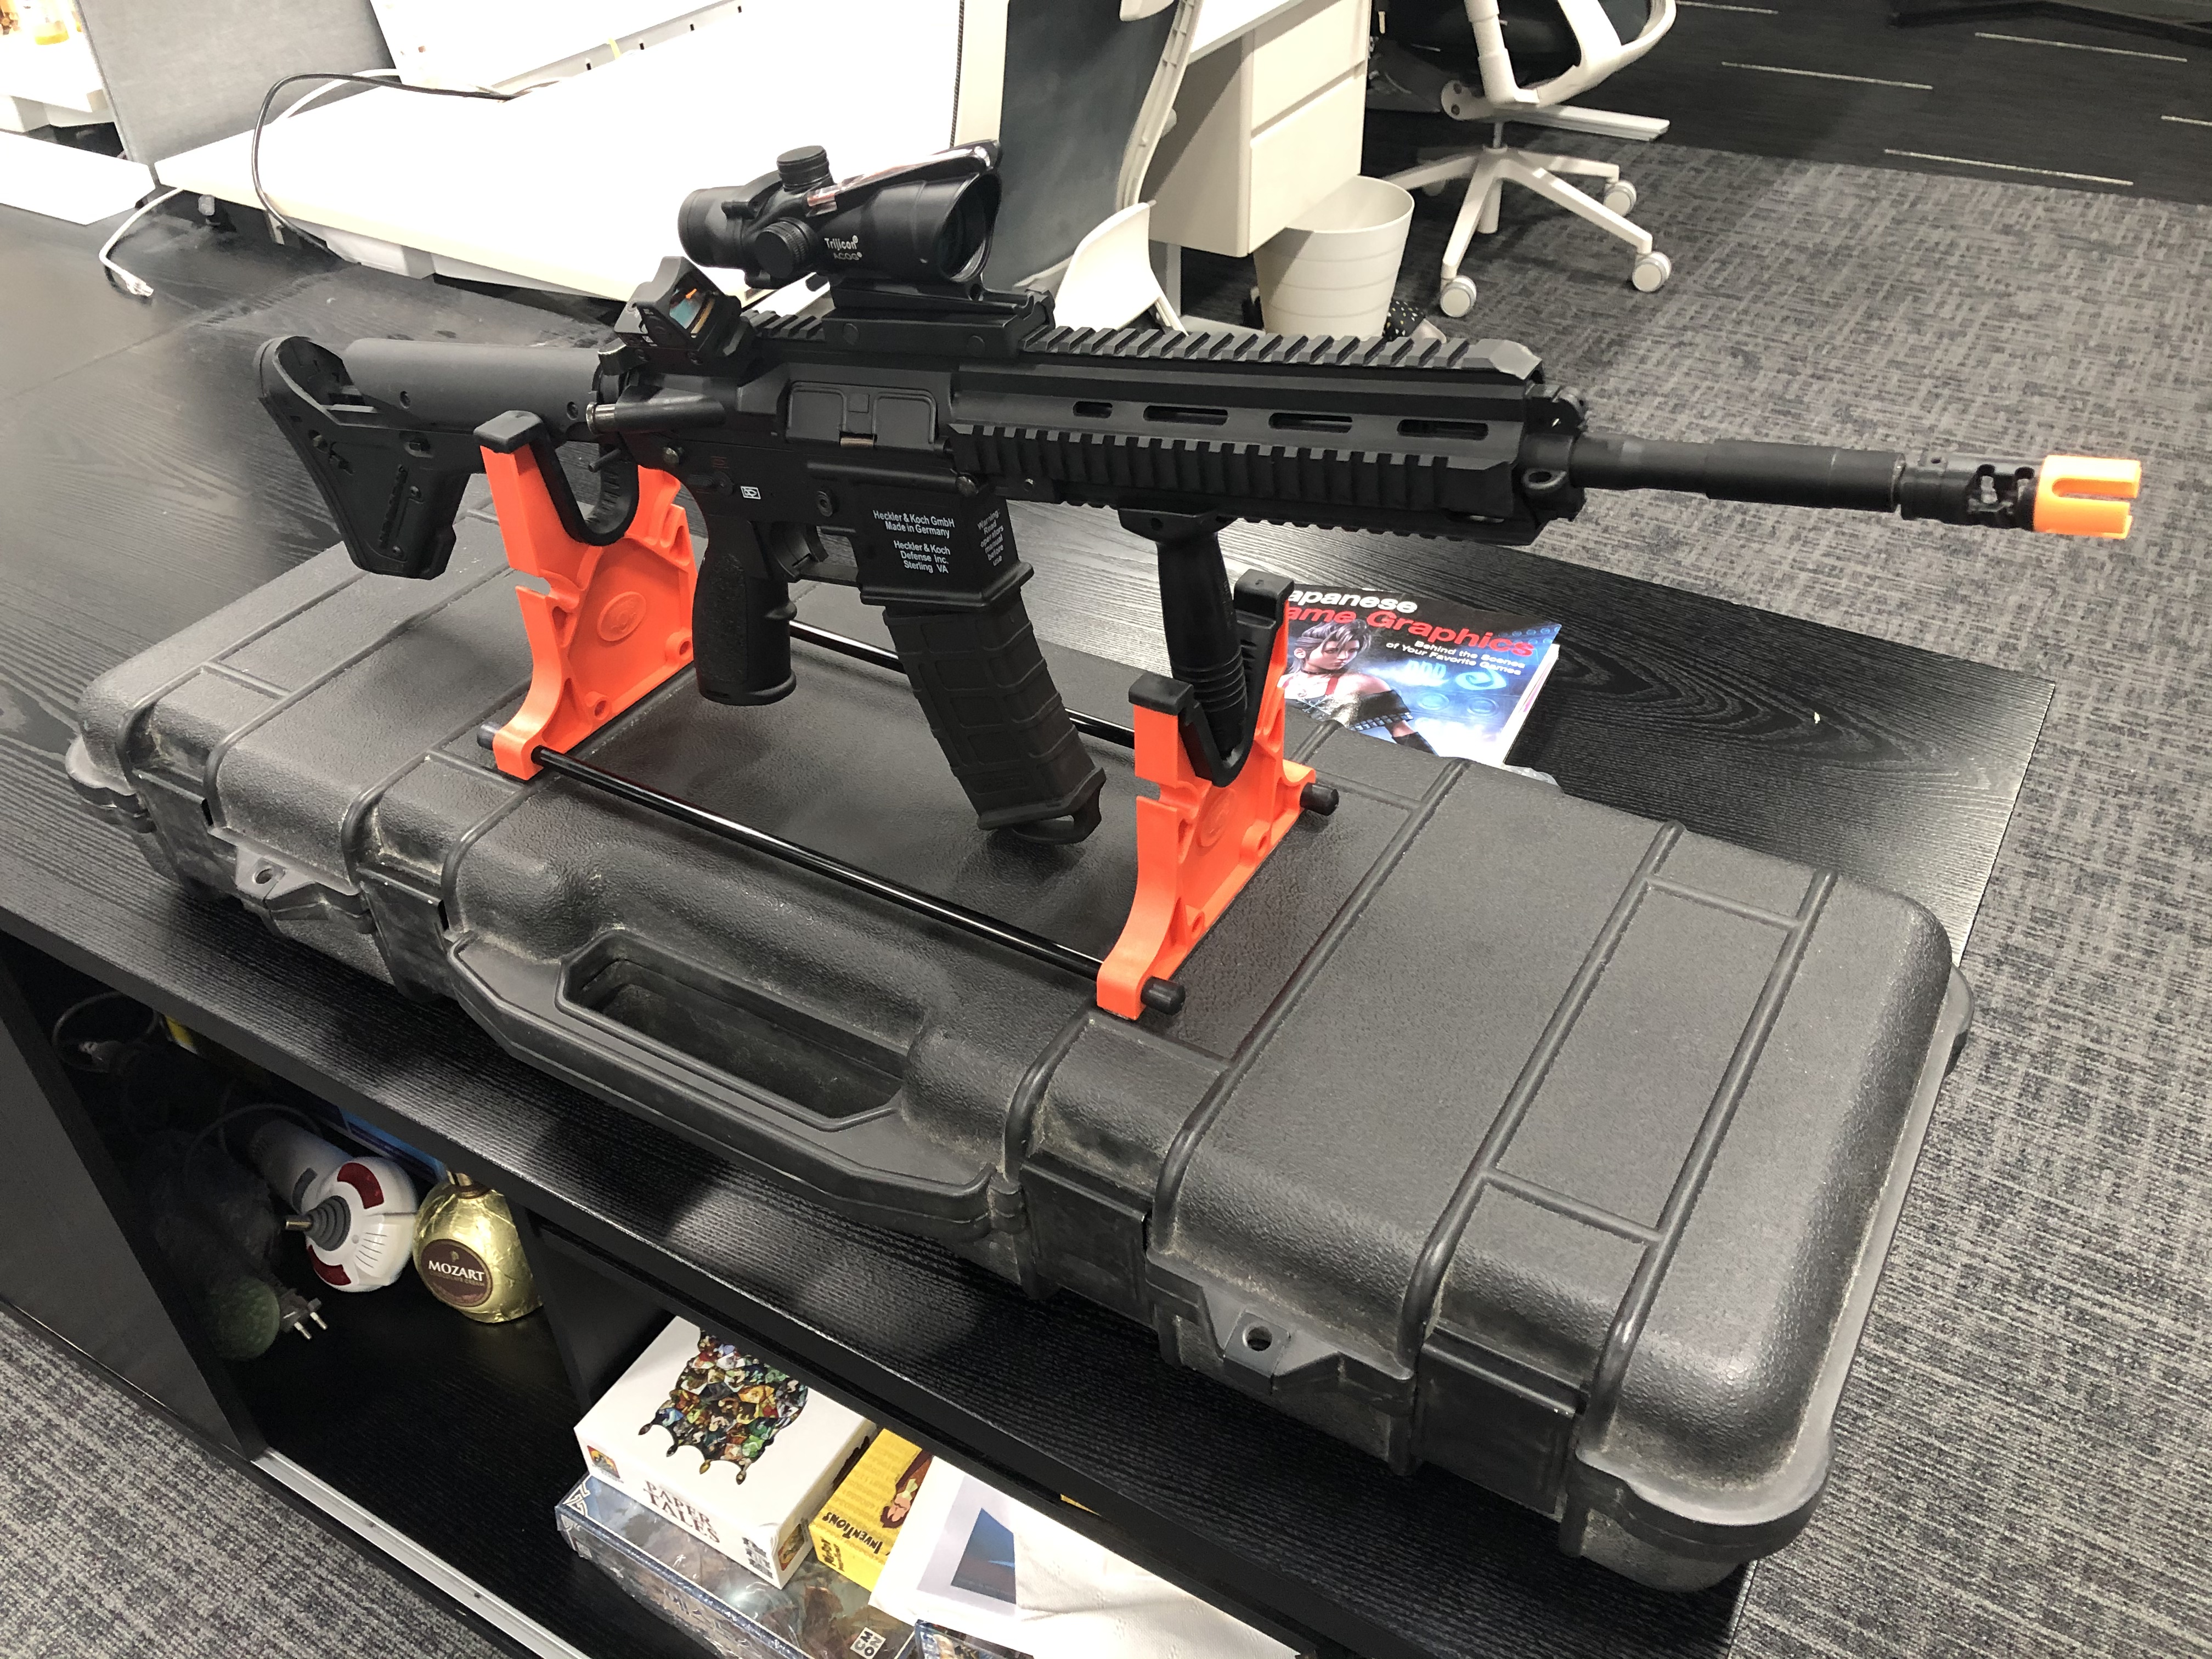
Now I have a living room. Trying to put a sofa, table, or something fits in living room, I decided to buy UHD TV. No, not only UHD resolutionโฆalso 120Hz framerate should be great. That is a maximum range of next-gen consoleโs signal output. Yeap, I bought a next-gen console, too. Xbox Series X (XSX). Finally it looks like below:
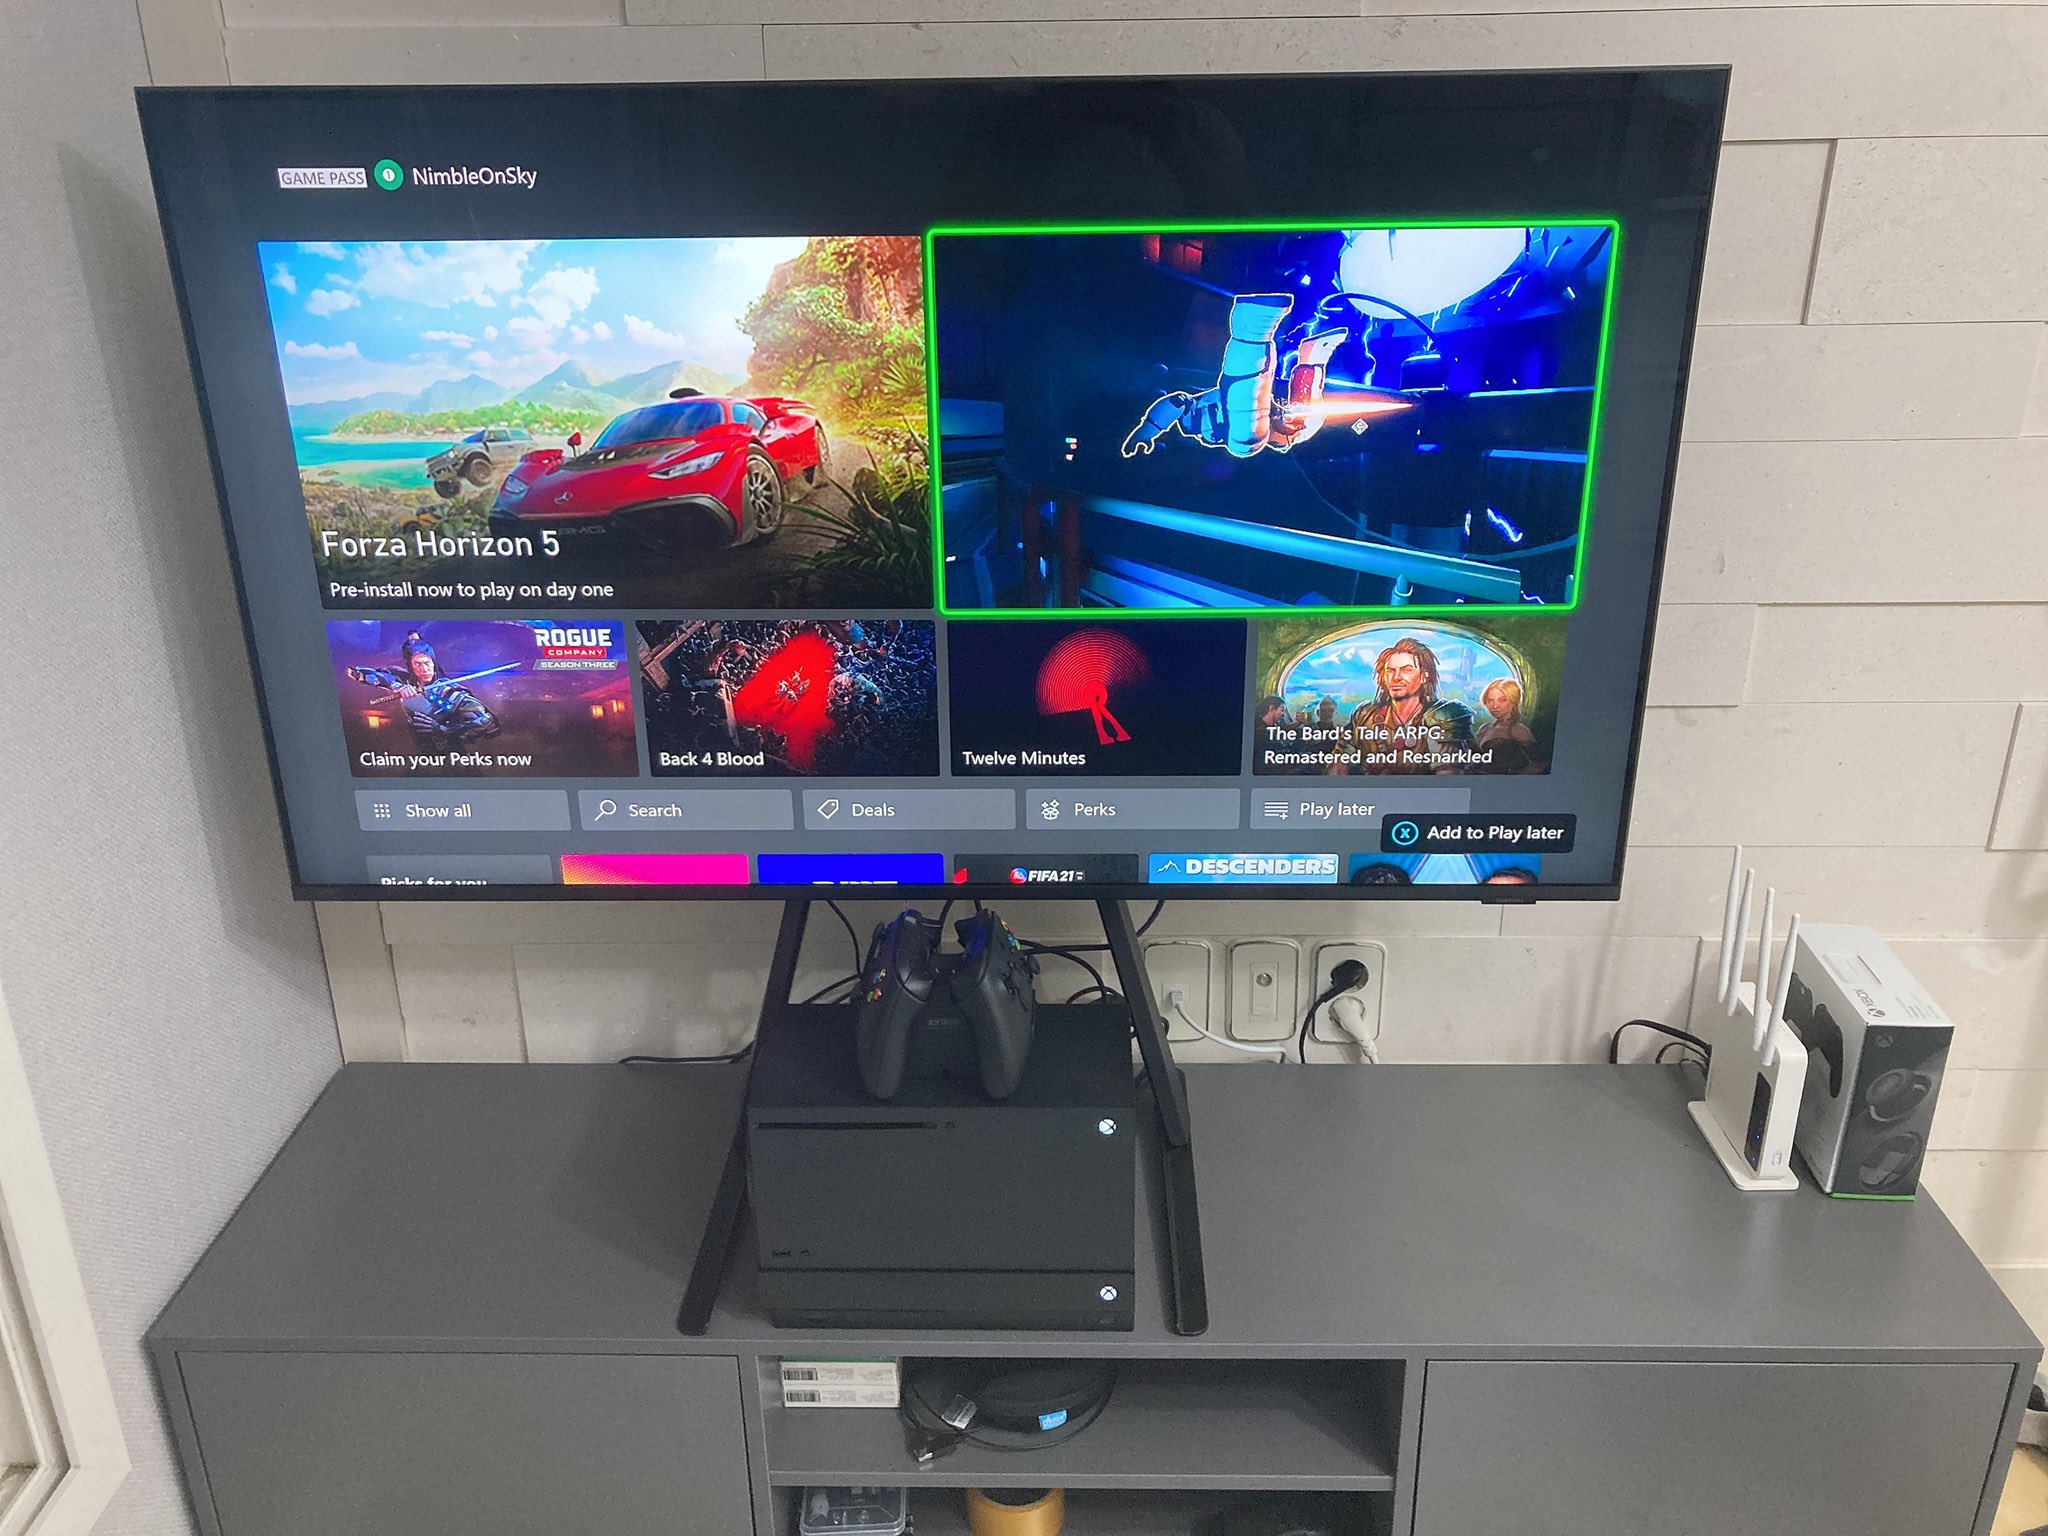
The TV is the product of SAMSUNG, 50QN90A. It supports resolution and framerate upto UHD/120Hz, and has 50 inches display. I am satisfied with this product in overall aspects, what a nice TV. Only one thing disappointed is, the OS of TV is TIZEN, which is SAMSUNGโs proprietary OS. This OS does not have plenty of applications yet. For example, if you want to watch Twitch ? There is no twitch application in TIZEN, so you have to watch Twitch via web browser. Very inconvenient. Or you should check this.
After living at new house for about 6 months, I think it was a good choice. More space gets me more comfortable, and makes it possible to stay home more than before. Still we are living with the various, so I wanted to stay home without some reason. Besides, I am also working from home, so more space is suitable for me. :)
Thought about next-gen console
I cannot help saying this, I bought the next-gen console to play Battlefield 2042. Yeapโฆsadly, the game has totally been ruined. HuhโฆI might write some post for that sometime. As a fan of Battlefield series, it is so sad that people compare Cyberpunk 2077 and Battlefield 2042. Even worse, it is not easy to find any point that Battlefield 2077 is better than Cyberpunk 2077. Crap. Anyway, that is why I decided to buy a next-gen console.
Though a start of experience was not good, the console itself was amazing. Recently, UnrealEngine has released The Matrix Awakens: An Unreal Engine 5 Experience, which is kind of tech demo that shows what UnrealEngine 5 can do. The game runs at UHD/30Hz with DynamicResolution on XSX, but it looks like REAL footage. At least, it seems this tech would become popular on movie industry. Already many of short films, part of films, or commercials use UnrealEngine, but currently they are using UnrealEngine for capturing a video. In other words, they are not realtime rendering. In the view, the tech demo was so impressed. โWow, is it possible in realtime rendering ?โ
Absolutely, this is not possible only with improvement of processor performance. In comparison of playing video, playing game needs more various resources not only processor resource. Playing video only needs loading next frame and next frameโฆuntil the video ends. (Displaying is none of business here) But, playing game needs loading assets should be displayed, executing codes may update the world or actors, integrating everything into a projectionโฆin SINGLE ONE frametime.
CPU takes charge of executing codes, and GPU takes charge of integrating into a projection. Then, who takes charge of loading assets ? In general, CPU and memory works for it. CPU tries to read data from memory and blocks itself until the read done, but it takes some time if memory bandwidth is low. Low bandwidth means that you are try to load data from auxiliary storage, and it must not be always faster than loading data from main storage (ex: RAM). Even the problem gets worse when the size of data bigger and bigger. Thus, people have tried several techniques; A compression skill is sometimes applied to minimize the size of data. Just loading a compressed data and decompress it into the original data. Of course, this skill needs an extra resource from CPU, which could trigger a hitch while playing a game. Next, a asset duplication skill is common one in games supporting for device using HDD. The skill is for reducing the seek time of HDD, because the seek time of HDD is too slow to load data in realtime. This skill also has a drawback that the size of game package gonna be VERY large. Horrible.
Thankfully, both Microsoft and Sony seem to have recognized these kind of issues. Specially, Microsoft. They made an exclusive processor for decompressing data to minimize any side effect of data compression skill. Like Sony did, Microsoft customized their NVMe SSD. Furthermore, Microsoft gave game developers more flexibity atm manpulating storage by providing DirectStorage API. Finally, Sampler Feedback Streaming (SFS) could be built on these basement skills. SFS will optimize gameโs memory usage and file I/O operations. Then, Microsoft names all the skills as an architecture Xbox Velocity Architecture. Previously, I did not believe their words because it looks like hype. But I do know that is an amazing advance in game development. Turning back to UnrealEngine, EpicGames did great job so far with the new features.
Plans on next year
Except for writing a blog post each month, I have considered some plans to do.
Plan #1. Making a game.
Recently, I started to develop a game. About 3 months ago, my ex-coworker had suggested an Action RPG game project, and I accepted that. I do not know when the game is released, but some milestones should be completed in next year. In 2022, there may be a playable build. Developing this game, I should develop many features or design critical systems. With these kind of experiences, I retrospect when I was a student. It is the same that struggling on every issue, but the result would be better than when I was a student.
Plan #2. Starting to develop a game engine.
Working as a game programmer for 2 years, I have thought that โHow about making my own game engine ?โ. It would be fun that developing my own game engine, proud if many games are made of it, satisfied that I could do this. This kind of thought would be similar many of programmers have a dream that making their own programming language, operating system, database system, or etc. The game engine I will develop would be lightweight, but Rust gonna be used. I want to use Rust as many as possible in developing it. Because managing the side effect of using CPP would not be easy in a small project.
Plan #3. Publishing console application or game.
Actually, I have already subscribed the Xbox developer plan. It was cheaper than I expected, $19 USD only one time. (Maybe I would work for Playstation sometimeโฆbut I want to focus on Xbox now) I want to utilize this Xbox developer license. How or what to make ? Let us think about. Case first, Playing games in Xbox, I will note them if I experience some inconveniences. It would be great project if there would be something to make users convenient. Second case, making a tech demo just like The Matrix Awakens would be fun. It could be a kind of inspiration to some developers. WellโฆI may not make any application or game if I am busy for other works. It is on the back burner. XD
]]>branch: 5.0
version: 17.0.1
build: 22000.318
Overview
UnrealEngine provides you two options to build your project and you can choose one of them. The options are BLUEPRINT
and C++
as you can see at the screenshot above. Selecting left one means that, โI gonna develop my project using only blueprintโ. Otherwise, selecting right one means, โI want to use both blueprint and cpp on my projectโ.
By the way, what is different between them ? How can we convert BP only project into BP+CPP project ? Let us go over.
Comparison
After creation, you can see the directory if selected the BP-Only. In this project BPOnly
, you only can execute UnrealEngine editor and write blueprints. Even if you make source code files and place them into appropriate position, your project does not compile the source code. Let us find out โwhy not workingโ by the difference between BP only project and BP+CPP project.
After creation with C++
selection. The BPCPP
project supports both blueprint and cpp like its name. You can see the difference on number of files, BPOnly
is 6 while BPCPP
is 10. Files that exist only in BPCPP
are here.
Name of file/folder | Description |
---|---|
.vs | Containing VisualStudio related files. Mostly, cached data for optimization. |
Binaries | Containing output files of this project. Currently, this projectโs UnrealEditor library exists. |
Source | Containing some simple source code files. Plus, BuildRule and TargetRule exist in this folder. |
<ProjectName>.sln | Just like uproject file, it defines required version of VisualStudio, dependency of the project, and so on. |
The only Source
folder is not generated one. The Binaries
folder is generated when you build the project with a certain target such as WindowsClient
, WindowsServer
, and Editor
. The files related to VisualStudio are generated when you attempt to make project files. Also, UnrealEngine refers the Source
folder while generating project files.
So, is that all ? No, actually there is one more thing different. Check the uproject file and you can find some difference. The contents of uproject file looks like similar, but BPCPP
โs one has a Modules
property. The name of module is the same with project name, BPCPP
.
In summary, there are some differences between BP only project and BP+CPP project. (Except for generated files)
Source
folderModules
in uproject fileWhere these differences come from ?
Template
We have learned about templates used in UnrealEngine at the post. What found was that making new project from a template is equal to copying the template project and replacing placeholders. Right, then it would be similar to that. Find the template project for BP only project and BP+CPP project.
1 | TMap<FName, TArray<TSharedPtr<FTemplateItem>> > SProjectDialog::FindTemplateProjects() |
As you see, UnrealEngine finds template files from the path; Root/Templates/
.
There are many folders for each template, and now we found. The TP_Blank
and TP_BlankBP
. The templates contain a uproject file, which is used for making new uproject file while creating new project using template.
The BPOnly.uproject
was created based on TP_BlankBP.uproject
. You can check that at the FProjectDescriptor::Write()
function.
1 | void FModuleDescriptor::WriteArray(TJsonWriter<>& Writer, const TCHAR* ArrayName, const TArray<FModuleDescriptor>& Modules) |
Why the Modules
property not copied ? Look at the FModuleDescriptor::WriteArray()
. UnrealEngine does not write that property when it is empty.
1 | bool GameProjectUtils::SetEngineAssociationForForeignProject(const FString& ProjectFileName, FText& OutFailReason) |
Why the EngineAssociation
property not filled ? That property is filled later at the FDesktopPlatformBase::SetEngineIdentifierForProject()
function.
Of course, the BPCPP.uproject
was created based on TP_Blank.uproject
. In this case, whole contents of file copied. And, the EngineAssociation
would be overwritten.
1 | // Retarget any files that were chosen to have parts of their names replaced here |
The name of folders and content of files are replaced by the codes above. In this post, from TP_Blank
into BPCPP
. (Or, from TP_BlankBP
into BPOnly
)
Module
We have confirmed that the difference between BPOnly
and BPCPP
is about a module system, which are Modules
property in uproject and Source
folder containing code files. Thus, it would be possible converting blueprint only project into blueprint with cpp project by making some changes. In other words, we should make a new module.
Though a good wiki page for this exists, I will show you an example based on TP_BlankBP
template.
#1. Prepare a project created with TP_BlankBP
. In this post, I use the BPOnly
project.
#2. Make a folder Source
at project directory, and make a folder <ModuleName>
in the Source
directory.
Name the module as you want, but it is recommended to set by project name. (Because this module is the first module of project) Just to show that any name is okay, I set the module name as Robb
, which is different with project name.
#3. Copy some files from the template TP_Blank
. Replace their names and contents.
I had copied all of files in Source
folder of TP_Blank
template. For using the template files in this project, I replaced filenames and contents. (In this case, I need to replace the text TP_Blank
into Robb
)
#4. Generate VisualStudio project files and open VisualStudio project file.
#5. Build the project and open UnrealEngine editor. Profit !
Wrap-Up
It is not common case that creating a project with blueprint only option, but we are able to convert blueprint only project into blueprint with cpp project. We have checked what happens while creating our project using template, what is different between TP_Blank
and TP_BlankBP
, and how to add cpp module at blueprint only project. As we seen earlier in this post, the conversion we did is the same work of what UnrealEngine does.
When we make an initial module, the name of module does not have to be the same with project name. But, it is recommended to set by project name with convention and several reasons. For example, I had made a module Robb
at the project BPOnly
. I tried to package the project and got the result like below. Some of files have the name as Robb
, but others have the name as BPOnly
. Kind of disharmony on naming could be problem when accessing files with name.
About 4 months ago, I moved to new house, which is rented for 2 years. The building had been built in 2018, so I expected a quite simple and modern facilities including home networks infra. But, on the day moving to new house, a previous tenant said to me that โOnly one LAN port works while others notโ. At that time, I took this as a misunderstanding of the previous tenant. Because it is common that general people cannot handle or solve an network issue easily. Wellโฆas you can see I write this post, he was right.
The previous tenant has mostly used the internet via wireless network, a.k.a. Wi-fi. It seemed that he does not know computer things. Even he connected to other rooms with exposed LAN cables. (I did not take the picture, but it was similar to a picture below.)
I made a floor plan for new house. The green markers mean LAN ports. The LAN port with blue check mark was the only one working properly. Other LAN ports were not. The orange marker means a terminal box. When I first opened the terminal box, it looked like a picture below.
Very weird. The red cable might be the inbound. But other cables are connected in disorder. In this situation, I cannot guess which cable is destinated to certain LAN port. So I followed steps below for examination.
After some moments, I could organize a mapping for LAN ports. Let us see the picture below.
Now, preparation done. It was time to do my plan. My plan wasโฆ
For this purpose, I planned to put a switch hub into the terminal box. Then, the wireless router should be near port #3. Because the Wi-fi signal would get weak when the router is in terminal box. However, on trying this plan, I found a very critical problem.
There is no power socket in the terminal box. In other words, there is no way to place a switch hub in the terminal box. In general, switch hub consumes power even it is small amount. What a panic !
I searched for bypassing the issue. Fortunately, there is one way fits in my case. The PoE, Power over Ethernet. The PoE is usually used at certain devices such as CCTV, Network Router, and VoIP Phone. These devices can be installed restricted environments.
Yes. That is a perfect feature for this situation.
So, I chose to find injector and splitter. They are needed to implement PoE infra. The injector injects signal and power into LAN cable. The splitter splits it into signal and power at destination. Therefore, the floor plan can be redrawn as below.
Though it looks like some mess, anyway it worked. First, injector provides power to splitter via Ethernet. Therefore, splitter can supply power to switch hub. Second, inbound signal gets distributed by switch hub in terminal box. Finally, home network is constructed by the router on port #3.
Great. I was satisfied with the resultโฆfor a while.
It was totally fine that connecting multiple devices with the router. Of course, because the router is extremely close. But, the problem happened when I had added several devices on port #4 side. When using one device on port #4, the device could recognize the network well. In contrast, when using two devices on port #4, one of them could not recognize the network. It can be drawn as below.
By the way, the devices were too far from the router. There were two switch hub between the router and devices, and it could prone some network conflicts. I had decided to change my home network configuration, with keeping my goals mentioned before.
A solution for this problems is simple. Placing a router in the terminal box. Then, my home network would be like picture above. But, one thing left behind, a wireless network. I cannot expect a wireless network functions well if the wireless router is in terminal box because the terminal box must be closed.
So, I had to buy new router for putting it in the terminal box. Placing new router in the terminal box and leave old router in the same position would be okay. In this case, the old router must be used like switch hub, not a router. My home network looks like picture above. And I will be able to connect the devices on port #4.
Hmmโฆeverything works well. Nothing malfunctions. But Wi-fi SSID issue was annoying me. New router and old router had been activated on wireless network, and they got each one of SSID. Yeah, right. There are TWO SSID separately, even though in the same network. I wanted them to merge into one.
Searched again. Maybe the EasyMesh a solution for me. The EasyMesh is one of Wi-fi technology that enables to merge multiple access points. Even EasyMesh does not care about type of frequency of access point. In other words, all of access points with 2.4GHz or 5.0GHz frequency will be merged into single access point. That was what I looked for !
My routers were made by EFM networks, the company famous of ipTIME trademark. EFM networks provides an utility program controls EasyMesh configuration like picture above. (Almost every company seems that develops and implements the EasyMesh specification, so find out other companies too.)
Setting up EasyMesh was completely easy. The structure of my home network was fit for the conditions. Now I can access Wi-fi via only single SSID. Furthermore, Wi-fi range is larger than before by merging two SSID. What a convenient :)
With the series of effort, I could setup my home network completely without great expense. It was lucky that there was no need to call workers. Maybe I would tell a next tenant of these story and give advice. I do not want anyone to suffer from the problems. ;)
Oh, I almost forgot. You should check the router before buying it if you want to setup EasyMesh. EasyMesh requires two types of router; MeshController and MeshAgent. Check the item you gonna buy whether it is kind of MeshController or MeshAgent.
]]>version: P4D/LINUX26X86_64/2021.1/2156517
version: 20.04 LTS
version: P4V/NTX64/2021.3/2170446
build: 19043.1165
References | |
---|---|
Helix Core Server Administrator Guide | https://www.perforce.com/manuals/p4sag/Content/P4SAG/chapter.install.html |
.p4ignore for UnrealEngine | https://github.com/mattmarcin/ue4-perforce/blob/master/.p4ignore |
P4 Typemap for UnrealEngine | https://docs.unrealengine.com/4.27/en-US/ProductionPipelines/SourceControl/Perforce/ |
As the Perforce is a kind of CVCS*, it is recommended to use a dedicated server. The dedicated server should run all day and night, and should have a fixed IP address. Thus, you would better choose a cloud server if not have a machine for the purposes. In this post, I chose DigitalOcean for a cloud server provider. The DigitalOcean provides instances with cheaper cost than others such as AWS. You know, you may not need a high quality instance for your small size project.
โป CVCS : Centralized Version Control System. Find more information at here.
Sign-up and Sign-in the DigitalOcean. Click the button Create
and choose Droplets
.
At the page Create Droplets
, you would be asked to choose options for a instance. In this post, we gonna choose options like below:
Choose an image
Choose a plan
Add block storage
Choose a datacenter region
Select additional options
Authentication
Any options I did not mention are left as default selection. Let us create our Droplet by clicking the button Create Droplet
.
Now you can see the new Droplet. Connect the instance via SSH. You can do it with Powershell or WSL in Windows 10. The X.X.X.X
must be replaced with the IP address of instance.
1 | > ssh root@X.X.X.X |
But, when you attempt to connect the instance via SSH, you are asked to enter a password.
1 | root@X.X.X.X's password: |
Enter the password that you typed at the Authentication
text block. If the right password entered, you can see the logs like below:
1 | Welcome to Ubuntu 20.04.2 LTS (GNU/Linux 5.4.0-73-generic x86_64) |
At the your instance page, you can check the volume setting. Click the Config Instructions
.
If you selected the option Automatically Format & Mount
at the section Add block storage
, the volume is already attached even you did nothing. In other words, the process Mount the volume
is already done. Let us check whether the volume is well mounted. The volume_X
must be replaced with yours.
1 | > cd /mnt/volume_X |
You successfully setup an Ubuntu instance. Good to go !
We need to setup public key for accessing Perforce packages. For this, you need to download the public key at https://package.perforce.com/perforce.pubkey. The download can be done by command below:
1 | > curl https://package.perforce.com/perforce.pubkey > perforce.pubkey |
This command let you save the public key as a file, whose name is perforce.pubkey
.
1 | > curl https://package.perforce.com/perforce.pubkey > perforce.pubkey |
You can check the contents of file with cat
.
1 | > cat perforce.pubkey |
Let us register the public key.
1 | > gpg --with-fingerprint perforce.pubkey |
Add the Perforce packaging key to your APT keyring.
1 | > wget -qO - https://package.perforce.com/perforce.pubkey | sudo apt-key add - |
Execute the command for adding Perforce to your APT configuration.
1 | > sudo add-apt-repository 'deb http://package.perforce.com/apt/ubuntu focal release' |
Run update.
1 | > apt-get update |
Install the package.
1 | > sudo apt-get install helix-p4d |
Now you have one last step, launching the Perforce service ! Execute the batch file for it.
1 | > sudo /opt/perforce/sbin/configure-helix-p4d.sh |
You will be asked to enter some configurations such as name of service, directory, case sensitiviy, and so on. Setup them appropriately.
1 | Perforce Service name [master]: Test |
You should select the proper directory. It would be better to select the attached volume if the size of your project would be more than 25GB.
1 | Perforce Service name [master]: Test |
Now you can access the Perforce service via P4V at a client. Before that, take care of typemap. The typemap is an abbreviation of Type Mapping
. You can define how Perforce handles certain type of files by it. If your project uses UnrealEngine, for the types related to UnrealEngine, Epic Games recommends to setup like below:
1 | TypeMap: |
You can edit the typemap of instance by executing command p4 typemap
. The command would open typemap file with vi editor.
Add the Epic Gamesโs mappings to your mapping file*. Now all preparation of server side completed.
โป FYI, the //
string does not mean โIt is a kind of comment.โ in P4 typemap system. You should copy the all of text.
Download the P4V installer at https://www.perforce.com/downloads/helix-visual-client-p4v and install with default options. When the installation compeleted, execute the P4V. You will see the display.
Enter ssl:X.X.X.X:1666
at the section Server
. The X.X.X.X
must be replaced with the IP address of instance. Enter super
at the section User
. The user super
is an administrator account we have set. Now click the button OK
. Check Trust this fingerprint
and click the button Connect
if you encounter the dialog like below:
Enter the password you set while launching the Perforce service at instance.
You can see the display when successfully entered.
The admin tool can be accessed at Tools/Administration
.
In the tool, you can add or delete user directly.
Let us prepare some Depot and Stream. Click the Depots
. Right-click any depot and select New Depot...
.
Type the name of new Depot.
Select stream
at the section Deopt type
and click OK
.
Close the admin tool and return to the P4V*. Now you can find the new Depot at Depot view.
โป Actually, the admin tool was the program P4Admin, which is different with P4V. Just, Perforce supports to launch the P4Admin from P4V.
Restart the P4V for applying changes from P4Admin. After restart, find the File/New/Stream...
and click it.
Let us make a Stream, name of mainline
. The Stream will be placed in the new Deopt. Click the button OK
.
Click New Workspace...
at workspace view.
Name the new workspace and click the button Browse
in line of Stream
. You can find the Stream mainline
at the dialog. Select it.
Finally, we have prepared a workspace in totally empty new Perforce service ! But, you should config p4ignore
before getting into the work. Open any terminal and execute the command below:
1 | > p4 set P4IGNORE=.p4ignore |
This command will let your Perforce refer the file whose name is .p4ignore
. It is kind of configuration lets you can use Perforce like git, which provides .gitignore
. To apply this changes, restart P4V. And, create .p4ignore
at your workspace directory. Let us test whether .p4ignore
works well. Fill the contents of .p4ignore
like below:
1 | *.sln |
Select Mark for Add...
for .p4ignore
and submit it.
Next, create a empty file whose name is Test.sln
. Try to add this !
You try to check out the file, but the dialog would be popped-up. Great, your p4ignore works well.
If your project uses UnrealEngine, you should search for good one. I recommend you to use the p4ignore mentioned at references. Okay, thenโฆall of preparation done. You are good to go :) !
]]>branch: ue5-early-access
version: 16.10.4
build: 19043.1110
UCLASS()
1 | /UnrealEngine/Engine/Source/Runtime/Engine/Classes/GameFramework/PlayerController.h |
The macro UCLASS()
may be the most famous one of the unreal macros. First of all, let us find out how it can be expanded. Our goal is expanding UCLASS()
of the class APlayerController
, which can be found at line #222 of PlayerController.h
.
1 | /UnrealEngine/Engine/Source/Runtime/CoreUObject/Public/UObject/ObjectMacros.h |
In UnrealEngine, most of definitions for core macros are placed in ObjectMacros.h
file. We can see the definition of UCLASS
here, and it would be the second definition in usual case. Then, what is the macro BODY_MACRO_COMBINE
?
1 | /UnrealEngine/Engine/Source/Runtime/CoreUObject/Public/UObject/ObjectMacros.h |
The macro is defined as BODY_MACRO_COMBINE_INNER
, which concatenates parameters as one string. Thus, the macro UCLASS
would result the text like below:
1 | UCLASS(...) -> |
It can be tested with simple code. Check it out at the screenshot below. The __LINE__
is one of pre-defined macro, so it is turned to 222
, where the UCLASS
is written.
Here is test code and its result. Check the name of integer variable.
Actually, the macro CURRENT_FILE_ID
can be found at header files generated by Unreal Header Tool. You can find the definition at generated header files, for instance, PlayerController.generated.h
. The generated header files are created when you attempt to build your project.
1 | /UnrealEngine/Engine/Intermediate/Build/Win64/UnrealEditor/Inc/Engine/PlayerController.generated.h |
Thus, the macro CURRENT_FILE_ID
would be replaced before BODY_MACRO_COMBINE
is expanded. We can rewrite the macro evaluation process.
1 | UCLASS(...) -> |
And, the Engine_Source_Runtime_Engine_Classes_GameFramework_PlayerController_h_222_PROLOG
is also defined at the generated header file for PlayerController.h
.
1 | /UnrealEngine/Engine/Intermediate/Build/Win64/UnrealEditor/Inc/Engine/PlayerController.generated.h |
The Engine_Source_Runtime_Engine_Classes_GameFramework_PlayerController_h_225_EVENT_PARMS
is a macro containing definitions for essential structures.
1 | /UnrealEngine/Engine/Intermediate/Build/Win64/UnrealEditor/Inc/Engine/PlayerController.generated.h |
Let us rewrite the evaluation process. As a result, the macro UCLASS
is replaced by definitions for some essential structures.
1 | UCLASS(...) -> |
Okay, we have just peeled off one layer to the truth. But, is that all ? We should take care of something moreโฆMost of time, the macro UCLASS
is not solely used. Various keywords and specifiers come with this. (ex: config=Game
, BlueprintType
, meta=(ShortTooltip=...
, โฆ) So, how they are handled ? Even, how the generated header file is created ?
1 | /UnrealEngine/Engine/Source/Programs/UnrealHeaderTool/Private/CodeGenerator.cpp |
The UHT writes header files containing auto-generated codes at the code above. The PreloadedFiles
has absolute paths of generated header file, for instance, D:/Git/UnrealEngine/Engine/.../Inc/Engine/PlayerController.generated.h
.
1 | /UnrealEngine/Engine/Source/Programs/UnrealHeaderTool/Private/CodeGenerator.cpp |
An example of NoExportTypes.generated.h
.
You can track what UHT writes on the generated header file via the variable GeneratedHeaderText
. Because its contents will replace old generated header file, whenever there is any difference between old contents and new contents.
1 | /UnrealEngine/Engine/Source/Programs/UnrealHeaderTool/Private/CodeGenerator.cpp |
For example, there is some definition for preventing duplicated include. The format above turns to like below.
1 | /UnrealEngine/Engine/Intermediate/Build/Win64/UnrealEditor/Inc/Engine/PlayerController.generated.h |
There are more things worthy to check.
1 | /UnrealEngine/Engine/Source/Programs/UnrealHeaderTool/Private/CodeGenerator.cpp |
That is why the CURRENT_FILE_ID
and ..._EVENT_PARMS
macros are defined. Furthermore, other codes can be found at FNativeClassHeaderGenerator::FNativeClassHeaderGenerator(const UPackage*, const TSet<FUnrealSourceFile*>&, FClasses&, bool)
.
So, we have found the relationship of unreal macro and generated header file. But, there is one thing left, the metadata.
1 | /UnrealEngine/Engine/Source/Runtime/Engine/Classes/GameFramework/PlayerController.h |
Back to the start, there are metadata within the macro UCLASS
such as config=Game
, BlueprintType
and meta=...
. We are going to check out how they are handled by UnrealEngine.
1 | /UnrealEngine/Engine/Source/Runtime/CoreUObject/Public/UObject/ObjectMacros.h |
You can find some enum definitions seems related to the metadata. But, they are for only supporting autocomplete hints such as Intellisense and VisualAssistX. There is another code handling metadata.
1 | /UnrealEngine/Engine/Source/Programs/UnrealHeader/Private/CodeGenerator.cpp |
This code is for parsing metadata. Any header file in your project is passed through the parsing.
1 | static void SetupUObjectModuleHeader(UHTModuleInfo ModuleInfo, FileItem HeaderFile, SourceFileMetadataCache MetadataCache) |
About all modules, header files in Classes
folder are stored at PublicUObjectClassesHeaders
and header files in Public
folder are stored at PublicUObjectHeaders
. Even you have located a header file in other folder, the Unreal Build Tool
collects it into PrivateUObjectHeaders
.
A screenshot on debugging UBT.
Back to the FBaseParser::ReadSpecifierSetInsideMacro()
, let us test with the keyword BlueprintType
. How does the BlueprintType
keyword parsed ? The UHT parses your header file with tokens. Suppose the input as UCLASS(config=Game, BlueprintType, Blueprintable, meta=(...))
.
1 | /UnrealEngine/Engine/Source/Programs/UnrealHeaderTool/Private/HeaderParser.cpp |
Due to this code, the left input would be (config=Game, BlueprintType, Blueprintable, meta=(...))
. And, the following tokenizing is like below based on FBaseParser::ReadSpecifierSetInsideMacro()
.
1 | (config=Game, BlueprintType, Blueprintable, meta=(...)) |
A screenshot on debugging UHT.
1 | C/CPP (pure) macro |
There are so many hidden code for implementing unreal macros, and the macros have complicated relationship with other engine code. Even most part of final code from the macros cannot be evaluated before some preprocessing and compilation. In this perspective, unreal macro such as UCLASS
is not a pure C/CPP macro, because unreal macro functions fully only when UHT and UBT must preprocess the macro.
There is no doubt. Any of C/CPP compiler cannot recognize the unreal macro such as UCLASS
. Even the Epic Games did not modify the compilers, and did not have to do. They have simply setup some build pipeline satisfying their needs. The program managing their custom build pipeline is the Unreal Build Tool
, UBT. Most of jobs for build are done by UBT and UHT. In official document for UHT, these background knowledge is introduced.
1 | UnrealHeaderTool (UHT) is a custom parsing and code-generation tool that supports the UObject system. Code compilation happens in two phases: |
As they said, the compilation order is the opposite direction of the paragraphs; Expanding UCLASS
, Generated Header File
and Metadata Parser
. The actions for Expanding UCLASS
are done by C/CPP compilers(+preprocessors), and the actions for Generated Header File
and Metadata Parser
are done by UHT. Additionally, actions for Metadata Parser
happens early than ones for Generated Header File
.
1 | main function for parsing metadata -> FHeaderParser::ParseHeaders() |
Let us make a conclusion.
Overview
Nowadays, STL is an essential component in almost every CPP project. That is why several questions about STL are asked in a technical interview. Especially, the std::vector
is a popular subject. In this post, we gonna check the codes related to std::vector
โs growth, which is a hot topic in STL.
The term โgrowthโ in std::vector
means an event to increase a size of instance by some actions. The action would be inserting an element (e.g. push_back()
) or tuning its size (e.g. resize()
). Some of us say โWhen the growth happens, its size become twice.โ, but some of others say โNo, it is exactly 3/2 times.โ. Wellโฆboth of saying are not wrong. Let us find out why it is.
The environment is below:
2004 OS Build 19041.985
19.28.29914
18.04.4 LTS
7.5.0
The reference is below:
Growth in MSVC
First, let us trace codes about push_back()
. Suppose we use a code below:
1 | int Number = 0; |
The function below will be called in this code. You can find all of STL codes for MSVC at reference #2.
1 | _CONSTEXPR20_CONTAINER void push_back(const _Ty& _Val) { // insert element at end, provide strong guarantee |
1 | template <class... _Valty> |
As you can see, there is a branch on returning the function. When _Mylast != _My_data._Myend
is true, the growth not happens. Because the logic in the _Emplace_back_with_unused_capacity()
does not reallocate memory, but reuse unused memory. FYI, values about _Mypair
have the relationship like below:
1 | _Compressed_pair<_Alty, _Scary_val> _Mypair; |
1 | // https://github.com/microsoft/STL/blob/c12089e489c7b6a3896f5043ed545ac8d1870590/stl/inc/xmemory |
1 | // CLASS TEMPLATE vector |
1 | // CLASS TEMPLATE _Vector_val |
Since the elements are placed in sequential memory address, _Mylast - _Myfirst
means โcurrently used sizeโ.
1 | _NODISCARD _CONSTEXPR20_CONTAINER size_type size() const noexcept { |
Similarly, _Myend - _Myfirst
means โcurrently avaiable sizeโ.
1 | _NODISCARD _CONSTEXPR20_CONTAINER size_type capacity() const noexcept { |
As a result, _Mylast != _My_data._Myend
is true when _Mylast < _Myend
is true. That is why reallocation not happens. Get back to emplace_back()
code. According to those upper reasons, now we need to focus on _Emplace_reallocated()
function.
1 | template <class... _Valty> |
As you can see the codes, deallocation and reallocation happen. The variable _Newcapacity
determines the size of memory will be reallocated. Let us check the function _Calculate_growth()
.
1 | _NODISCARD _CONSTEXPR20_CONTAINER size_type max_size() const noexcept { |
There are three return statement in the function.
For instance, a maximum value of int
type is +2,147,483,647
and 2/3 times of value is +1,431,655,764.666... โ +1,431,655,765
. Let us put them in the expression. if (1431655765 > 2147483647 - 1431655765 / 2)
will be false, but how about if _Oldcapacity = +1,431,655,766
? if (1431655766 > 2147483647 - 1431655766 / 2)
will be true. In this case, new size will be forced as the maximum size.
2
.For instance, when the _Oldcapacity
is in {0, 1}
the expression const size_type _Geometric = _Oldcapacity + _Oldcapacity / 2;
will be the same with _Oldcapacity
. In this case, new size will be forced as _Newsize
, which is passed by _Oldsize + 1
in _Emplace_reallocate()
.
_Oldcapacity | Calculation |
---|---|
0 | 0 + 0 / 2 = 0 |
1 | 1 + 1 / 2 = 1 |
The _Geometric
will have 3/2 times of _Oldcapacity
. That is why the 3/2 times of growth happens in MSVC. And now you understand why new size has to be set by maximum value when the _Oldcapacity
is bigger than 2/3 times of maximum size.
The resize()
has a similar flow. Let us find out.
1 | _CONSTEXPR20_CONTAINER void resize(_CRT_GUARDOVERFLOW const size_type _Newsize) { |
1 | template <class _Ty2> |
The resize()
can trim or append available memory. Trimming happens when you call resize()
with smaller value than current available size. Appending happens when you call resize()
with greater value than current available size. We go to _Resize_reallocate()
.
1 | template <class _Ty2> |
Oh, Hi. We meet again. It is him, the _Calculate_growth()
. Now we know the resize()
has a similar logic.
Growth in GCC
First of all, let us find push_back()
in GCC. Suppose we use the example written at MSVC part. You can find the code at reference #3
1 | // [23.2.4.3] modifiers |
Here are two cases. First, when an available memory exists. Second, otherwise.
1 | struct _Vector_impl_data |
std::vector
in GCC has internal indicators like std::vector
in MSVC. So we should focus on _M_realloc_insert()
function.
1 |
|
Hoo, it is too long. We do not have to look into whole code, but the variable __len
. The variable is used for reallocation. And it is set by _M_check_len()
.
1 | // Called by _M_fill_insert, _M_insert_aux etc. |
The code throw an error when current size is the same with maximum size because the function was called as _M_check_len(size_type(1), ...)
. Otherwise, new size will be set by 2 times of current size. Except for when current size is 0
.
Current size | Calculation |
---|---|
0 | 1 = 0 + max(0, 1) |
1 | 2 = 1 + max(1, 1) |
2 | 4 = 2 + max(2, 1) |
And, returns maximum size when underflow or overflow happens. Otherwise, returns new size calculated as 2 times of current size.
Next, check the resize()
in GCC.
1 | /** |
We can see the resize()
in GCC also do trimming and appending. (Interestingly, nothing happens when __new_size
is equal to current size.) So, we should focus on _M_default_append()
function.
1 | template<typename _Tp, typename _Alloc> |
It is long one, too. What is __navail
? It seems meaning of Number of AVAILable memory
, not the Not AVAILable memory
. So, we can see the memory is reused when if (__navail >= __n)
is true. Otherwise, reallocation happens. Oh, Hi. We meet _M_check_len()
again. Then, new size will be 2 times of current size.
Wrap-up
Common
push_back()
logic.){First, Current, End}
End - First
Current - First
End - Current
MSVC
GCC
Build.cs
doTarget.cs
doBuild.cs
and Target.cs
ver. 4.25
ver. 16.9.1
UnrealBuildTool.ModuleRules
UnrealEngine provides its own module system, which is absolutely different with CPP 20 Module. The class UnrealBuildTool.ModuleRules
is for the module system and it is written by [ModuleName].Build.cs
. You can decide what to include for creating output files (= DLL). For example, ShaderCompileWorker
project has the module rules below:
1 | /Engine/Source/Programs/ShaderCompileWorker/ShaderCompileWorker.Build.cs |
There are several libraries such as Core
, Projects
, RenderCore
and so on. We can also find them in Binaries
folder like below:
(FYI, the ShaderCompileWorker.exe
is created with ShaderCompileWorker.Target.cs
not the ShaderCompileWorker.Build.cs
.)
In other words, output files are created with the name containing its module when you add corresponding libraries to module rules (ex: [TargetName]-[ModuleName]-[ConfigurationName].dll
). Additionally, UnrealEngine re-uses them as possible. Suppose your project need some libraries already included on engine side. In this situation, UnrealEngine does not create output files for the duplicated libraries included in your project. Instead of that, UnrealEngine leaves some meta file describes what the project included.
1 | // Copyright Epic Games, Inc. All Rights Reserved. |
This is a generated module rules based on third person template. This module rules contains CoreUObject
library but we cannot find it in Binaries
folder. Let us see the ThirdPerson_4_25Editor.target
file.
1 | /Project/Binaries/Win64/ThirdPerson_4_25Editor.target |
1 | /Engine/Source/Programs/UnrealBuildTool/System/TargetReceipt.cs |
For more details about the module system, visit reference #1.
UnrealBuildTool.TargetRules
UnrealEngine provides its own target system, which makes you can create an executable. There are various target configurations such as Editor
, Client
and Server
. The class UnrealBuildTool.TargetRules
is for the target system and it is written by [TargetName].Target.cs
. You can decide which modules to include for a certain target. For example, UE4
project has the target rules for editor below:
1 | // Copyright Epic Games, Inc. All Rights Reserved. |
1 | ExtraModuleNames.Add("UE4Game"); |
The target rules specifies UE4Game
module included, which is located in Engine/Source/Runtime/UE4Game
. So, output files for editor are consist of modules in UE4Game
.
1 | // Copyright Epic Games, Inc. All Rights Reserved. |
Yes, they are. :)
1 | Type = TargetType.Editor; |
UnrealBuildTool.TargetRules
has a field Type
.
1 | /Engine/Source/Programs/UnrealBuildTool/Configuration/TargetRules.cs |
The field is used for branching target-specific features such as build configuration. For example, UnrealEngine manages target configurations as enum
.
1 | /Engine/Source/Programs/UnrealBuildTool/Configuration/UEBuildTarget.cs |
Unlike others, the editor target support only 3 types of target configuration. Debug
, DebugGame
and Development
.
1 | /Engine/Source/Programs/UnrealBuildTool/Configuration/TargetRules.cs |
For more details, visit reference #2.
[ModuleName].Build.cs
Each module has its own Build.cs
file. For example, a [ProjectName].Build.cs
will be generated when you create new project with cpp enabled. Because UnrealEngine makes a default module that has the same name with project. (Exactly, Build.cs
and Target.cs
files are copied from template in general cases.)
1 | /Engine/Source/Editor/GameProjectGeneration/Private/GameProjectUtils.cpp |
WHEN YOU CREATE A PROJECT ITS NAME OF ThridPerson_4_25
FROM THIRD PERSON TEMPLATE
Saying that again, [ModuleName].Build.cs
defines the dependencies for building its module. So, every module must have its own [ModuleName].Build.cs
file and every module has its own [ModuleName].Build.cs
will generate a DLL when you build the project.
Module generation can be done by manipulating some CSharp scripts (Build.cs
and Target.cs
files). You can find how at https://www.ue4community.wiki/creating-cpp-module-oshdsg2t.
[TargetName].Target.cs
While every module must have a Build.cs
file, but every module do not have to have a Target.cs
file. Some modules have only Build.cs
file. It means the modules should be used for library not a standalone. The AIModule
is a good example. The module has only Build.cs
as it is written for providing a support to make AI.
1 | /Engine/Source/Editor/UnrealEd/UnrealEd.Build.cs |
1 | /Engine/Source/Runtime/Engine/Engine.Build.cs |
1 | /Engine/Source/Developer/TargetPlatform/TargetPlatform.Build.cs |
1 | /Engine/Source/Runtime/Core/Core.Build.cs |
1 | /Engine/Source/Runtime/UE4Game/UE4Game.Build.cs |
1 | /Engine/Source/UE4Editor.Target.cs |
Sometimes, some modules should not be included on certain target configurations. For instance, only editor features should not be included in client or server target configuration. In the need, we can branch for ease like below:
1 | Engine/Source/Developer/SlateReflector/SlateReflector.Build.cs |
We can use Widget Relfector
only at editor target configuration. As we see, non-editor target will not contain the reflector feature. One more step, we can force to block generating projects by throwing an exception like this.
1 | /Engine/Source/Editor/UnrealEd/UnrealEd.Build.cs |
Build.cs
and Target.cs
are different with each other on why they are used.
Build.cs
.dll
.[ModuleName].Build.cs
.Target.cs
files or if build configurations are different on each other.Target1-ModuleA.dll
, Target2-ModuleA.dll
, Target2-ModuleA-Win64-Debug.dll
and etc.Target.cs
.exe
.[TargetName].Target.cs
and modules can be included selectively.UE4Editor.exe
, UE4Editor-Win64-Debug.exe
and etc.Logically, a target is above one than a module.
]]>ver. 4.25
ver. 16.8.1
According to reference #1, the name of Natvis framework means visualization of native types. It can help your debugging with more plentiful visibility, and sometimes support mutiple environments that have a different size on the same data type. Suppose you want to make a string class storing its text as UTF-32 or something custom format, it should not be displayed well because it is not kind of ASCII. Though, do you want to see the data (in this case, the text) at Watch
or Local
viewport ? Then you should implement your own xml for custom Natvis visualization.
SCREENSHOT WITHOUT CUSTOM NATVIS
SCREENSHOT WITH CUSTOM NATVIS
The custom visualizer has XML syntax and it would be comfortable than a sole programming language. Just create a file of any name with .natvis
extension and locate at the directory Documents/Visual Studio 2019/Visualizers
. The Visual Studio IDE will find all natvis files at there and parse them. At first after you create the file, you need the tag AutoVisualizer
.
1 | <AutoVisualizer> |
But you may meet the error like below with our current visualizer. (You should turn on an option for showing errors related to Natvis. Manipulate the option at Tools/Options/Debugging/Output Window/General OutputSettings/Natvisdiagnostic messages
. I recommend you to set the level as Error
.)
1 | Natvis: ...\Documents\Visual Studio 2019\Visualizers\Example.natvis(1,2): Fatal error: |
So you should specify the schemas. Like this.
1 | <AutoVisualizer xmlns="http://schemas.microsoft.com/vstudio/debugger/natvis/2010"> |
And, the AutoVisualizer
tag can have a child tag such as Type
. The Type
tag must have an attribute Name
. Name
can be set as the name of type. For example, you should type SomeClass
at the attribute when you created a type SomeClass
.
1 | class SomeClass |
1 | <AutoVisualizer xmlns="http://schemas.microsoft.com/vstudio/debugger/natvis/2010"> |
The Type
tag can have a child tag such DisplayString/Expand
. The DisplayString
tag can be used for displaying a string at the debugging window like below.
1 | <AutoVisualizer xmlns="http://schemas.microsoft.com/vstudio/debugger/natvis/2010"> |
You can get the value of member variable. Brace the member variable as {}
.
1 | <AutoVisualizer xmlns="http://schemas.microsoft.com/vstudio/debugger/natvis/2010"> |
With the Expand
tag, you can customize the expanded view. The Item
tags consist of the list. If you customize the expanded view as Expand
tag, automatically Raw View
item created, which was the original expanded view. You can decorate each line of list in expanded view. The specifier sb
and x
are respectively meaning โDisplay the string without quotation marksโ and โDisplay the integer with hexa-decimal formatโ. For more details, visit reference #2.
1 | <AutoVisualizer xmlns="http://schemas.microsoft.com/vstudio/debugger/natvis/2010"> |
Let us find an example in UnrealEngine one. You can find UE4.natvis
if you installed UnrealEngine at your local system. Mostly, the UE4.natvis
located in Engine/Extras/VisualStudioDebugging/UE4.natvis
.
1 |
|
First of all, the FString
welcomes us. Have a look for why the FString
visualizer has been made like this. ( <
and >
things are escaped characters in xml. For more details, visit reference #3. )
Put a breakpoint at where the FString
is initialized. Before initialization, we can see Invalid
at the debugging window.
Expand the items. We can see the ArrayNum
has a negative value. The condition Data.ArrayNum < 0
is satisfied and Invalid
would be shown.
After initialization, we can see the string very well. In this case, the condition Data.ArrayMax >= Data.ArrayNum
is satisfied and L"ABC"
would be shown. Why does the string look like L"..."
? Because of the format specifier su
. Check the reference #2 again.
1 | Engine/Source/Runtime/Core/Public/Containers/UnrealString.h |
The FString
stores its string with TArray<TCHAR>
. So we could see the ArrayNum
or ArrayMax
things at the FString
visualizer.
1 | Engine/Source/Runtime/Core/Public/Containers/Array.h |
1 | Engine/Source/Runtime/Core/Public/Containers/ContainersFwd.h |
1 | Engine/Source/Runtime/Core/Public/Containers/ContainerAllocationPolicies.h |
And you can find the type of ArrayNum
and ArrayMax
is int32
with this flow.
Sometimes, the UE4.natvis
gives us a hint for understanding the complicated engine code. Even someday you may need to customize UE4.natvis
for special case while supporting various platforms. It would be also good to learn Natvis if you mostly use Visual Studio IDE. Read premade ones and write your ones. :)
overview
Exactly one year passed after I wrote the retrospection of 2019. (https://baemincheon.github.io/2019/12/24/retrospection-2019/) Feeling that time goes so fast as I look back lots of things behind. From the god damn COVID-19 to the remote work during quarantine, we got so many things to say. But, the old year (2019) is still the hardest year to me. This year would be second one as I believe myself that I have taken plenty of breaks in this year.
Though the main topics of retrospection are related to worldwide crisis, I will try not to talk about it as possible. Now it is some kinda routine issue and I want to care about personal events. In addition to, other people are already saying or sharing the contents about it. I just hope this crisis ends as soon as possible and get back into old routines.
play
This year, I played games most of time with Nintendo Switch. Especially, Splatoon 2
and Ring Fit Adventure
were the ones that I liked. Splatoon 2
is not such a fresh game (released at 2017/07/21), so it was hard to enjoy multi-play contents due to other players much more skillful than me. But, its single-play contents were quite good and well structured. Therefore, I also purchased a DLC for another single-play contents. I played Splatoon 2
about 100 hours and am pleased with the game quality. The game is not kinda โGOD GAMEโ thing, but I am sure it has worth to play at least once. For me, an enthusiast of FPS game, unusual concepts of this game looks nice.
I really like the Ring Fit Adventure
. It has been so difficult to exercise funny that I used to stop exercising several times. You know, even such a strong will sustains less than few weeks or months. But, I am still keeping exercising for more than 6 months with the game. Thanks to its gamification, I seldom lost interest on exercising and sometimes got motive, too. I played Ring Fit Adventure
about 150 hours and am pleased with the game quality. I am sure I can recommend this game if you have Nintendo Switch. And there may be only this option in these days as fitness clubs closed. Home training is not optional but required.
Oh, I almost forgot it. I played the game 3000th Duel
, too. It is a game released at PC(Steam) and Nintendo Switch. The game is said as one of Metroidvania things, because of its contents and mood. It was not easy one but there was the balance between feeling fulfilled and bearing hardship. I played 3000th Duel
about 40 hours including DLC part. Though It does not have an easy mode option such as Just Enjoy The Story
difficulty, you can go easy or hard depends on how much you spent time at farming. It is up to you. Though there were several times that I screamed (lol) for anger, it helped me to get used to manipulating Nintendo Switch controller.
activity
Some old people may know about Touhou Project
. It is one of vertically scrolled shooting games such as Strikers 1945
. The game was popular on 90s and 00s for its unique worldview, which lead to numerous numbers of derivative works created by users. Some works are still created in these days although it is become less popular than before. But, almost every one is aimed for English or Japanese version not the Korean.
Fortunately, Touhou Spell Bubble
has recently started to support Korean version. It was first released at 2020/02/06, and started to support Korean version from 2020/10/15. Despite of many concerns, I was happy to see the game supports Korean. (You might know, Korean market is not actually attractive.) So I was willing to visit the cafe when the game is promoted. We ordered every menu once and pictured them.
I remember that I mentioned the laboratory in previous retrospection. (Maybe because I did my best in lab) The professor of lab suggested me to give a lecture, whose content is about C language. I accepted the suggestion without hesitation, and wrote some slideshows. The lecture is in the first-year curriculum, however, I wanted to deal with real application of C language. Why ? Every student in 2020 may have a doubt on studying C language. Because there are already many programming languages that looks awesome and easy such as Python or Javascript.
So I focused on โWhy We Study C Languageโ and โHow C Language Is Usedโ for resolving the doubts. I prepared the contents like Explaining โWhy C Language Can Manipulate Memoryโ with assembly codes, showing โHow C Language Is Used In Real Projectโ with Linux kernel codes. People rarely say about them. Time has passed, we do not use C language for all purposes. I thought now we should consider to focus what only C can do when we teach C language to students.
work
Already one year passed from join the PUBG. Exactly 1.5 year ? I am now familiar to my work, and even got the sub role additionally. We had an anniversary cake with people who joined PUBG in the same time, too. Work is not easy going, but we try to do boost each other and overcome it. I wish I can go with the people as many as can also even one year passed again. It is sad that now we cannot get together in offline due to the crisis. We had often got together once per 1~2 months, and had a dinner. I already miss that times.
Starting remote work, I found some pros and cons. Remote work seems not the silver bullet one in every situation. Of course, there are common topics on remote work regardless of job. But, some topics are unique ones only existing on game developer job. I can show cons below:
Common Topics
Extra Topics (for game developer job)
Play Station 5 has been released in recent. Sony planned to celebrate the event with partner companies, and collected the picture of members. I sent the picture above, and you can find it on the site https://sie.offbaseproductions.com/ too. It is something monumental and memorable. Sony did good job. I was glad to develop on PS5. :)
thoughts
This year, I leave some regrets that I should have done more things. I should have met more people and read books. Butโฆthe lethargy from the crisis, everyone may have felt this. I cannot assert it did not affect me. People around me seems sometimes sad and depressed, too. What was worse, we end up this year as bad situation with high amount of patients. It is hard to believe next year would be better.
Somebody said, โThe World Never Be The Sameโ. At first of this year, I did not agree the words. Because I could not imagine the new world. Butโฆwe going to the new world anyway, and it seems we must adapt. Even this year is said the most terrible one, I think we should remember it. To look back to stop this tragedy. We gotta be worry about how to adapt new world and how to live next year, based on new rules.
]]>ver. 4.25
ver. 16.7.6
ver. 2004
Term | Synonym | Meaning |
---|---|---|
Non-Axis | Key, Button | input type which has only two states: Pressed or Released |
Axis | Stick | input type which has numberless states |
Key | (sometimes) it is used for indicating any input type. be careful with context for distinction of Non-Axis | |
Deadzone | Threshold | range of input values, which blocks values in range. only bigger value cannot be blocked |
1 | UnrealEngine/Engine/Source/Runtime/Core/Private/GenericPlatform/GenericApplication.cpp |
we can find some pre-defined non-axis/axis keys as FName
in GenericApplication.cpp
. they are for mapping from various input messages to generic input messages. โvarious input messagesโ means, there are many types of gamepad in the world. the button/stick layout differs in Xbox One controller, Playstation 4 controller and so on. the gamepads below are Xbox One, Playstation 4, Stadia and Switch in order.
look at the Xbox One one and Playstation 4 one. they have many differences such as position of stick and exsitance of touch pad. even in comparison for Xbox One one and Switch one, the number of buttons differs. in this situation, it is not easy for every individual developer to support every type of gamepad, so the need of generic mapping for gamepad input arises. let us find out the generic mapping with Xbox One controller examples.
the tables are from the reference #1. you can find more details for each button/stick at the URL. though there are so many items in table, some of them are not counted as user input in common situation. so, we can gotta consider the items below:
Index | Item Name | Unreal Mapping | Input Type |
---|---|---|---|
1 | Left Stick | (Move Horizontally) Gamepad_LeftX | Key, Axis |
(Move Vertically) Gamepad_LeftY | Key, Axis | ||
(Move Left Side More Than Deadzone) Gamepad_LeftStick_Left | Key | ||
(Move Up Side More Than Deadzone) Gamepad_LeftStick_Up | Key | ||
(Move Right Side More Than Deadzone) Gamepad_LeftStick_Up | Key | ||
(Move Down Side More Than Deadzone) Gamepad_LeftStick_Down | Key | ||
(Click) Gamepad_LeftThumbstick | Key | ||
2 | Left Bumper | Gamepad_LeftShoulder | Key |
3 | View Button | Gamepad_Special_Left | Key |
6 | Menu Button | Gamepad_Special_Right | Key |
7 | Right Bumper | Gamepad_RightShoulder | Key |
8 | Directional Pad | (Left) Gamepad_DPad_Left | Key |
(Up) Gamepad_DPad_Up | Key | ||
(Right) Gamepad_DPad_Right | Key | ||
(Down) Gamepad_DPad_Down | Key | ||
10 | Right Stick | (Move Horizontally) Gamepad_RightX | Key, Axis |
(Move Vertically) Gamepad_RightY | Key, Axis | ||
(Move Left Side More Than Deadzone) Gamepad_RightStick_Left | Key | ||
(Move Up Side More Than Deadzone) Gamepad_RightStick_Up | Key | ||
(Move Right Side More Than Deadzone) Gamepad_RightStick_Up | Key | ||
(Move Down Side More Than Deadzone) Gamepad_RightStick_Down | Key | ||
(Click) Gamepad_RightThumbstick | Key | ||
11 | Right Trigger | Gamepad_RightTriggerAxis | Key, Axis |
(Press More Than Deadzone) Gamepad_RightTrigger | Key | ||
14 | Left Trigger | Gamepad_LeftTriggerAxis | Key, Axis |
(Press More Than Deadzone) Gamepad_LeftTrigger | Key | ||
X | X Button | Gamepad_FaceButton_Left | Key |
Y | Y Button | Gamepad_FaceButton_Up | Key |
A | A Button | Gamepad_FaceButton_Bottom | Key |
B | B Button | Gamepad_FaceButton_Right | Key |
some of them are handled as not only Key but Axis, too.
Gamepad_LeftY
is the one of casesfocus the function XInputInterface::SendControllerEvents()
. there is the logic to filter hardware input state.
1 | UnrealEngine/Engine/Source/Runtime/ApplicationCore/Private/Windows/XInputInterface.cpp |
the next screenshot shows the value of CurrentStates
when you press A button in Xbox One gamepad.
we can see the key, deadzone or threshold macro in the code. the macros are defined at XInput.h
1 | C:/Program Files (x86)/Windows Kits/10/Include/10.0.18362.0/um/XInput.h |
there is an exception case for input smaller than deadzone. let us take an example with Gamepad_LeftX
message. check out screenshots below.
when you input a tiny change on left stick, InputAxis()
is called. and the key will be accumulated in EventAccumulator
.
1 | UnrealEngine/Engine/Source/Runtime/Engine/Private/UserInterface/PlayerInput.cpp |
after that, the key in EventAccumulator
is moved to EventCounts
.
if you keep operating the stick, the key is regarded as down.
in this situation, the key is regarded as released if all keys are flushed.
the callstack of Axis one is similar to the Non-Axis one. there is a difference of execution at XInputInterface::SendControllerEvents()
1 | UnrealEngine/Engine/Source/Runtime/ApplicationCore/Private/Windows/XInputInterface.cpp |
in this case, OnControllerAnalog()
is called even a tiny change of input value exists. because the code compares with OldAxisValue != NewAxisValue
. the function will not be called only when there is no change on input value.
as unreal engine handles objects inherits UObject
, we can use unreal engine easily. there are several benefits when the object inherits UObject
.
then you might have one question,
โhow we can handle the objects does not inherit UObject
? should we use raw pointer for the objects ?โ
wellโฆthere are 2 ways for this.
std::unique_ptr
of cpp std library in memory.h
TUniquePtr
of unreal API in UniquePtr.h
you can use std::unique_ptr
in unreal project, but unreal engine implements their own smart pointer library. and it is common that using TUniquePtr
in unreal project unless you do not need cpp std library.
as purpose and functionality are the same, TUniquePtr
is similar to std::unique_ptr
. TUniquePtr
also provides the unique ownership and other features. let us check out what it is and how it is used.
you can find some example in unreal engine code.
1 | UnrealEngine/Engine/Source/Runtime/SandboxFile/Public/IPlatformFileSandboxWrapper.h |
class FSandboxPlatformFile
is not a class inherits UObject
and it is possible to be indicated with TUniquePtr
.
( conventionally, prefix U
is attached when the class inherits UObject
)
1 | UnrealEngine/Engine/Source/Editor/UnrealEd/Classes/CookOnTheSide/CookOnTheFlyServer.h |
class UCookOnTheFlyServer
is a class inhertis UObject
and it contains TUniquePtr
with FSandboxPlatformFile
as member variable.
1 | UnrealEngine/Engine/Source/Editor/UnrealEd/Private/CookOnTheFlyServer.cpp |
accessing the object through TUniquePtr
is the same on std::unique_ptr
. using ->
operator, you can access the object as the normal pointer.
1 | UnrealEngine/Engine/Source/Editor/UnrealEd/Private/CookOnTheFlyServer.cpp |
validation on TUniquePtr
is the same on raw pointer. if the value is zero, the TUniquePtr
is pointing nullptr
. you can use check
for ensuring whether the TUniquePtr
is valid.
1 | UnrealEngine/Engine/Source/Editor/UnrealEd/Private/Commandlets/AssetRegistryGenerator.cpp |
FAssetRegistryGenerator::SaveManifests
gets FSandboxPlatformFile*
as one of parameters. the type of parameter is not the TUniquePtr
, so we should convert TUniquePtr<T>
into T*
.
1 | UnrealEngine/Engine/Source/Editor/UnrealEd/Private/CookOnTheFlyServer.cpp |
use the TUniquePtr::Get()
if you need the raw pointer of TUniquePtr<T>
.
1 | UnrealEngine/Engine/Source/Editor/UnrealEd/Private/CookOnTheFlyServer.cpp |
assigning nullptr
into TUniquePtr
, you can let TUniquePtr
release the object and have its value as nullptr
.
1 | UnrealEngine/Engine/Source/Runtime/SandboxFile/Public/IPlatformFileSandboxWrapper.h |
constructor of FSandboxPlatformFile
takes one parameter as boolean.
1 | UnrealEngine/Engine/Source/Editor/UnrealEd/Private/CookOnTheFlyServer.cpp |
MakeUnique
returns TUniquePtr
object and calls the constructor of the template class. in this case, MakeUnique<FSandboxPlatformFile>
takes one boolean value.
suppose you have a class like below
1 | class UserInfo |
you should only use TUniquePtr
at the object, which exists only one thing. unless, you would get an exception for delete on nullptr
.
1 | void SomeUActor::BeginPlay() |
in this code, CreateUserInformation
will be called in BeginPlay
and ReleaseUserInformation
will be called in EndPlay
. UserInformation
is a memeber variable with TUniquePtr<UserInfo>
type. another TUniquePtr<UserInfo>
exists in CreateUserInformation
, which gets UserInfo*
.
what happens when CreateUserInformation
is ended ? AnotherPtr
would disappear and its destructor would be called. when the destructor of TUniquePtr
is called, it releases memory that TUniquePtr
has pointed. as a result, variable UserInformation
would be a dangling pointer.
UserInformation
has abnormal values.
because already the memory is released, an exception would be thrown when we execute ReleaseUserInformation
. it is why you have to use TUniquePtr
at the object only existing one thing and care about moving the ownership. moving the ownership with raw pointer is dangerous as we have seen.
1 | void SomeUActor::CreateUserInformation() |
let us move the ownership with MoveTemp
API. this code makes AnotherPtr
point the memory and UserInformation
set the nullptr
.
UserInformation
has nullptr
. so we can avoid the exception.
TUniquePtr
is similar to std::unique_ptr
and its usage and restriction, too.
TUniquePtr
with 2 waystype | method |
---|---|
using raw pointer | TUniquePtr<T> PointerA(T*); |
using other TUniquePtr | TUniquePtr<T> PointerA(MoveTemp(PointerB)); |
MoveTemp
1 | TUniquePtr<T> PointerA = new T(...); |
TUniquePtr
1 | // way #1 : release implicitly |
CDO
in unreal engineUCLASS
UCLASS
ctor/dtor1 | UCLASS(config=Game) |
somebody may have the experience your breakpoint stops in cpp constructor even the object is not placed in the world. you might say,"Why this happens ? I do not get it why the constructor is called even while opening editor !"
vice versa, destructor is called when editor is closed. in your intuition, the cpp constructor or destructor seems to be called when the actor is created or deleted. but it does not as you saw. then, let us find what do cpp ctor and dtor do in unreal engine. we would get a clue to truth through it.
unreal engine provides their own macro system, which has several features below:
to support these features, unreal engine constructed massive macro magics and hacks. so, cpp in unreal engine acts unlike cpp as we know. this ctor/dtor issue is one of them(different behaviors). from reference #2, we can find the reference of Class Default Object, CDO
.
cpp constructor makes the Class Default Object
and it is copied whenever you create instance of the UObject
. what UObject
means in this post, is the object created by NewObject
API. from reference #1, we can find the reference of NewObject
API.
in summaryโฆ
UObject
and follow some conventionsCDO
, which is used for cloning object instanceCDO
โป for more information of CDO
, visit reference #1 and reference #2
โป for more information of Unreal Reflection
, visit reference #3
that is why we could see that the breakpoint stops at cpp ctor/dtor before unreal editor opens. CDO
is needed to display the asset editor of the class. try some tests for yourself.
the pictures above says, changes in cpp ctor will be shown in asset editor (if the asset inherits the class). not only the simple float
variables, but it affects the various component or material things.
so, let us suppose real ctor/dtor for unreal should do its work when the instance of class is created in โgameโ, such as spawning bullets when player shoots the gun. there are several APIs for this purpose, but every child of UObject
does not have common API.
here is a table for major classes. almost of gameplay framework classes inherit them.
child | function |
---|---|
UUserWidget | UUserWidget::NativeConstruct |
AActor | AActor::OnConstruction |
UActorComponent | UActorComponent::InitializeComponent |
CDO
, not for the cloned instances in โgameโ. there are seperate APIs for them.UObject
, you should consider how to make unreal ctor/dtor for it.UUserWidget