| Environment | |
|---|---|
| Helix Core (P4D) | version: P4D/LINUX26X86_64/2021.1/2156517 |
| Ubuntu | version: 20.04 LTS |
| Helix Visual Client (P4V) | version: P4V/NTX64/2021.3/2170446 |
| Windows 10 | build: 19043.1165 |
| References | |
|---|---|
| Helix Core Server Administrator Guide | https://www.perforce.com/manuals/p4sag/Content/P4SAG/chapter.install.html |
| .p4ignore for UnrealEngine | https://github.com/mattmarcin/ue4-perforce/blob/master/.p4ignore |
| P4 Typemap for UnrealEngine | https://docs.unrealengine.com/4.27/en-US/ProductionPipelines/SourceControl/Perforce/ |
Prepare Ubuntu Instance
As the Perforce is a kind of CVCS*, it is recommended to use a dedicated server. The dedicated server should run all day and night, and should have a fixed IP address. Thus, you would better choose a cloud server if not have a machine for the purposes. In this post, I chose DigitalOcean for a cloud server provider. The DigitalOcean provides instances with cheaper cost than others such as AWS. You know, you may not need a high quality instance for your small size project.
※ CVCS : Centralized Version Control System. Find more information at here.
Sign-up and Sign-in the DigitalOcean. Click the button Create and choose Droplets.

At the page Create Droplets, you would be asked to choose options for a instance. In this post, we gonna choose options like below:
Choose an image- Ubuntu 20.04 (LTS) x64
Choose a plan- SHARED CPU
- Basic
- CPU options
- Regular Intel with SSD
- $5/month (= $0.007/hour)
- 1 core CPU, 1 GB RAM, 25 GB SSD, 1000 GB transfer
- SHARED CPU
Add block storage- $5/month (= $0.007/hour)
- 50 GB SSD
- $5/month (= $0.007/hour)
Choose a datacenter region- (Select a datacenter that is closest to your location)
- (In my case, it is Singapore)
Select additional options- Monitoring
Authentication- Password
- (Choose a password for entering the instance)
- Password
Any options I did not mention are left as default selection. Let us create our Droplet by clicking the button Create Droplet.
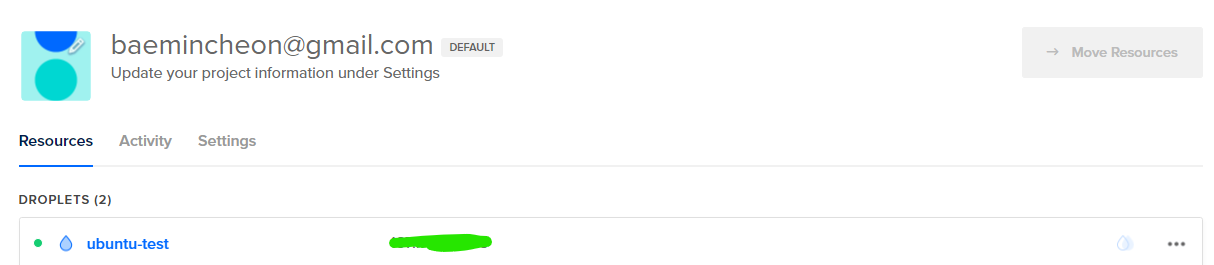
Now you can see the new Droplet. Connect the instance via SSH. You can do it with Powershell or WSL in Windows 10. The X.X.X.X must be replaced with the IP address of instance.
1 | > ssh root@X.X.X.X |
But, when you attempt to connect the instance via SSH, you are asked to enter a password.
1 | root@X.X.X.X's password: |
Enter the password that you typed at the Authentication text block. If the right password entered, you can see the logs like below:
1 | Welcome to Ubuntu 20.04.2 LTS (GNU/Linux 5.4.0-73-generic x86_64) |
At the your instance page, you can check the volume setting. Click the Config Instructions.
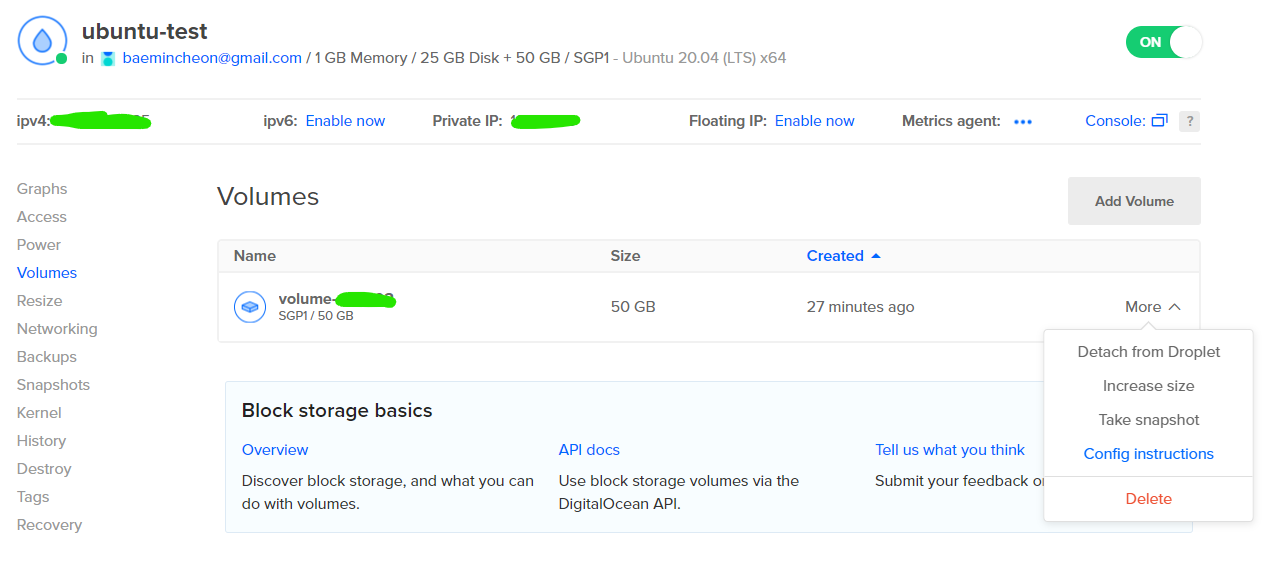
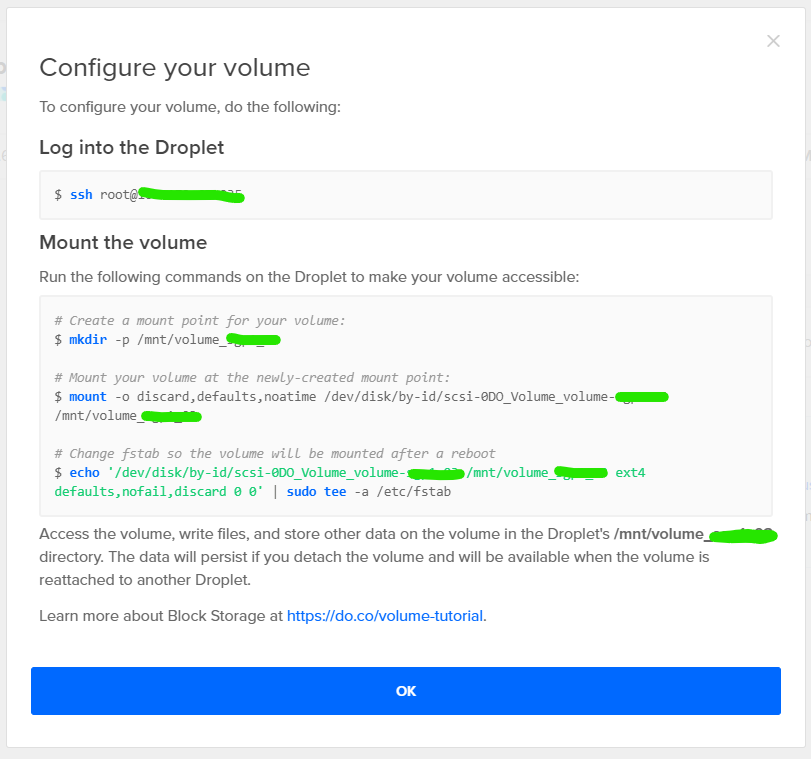
If you selected the option Automatically Format & Mount at the section Add block storage, the volume is already attached even you did nothing. In other words, the process Mount the volume is already done. Let us check whether the volume is well mounted. The volume_X must be replaced with yours.
1 | > cd /mnt/volume_X |
You successfully setup an Ubuntu instance. Good to go !
Install & Setup P4D
We need to setup public key for accessing Perforce packages. For this, you need to download the public key at https://package.perforce.com/perforce.pubkey. The download can be done by command below:
1 | > curl https://package.perforce.com/perforce.pubkey > perforce.pubkey |
This command let you save the public key as a file, whose name is perforce.pubkey.
1 | > curl https://package.perforce.com/perforce.pubkey > perforce.pubkey |
You can check the contents of file with cat.
1 | > cat perforce.pubkey |
Let us register the public key.
1 | > gpg --with-fingerprint perforce.pubkey |
Add the Perforce packaging key to your APT keyring.
1 | > wget -qO - https://package.perforce.com/perforce.pubkey | sudo apt-key add - |
Execute the command for adding Perforce to your APT configuration.
1 | > sudo add-apt-repository 'deb http://package.perforce.com/apt/ubuntu focal release' |
Run update.
1 | > apt-get update |
Install the package.
1 | > sudo apt-get install helix-p4d |
Now you have one last step, launching the Perforce service ! Execute the batch file for it.
1 | > sudo /opt/perforce/sbin/configure-helix-p4d.sh |
You will be asked to enter some configurations such as name of service, directory, case sensitiviy, and so on. Setup them appropriately.
1 | Perforce Service name [master]: Test |
You should select the proper directory. It would be better to select the attached volume if the size of your project would be more than 25GB.
1 | Perforce Service name [master]: Test |
Now you can access the Perforce service via P4V at a client. Before that, take care of typemap. The typemap is an abbreviation of Type Mapping. You can define how Perforce handles certain type of files by it. If your project uses UnrealEngine, for the types related to UnrealEngine, Epic Games recommends to setup like below:
1 | TypeMap: |
You can edit the typemap of instance by executing command p4 typemap. The command would open typemap file with vi editor.
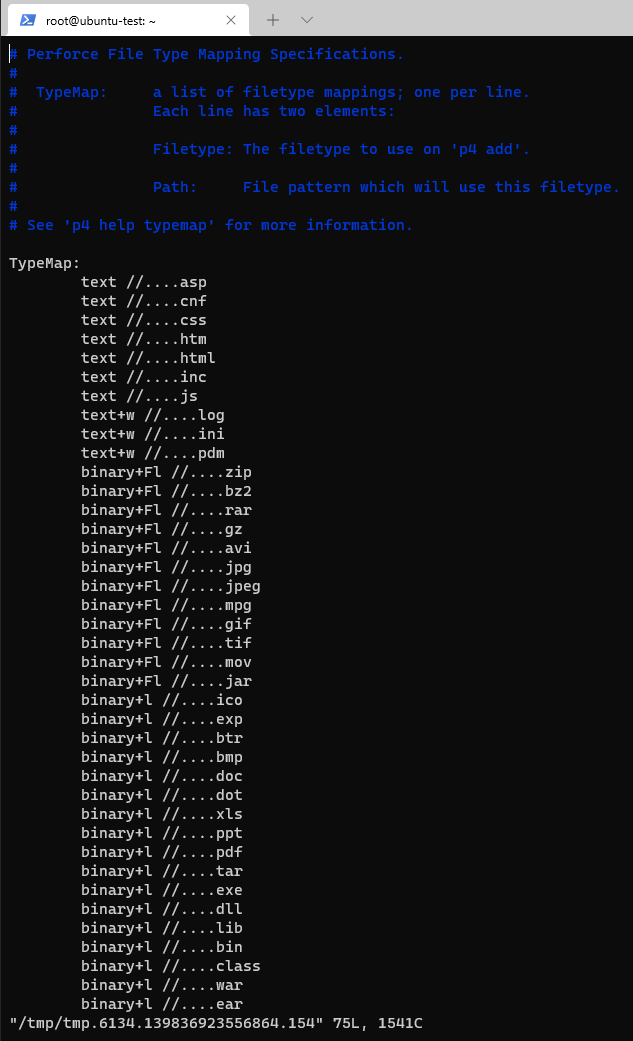
Add the Epic Games’s mappings to your mapping file*. Now all preparation of server side completed.
※ FYI, the // string does not mean “It is a kind of comment.” in P4 typemap system. You should copy the all of text.
Install & Setup P4V
Download the P4V installer at https://www.perforce.com/downloads/helix-visual-client-p4v and install with default options. When the installation compeleted, execute the P4V. You will see the display.
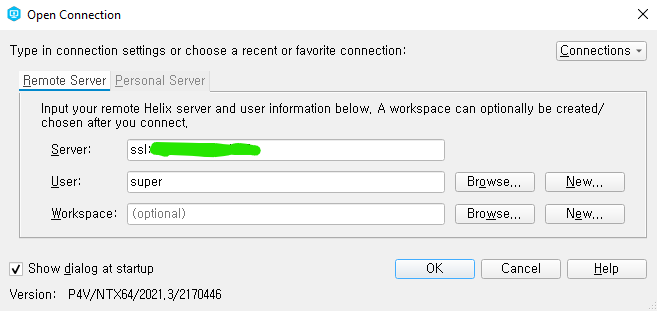
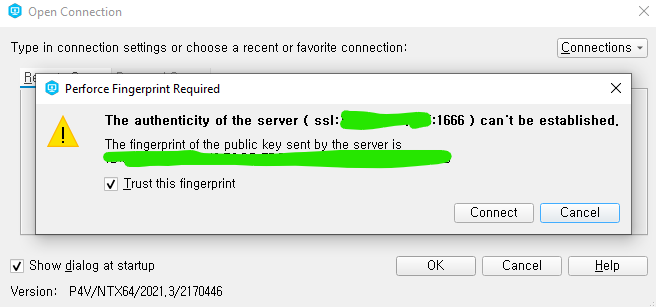
Enter ssl:X.X.X.X:1666 at the section Server. The X.X.X.X must be replaced with the IP address of instance. Enter super at the section User. The user super is an administrator account we have set. Now click the button OK. Check Trust this fingerprint and click the button Connect if you encounter the dialog like below:
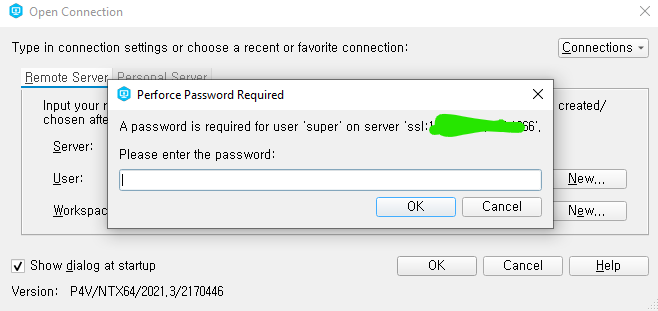
Enter the password you set while launching the Perforce service at instance.
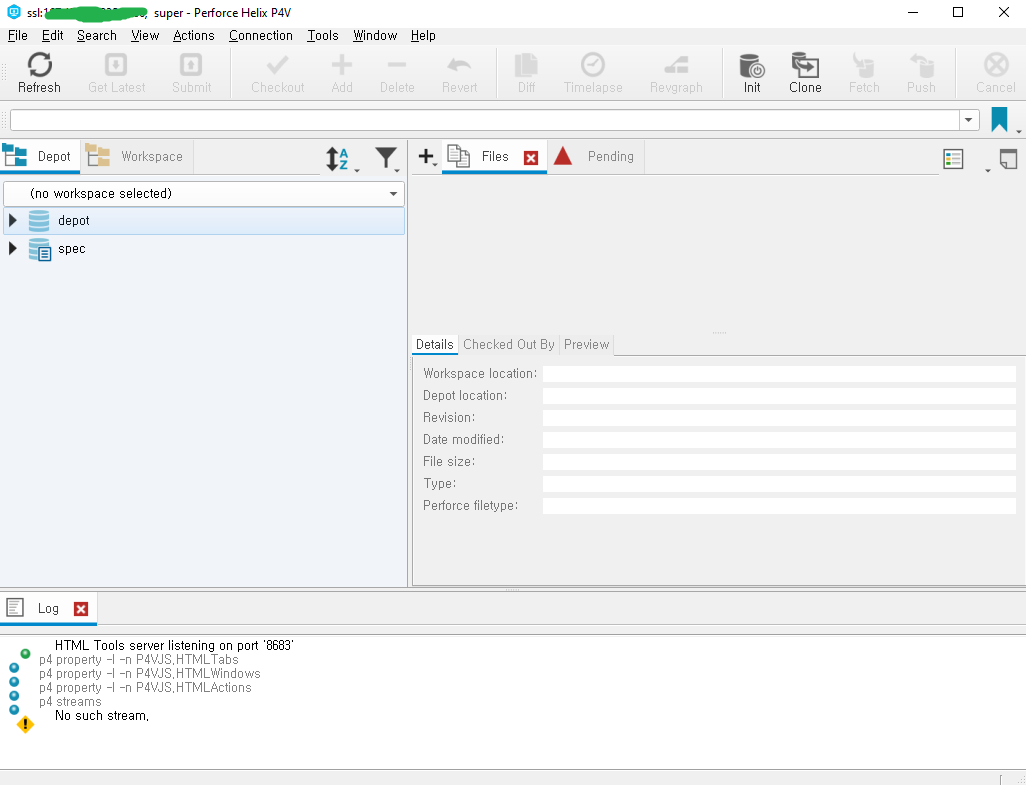
You can see the display when successfully entered.
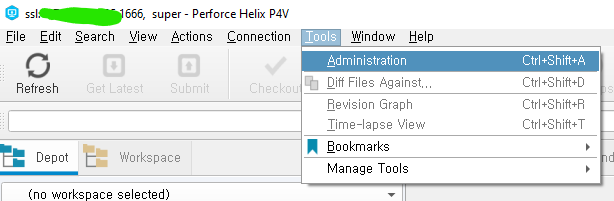
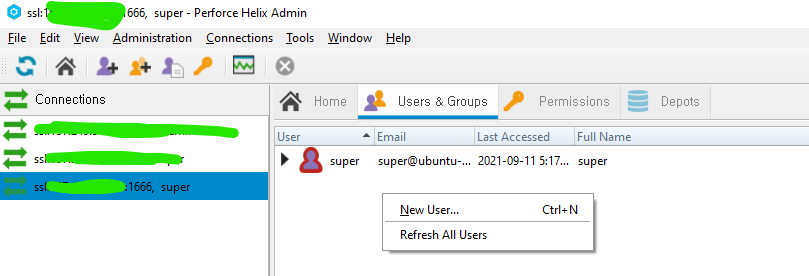
The admin tool can be accessed at Tools/Administration.
In the tool, you can add or delete user directly.
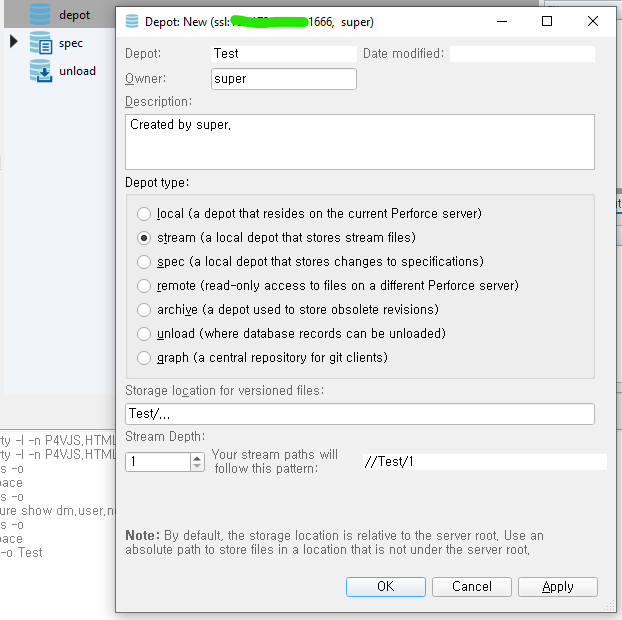
Let us prepare some Depot and Stream. Click the Depots. Right-click any depot and select New Depot....
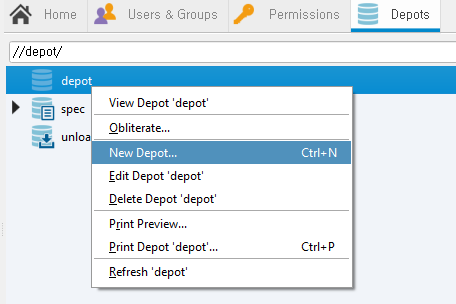
Type the name of new Depot.
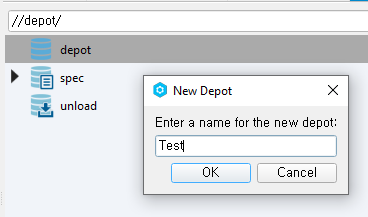
Select stream at the section Deopt type and click OK.
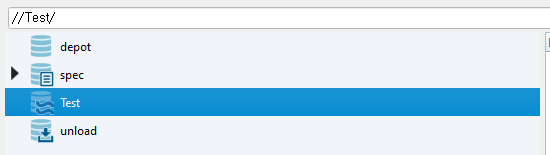
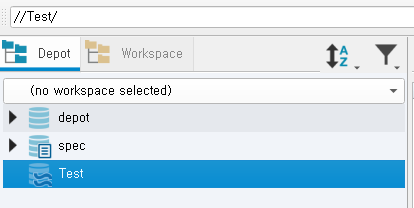
Close the admin tool and return to the P4V*. Now you can find the new Depot at Depot view.
※ Actually, the admin tool was the program P4Admin, which is different with P4V. Just, Perforce supports to launch the P4Admin from P4V.
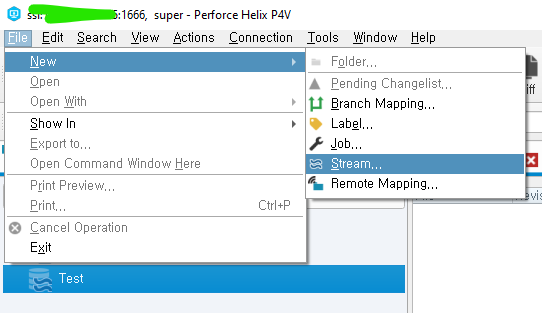
Restart the P4V for applying changes from P4Admin. After restart, find the File/New/Stream... and click it.
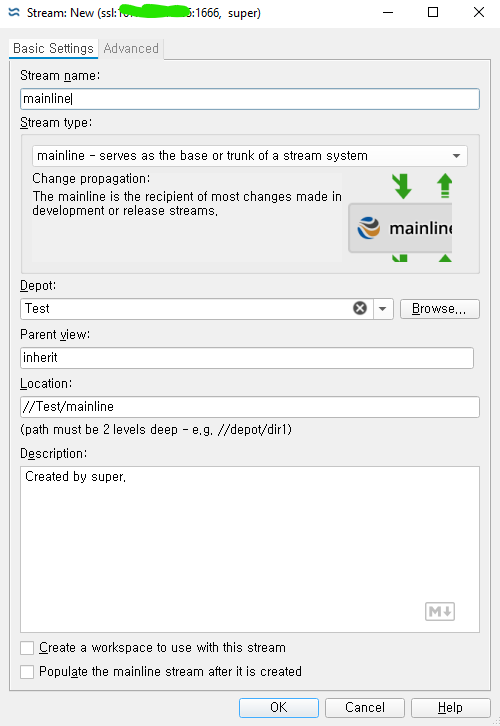
Let us make a Stream, name of mainline. The Stream will be placed in the new Deopt. Click the button OK.
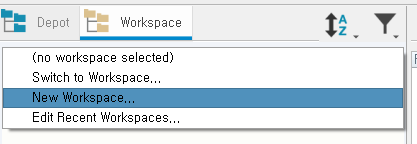
Click New Workspace... at workspace view.
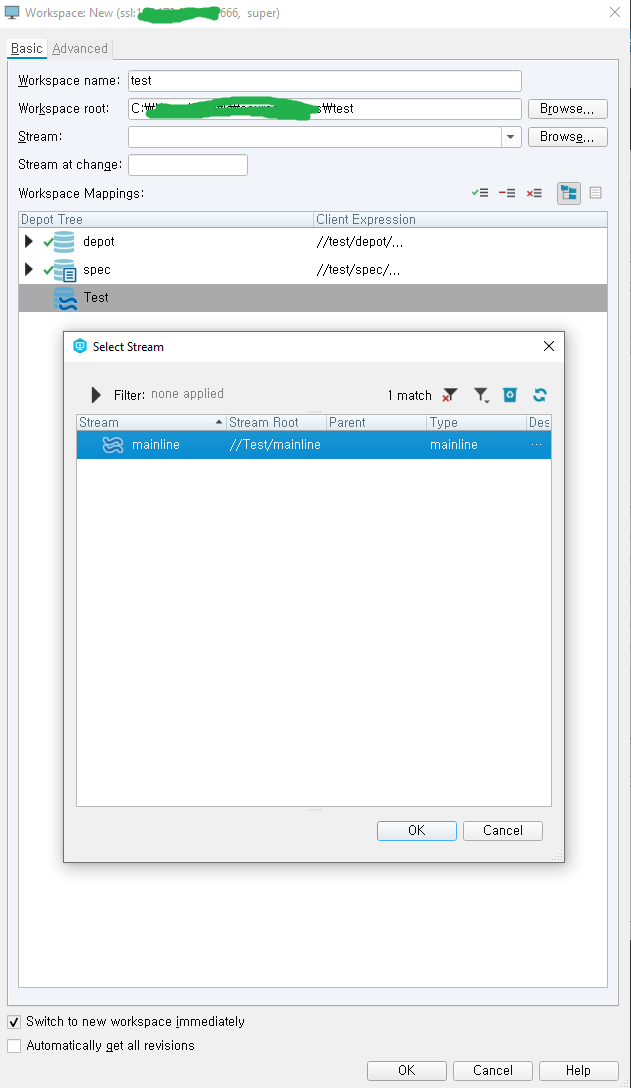
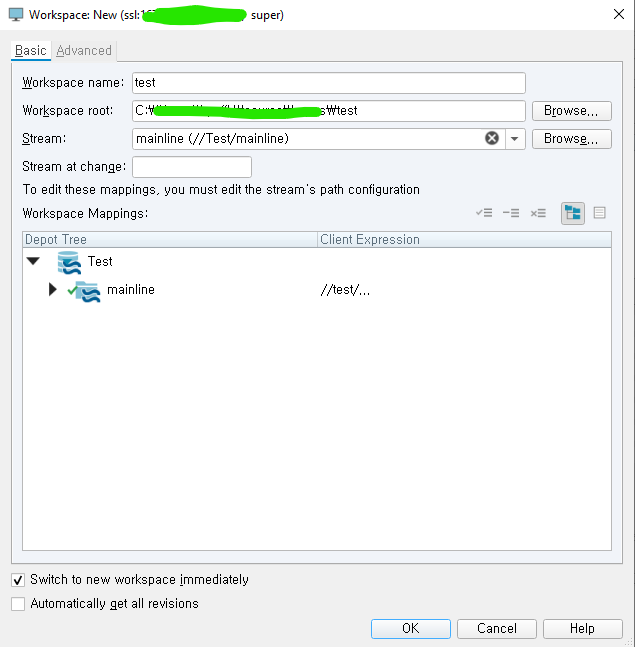
Name the new workspace and click the button Browse in line of Stream. You can find the Stream mainline at the dialog. Select it.
Finally, we have prepared a workspace in totally empty new Perforce service ! But, you should config p4ignore before getting into the work. Open any terminal and execute the command below:
1 | > p4 set P4IGNORE=.p4ignore |
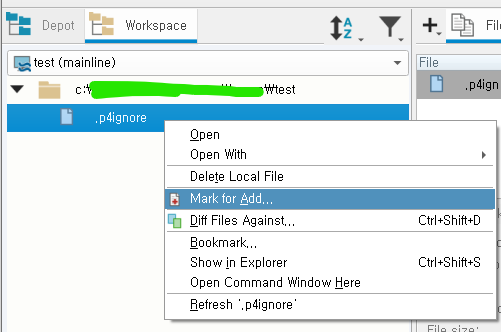
This command will let your Perforce refer the file whose name is .p4ignore. It is kind of configuration lets you can use Perforce like git, which provides .gitignore. To apply this changes, restart P4V. And, create .p4ignore at your workspace directory. Let us test whether .p4ignore works well. Fill the contents of .p4ignore like below:
1 | *.sln |
Select Mark for Add... for .p4ignore and submit it.
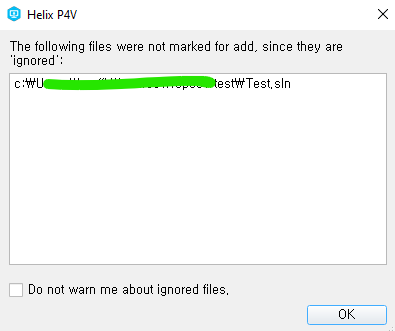
Next, create a empty file whose name is Test.sln. Try to add this !
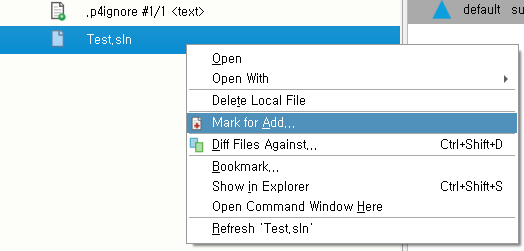
You try to check out the file, but the dialog would be popped-up. Great, your p4ignore works well.
If your project uses UnrealEngine, you should search for good one. I recommend you to use the p4ignore mentioned at references. Okay, then…all of preparation done. You are good to go :) !